


BOX 1 PUZZLES


Puzzle 1 - Hint 1

Puzzle 1 - Hint 2
Puzzle 1 - Hint 3
Puzzle 1 - Hint 4
Puzzle 1 - Hint 5
Puzzle 1 - Solution
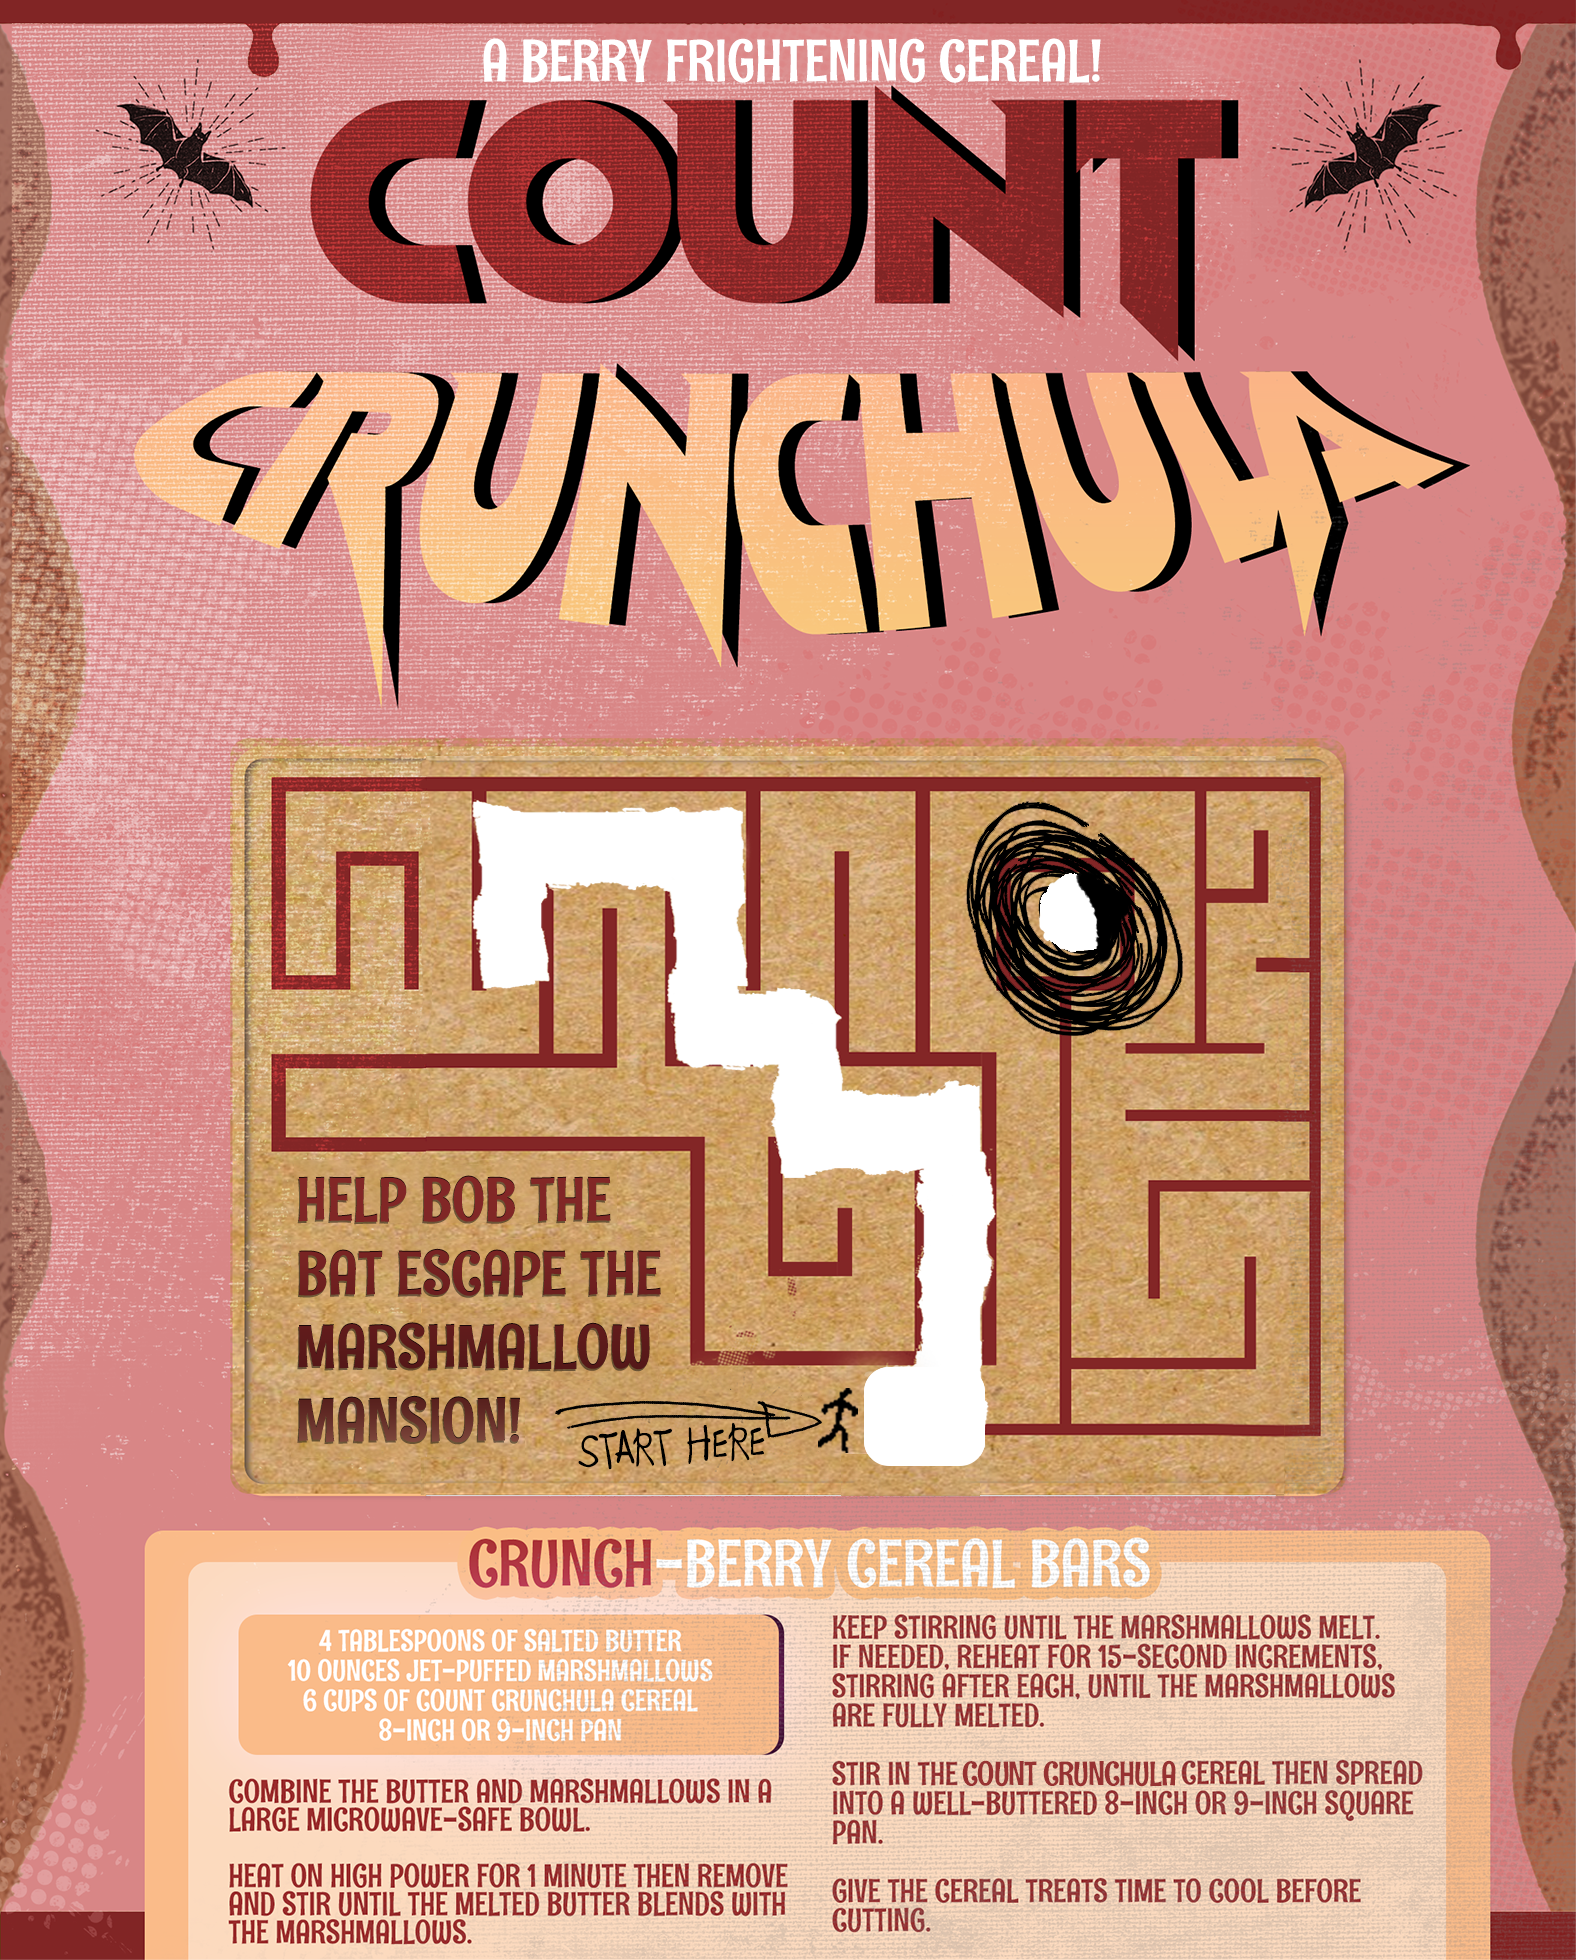
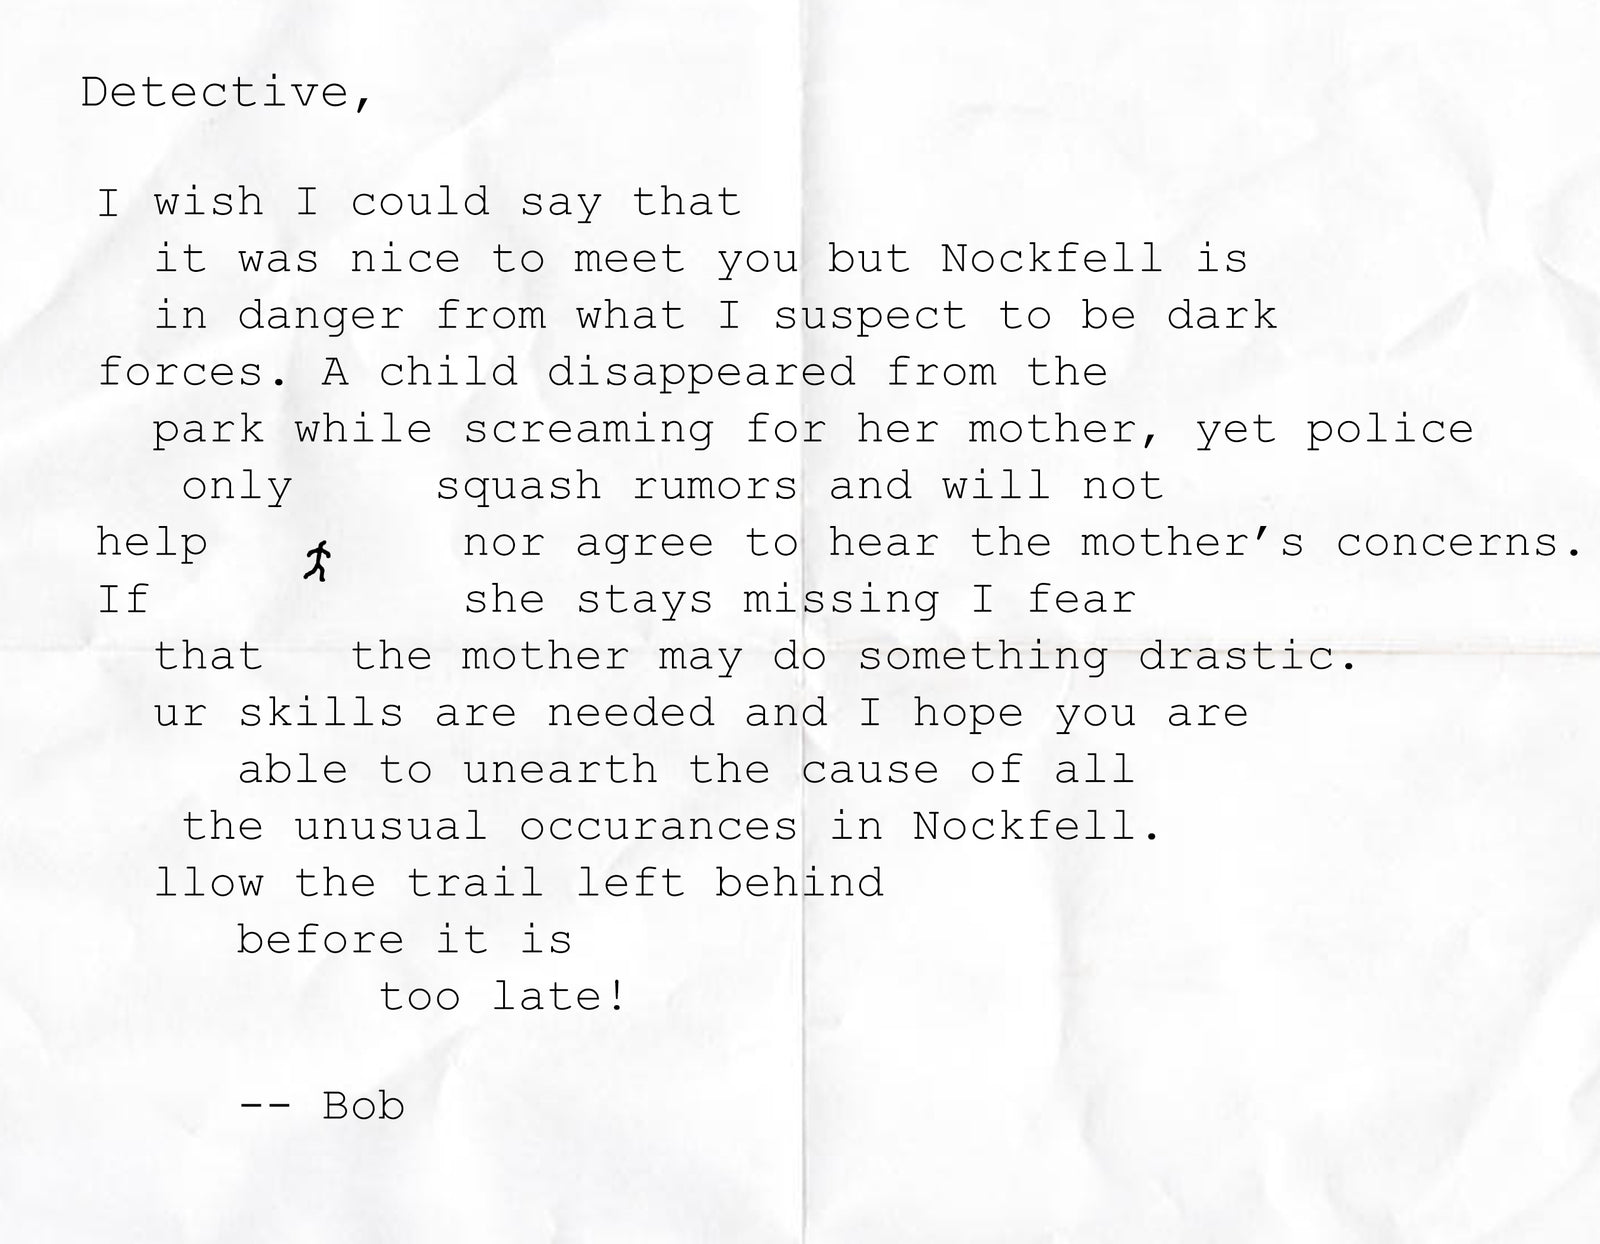
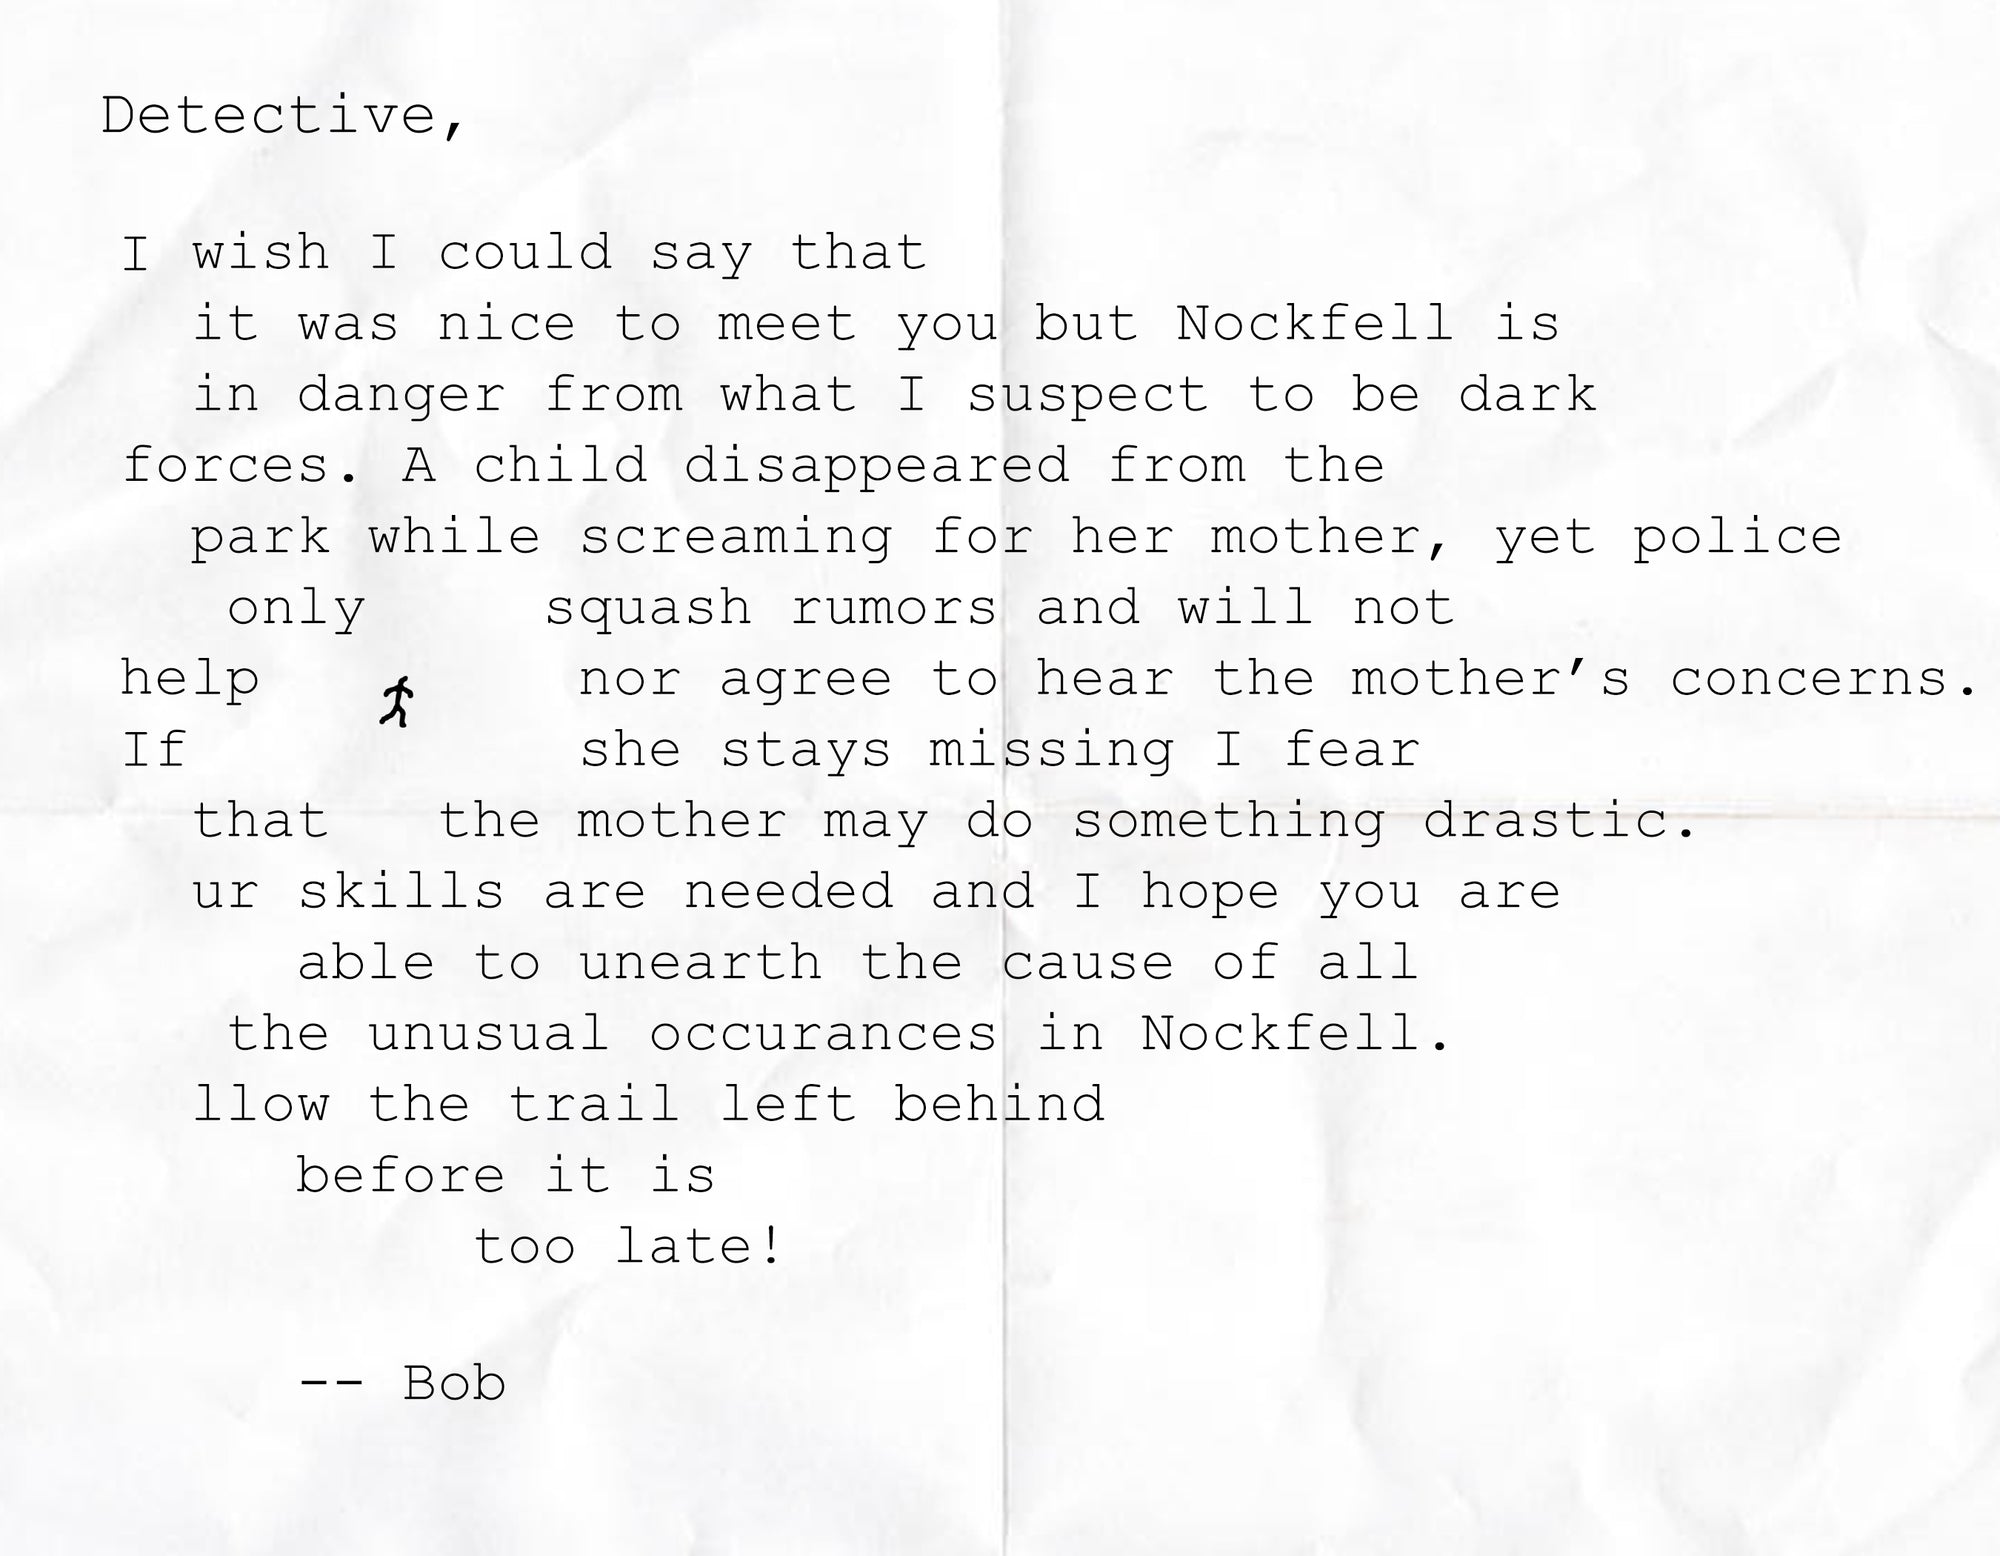
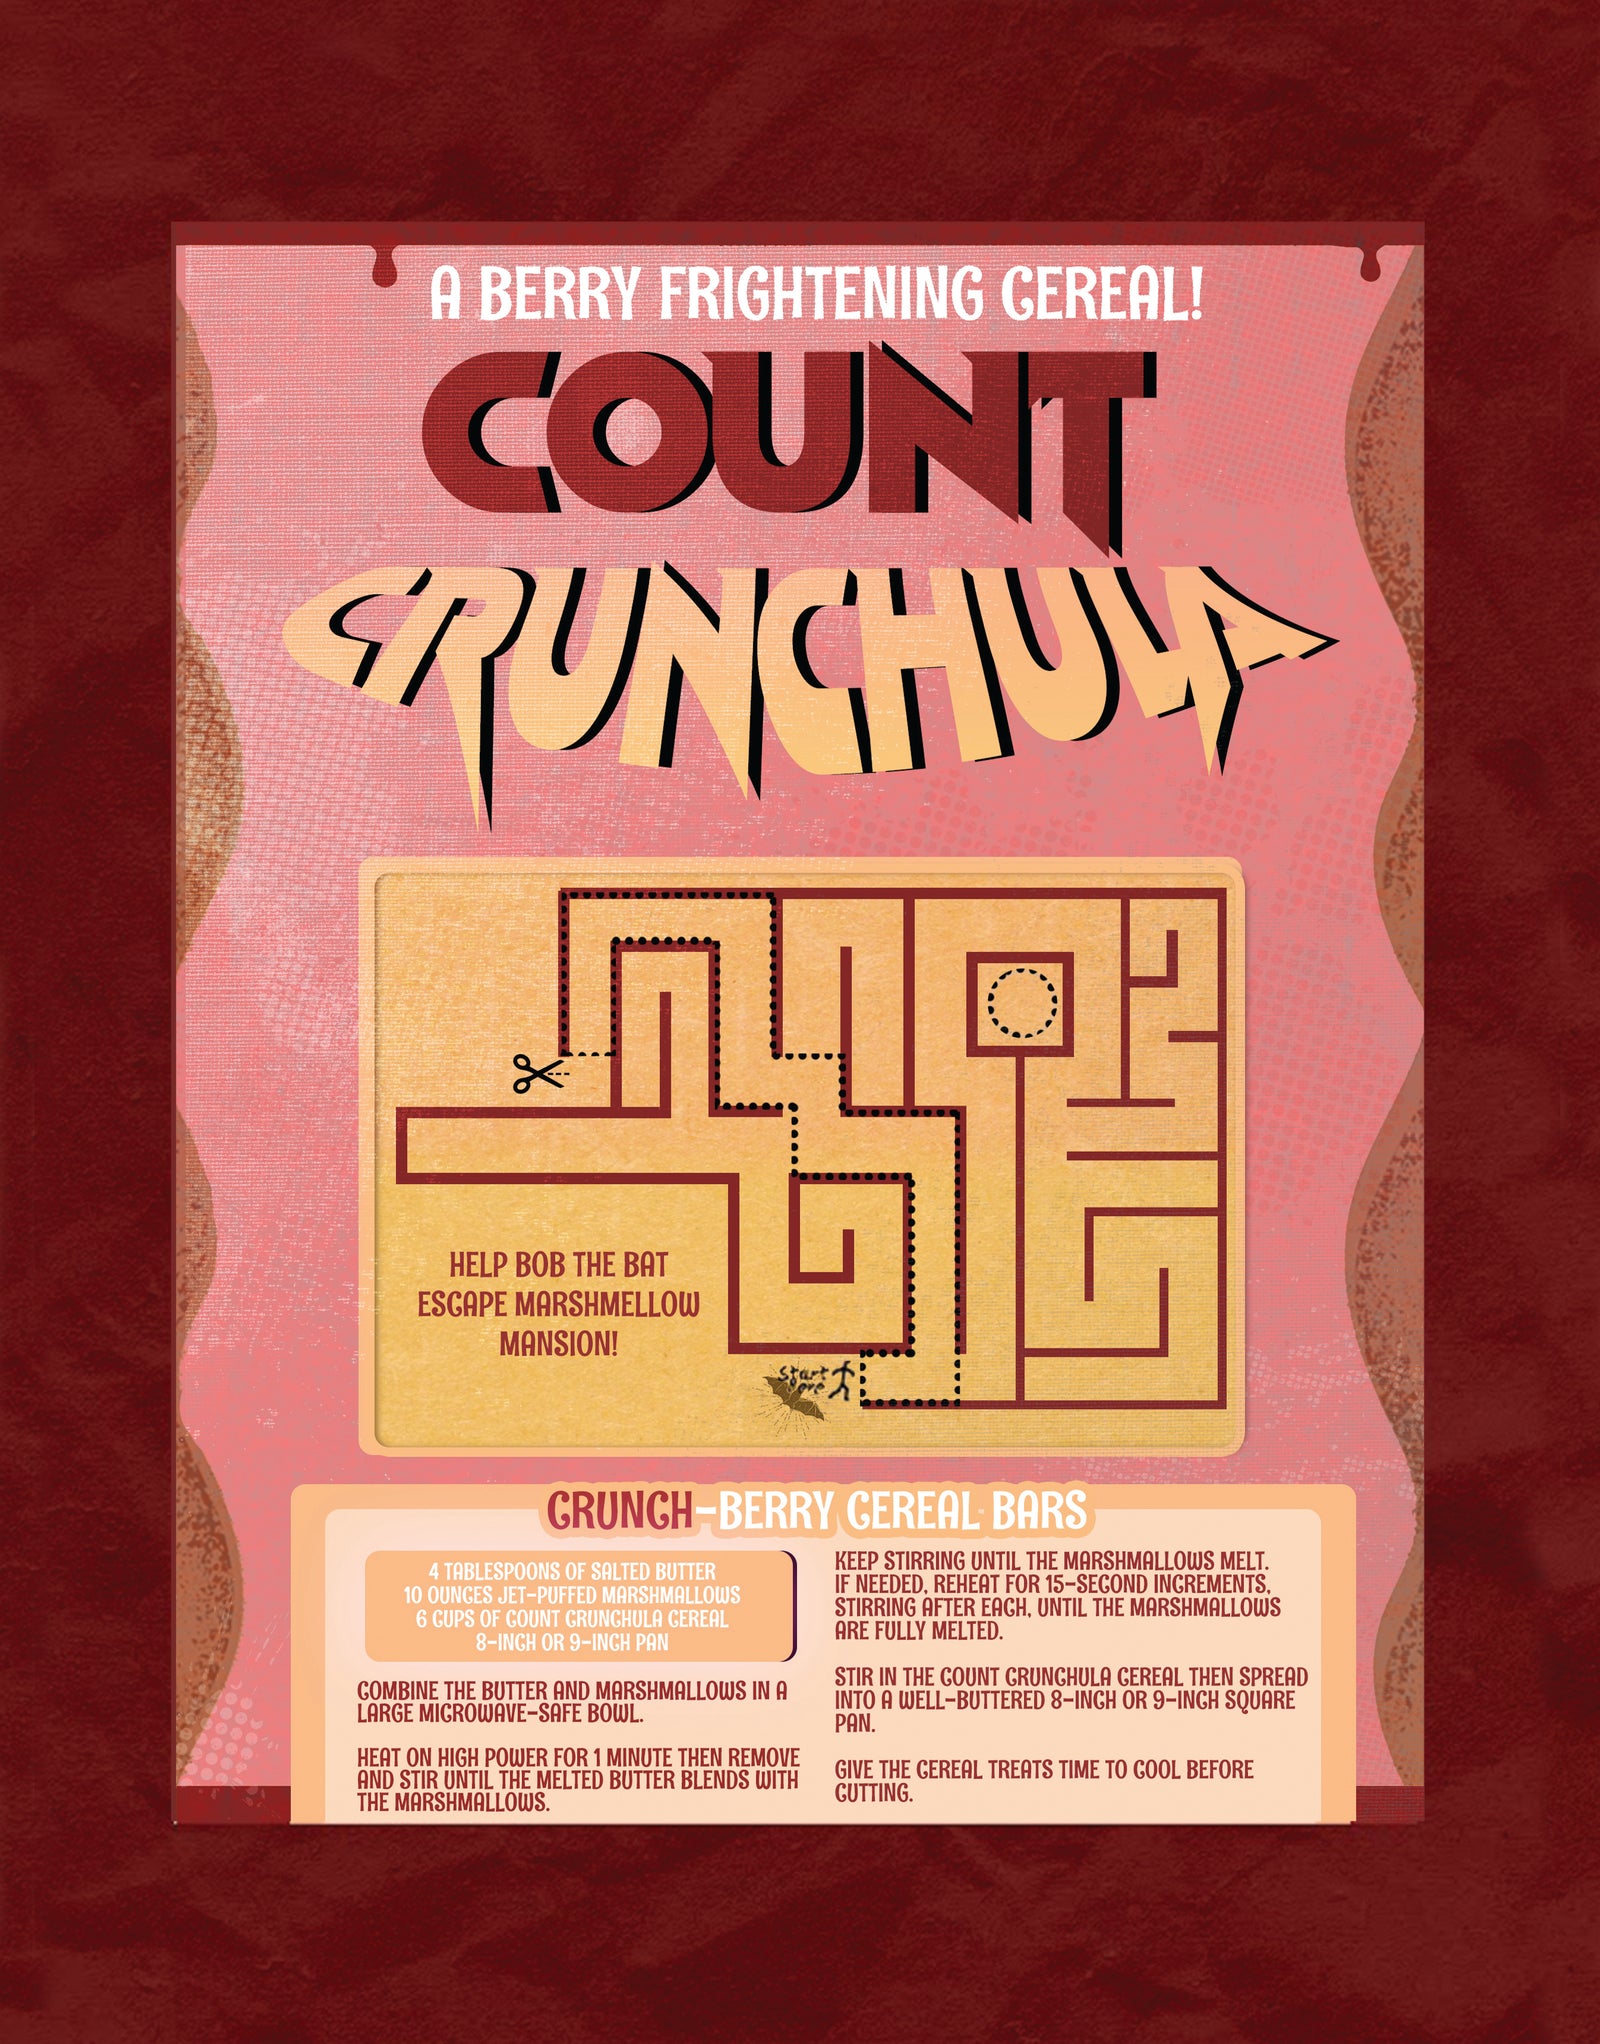
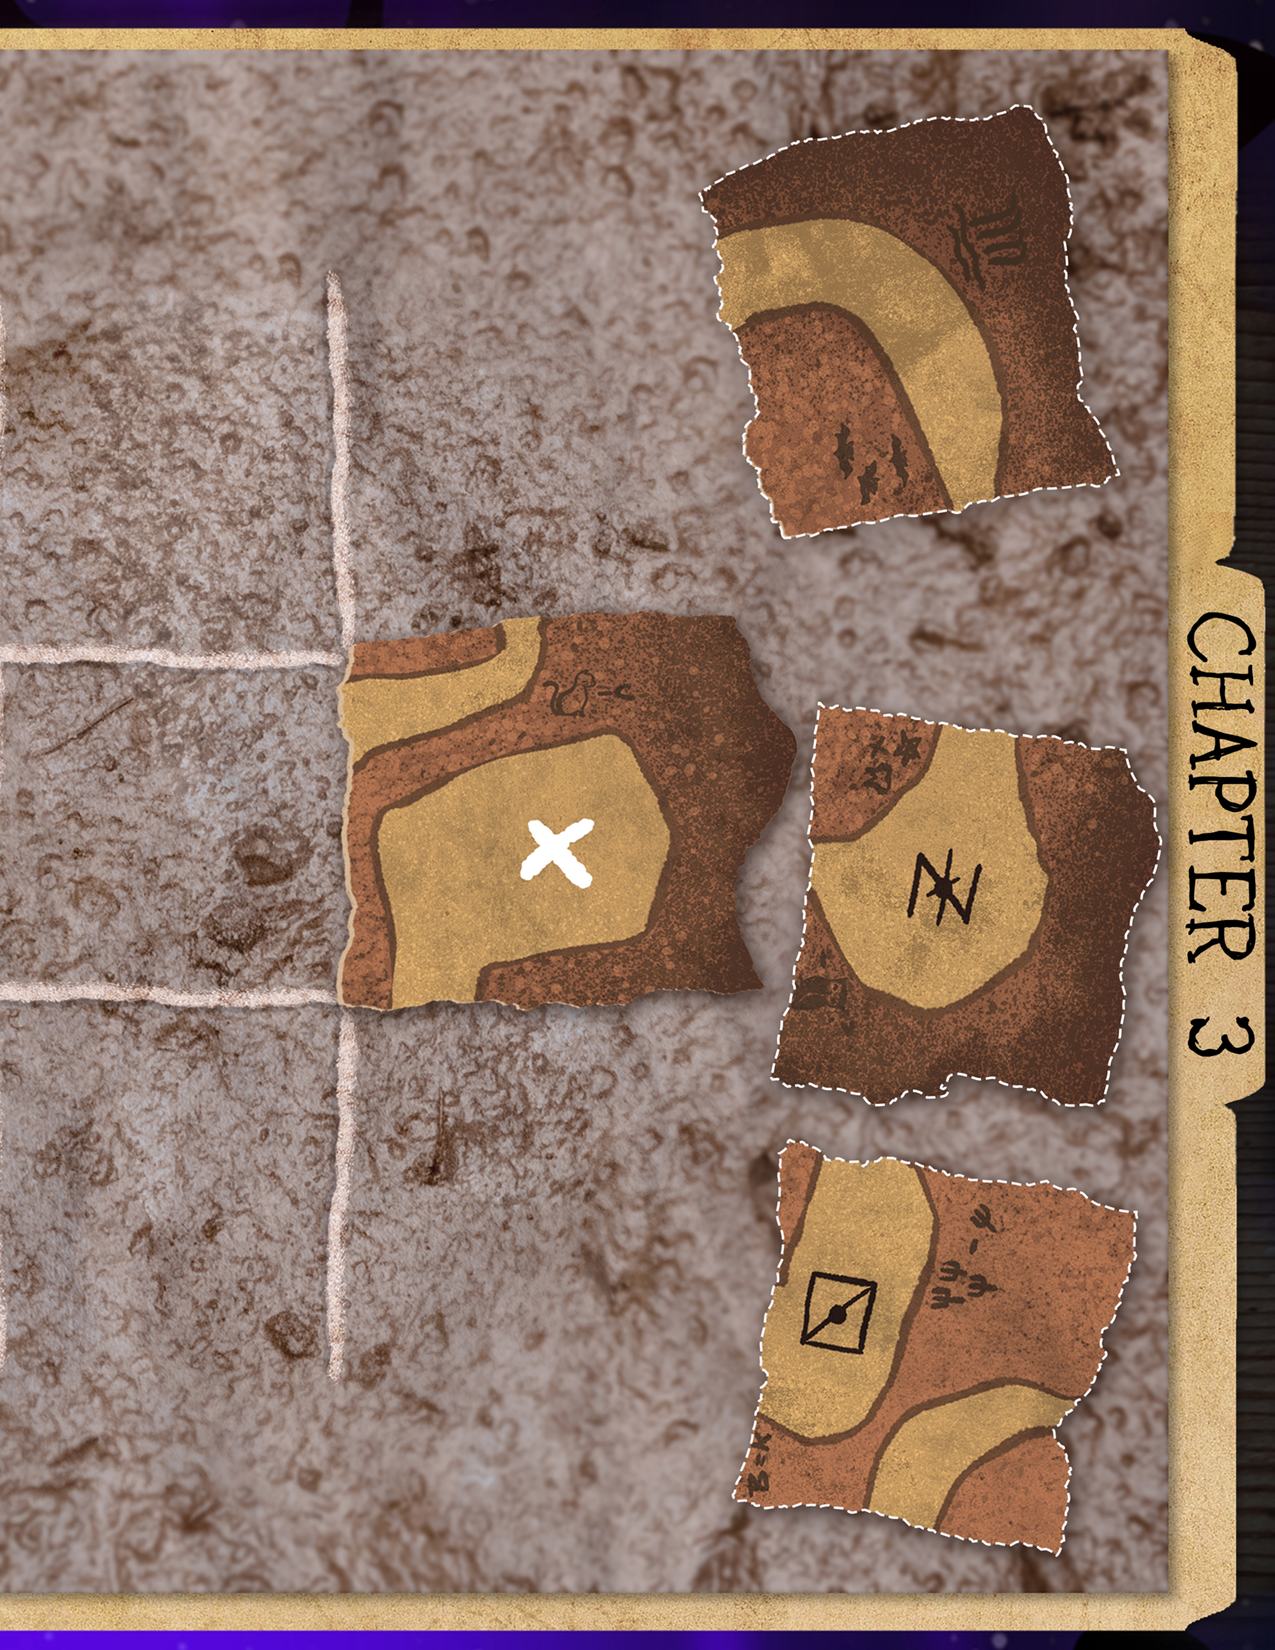
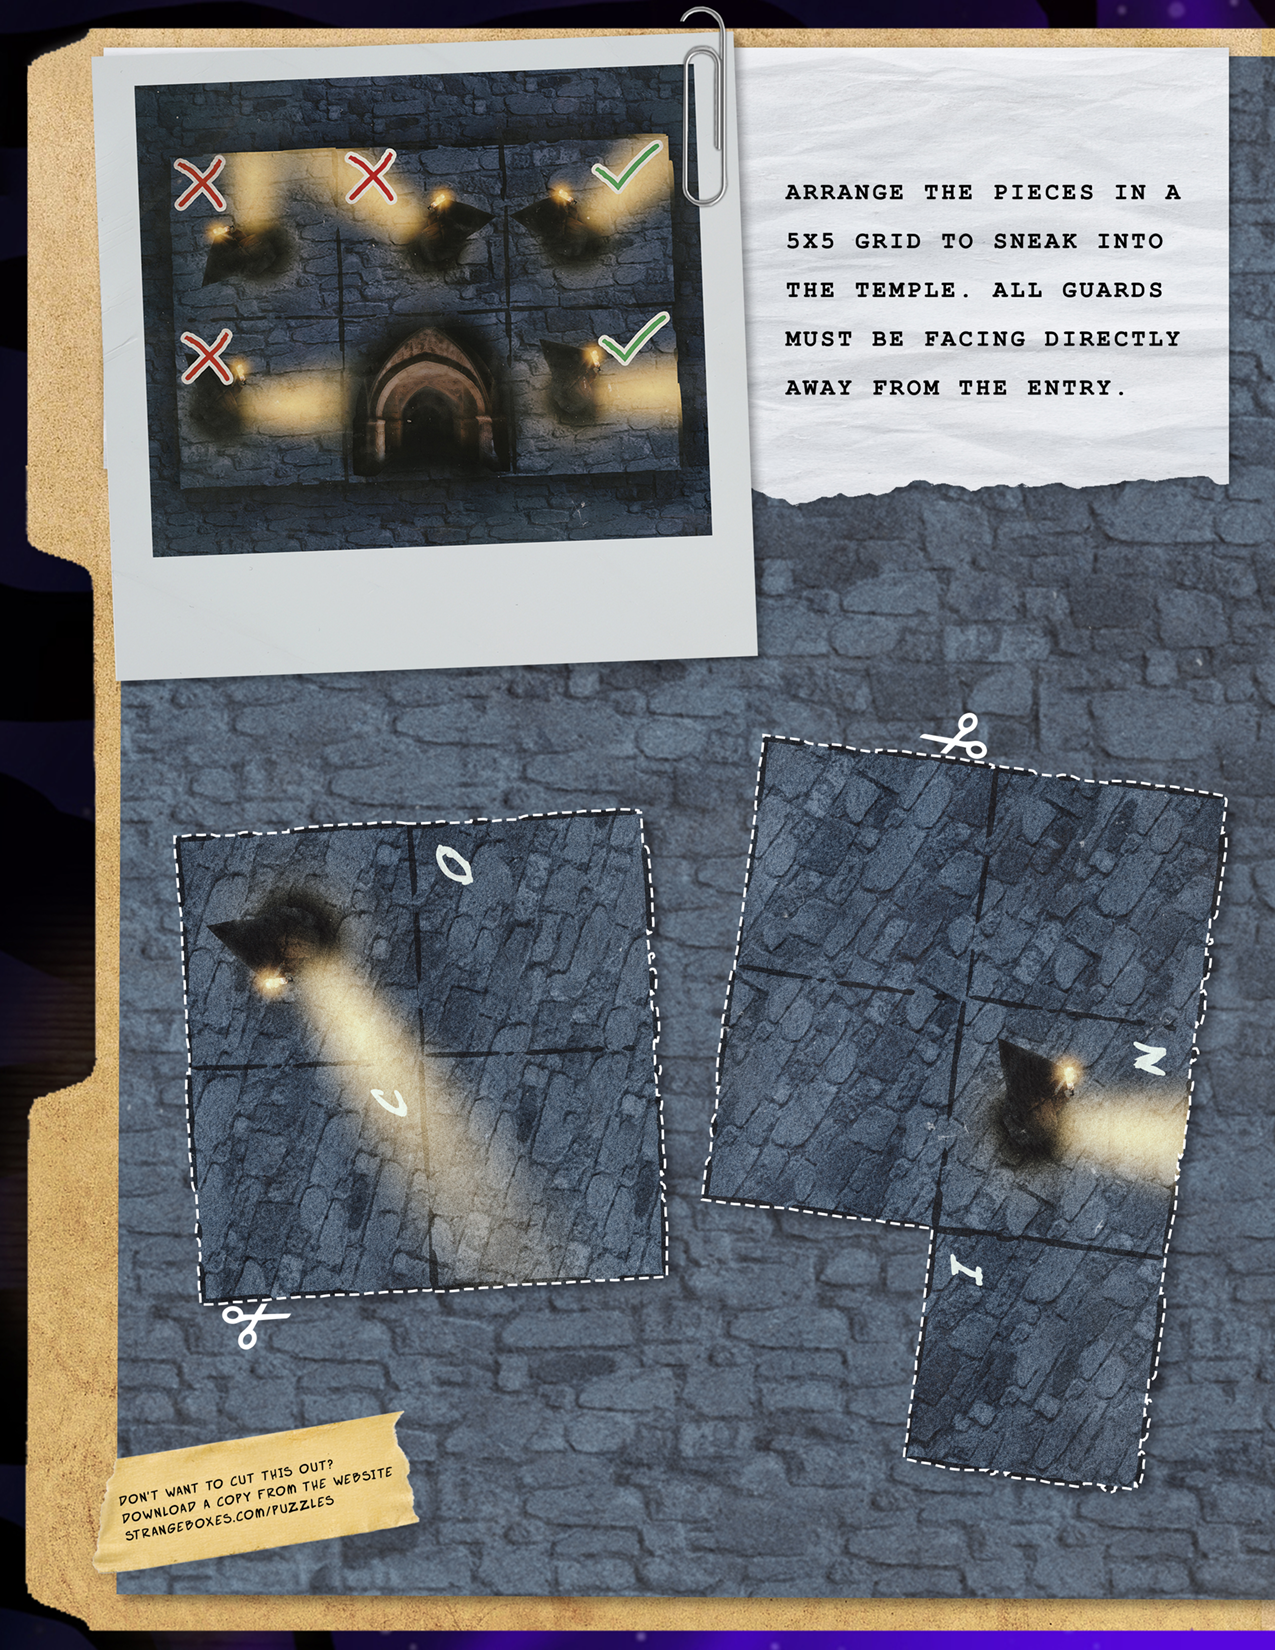
Place the maze with the cut out path over the letter, lining up the stick person in the letter with the start of the maze. Move the stick person through the maze, taking note of the letters that show up in the circle cut out.
The solution is CIRCLE SQUARE STAR.
Puzzle 2 - Hint 1

Puzzle 2 - Hint 2
Puzzle 2 - Hint 3
Puzzle 2 - Solution
Count the corners on each shape from the first puzzle. Circle = 0, square = 4, and star = 5.
The final solution is FLY.
Well, you’ve got the solution but what the heck does it mean? I guess you better hold on to that information and go investigate the disappearance of the child.

BOX 2 PUZZLES


Puzzle 1 - Hint 1
Puzzle 1 - Hint 2
Puzzle 1 - Hint 3
Puzzle 1 - Solution
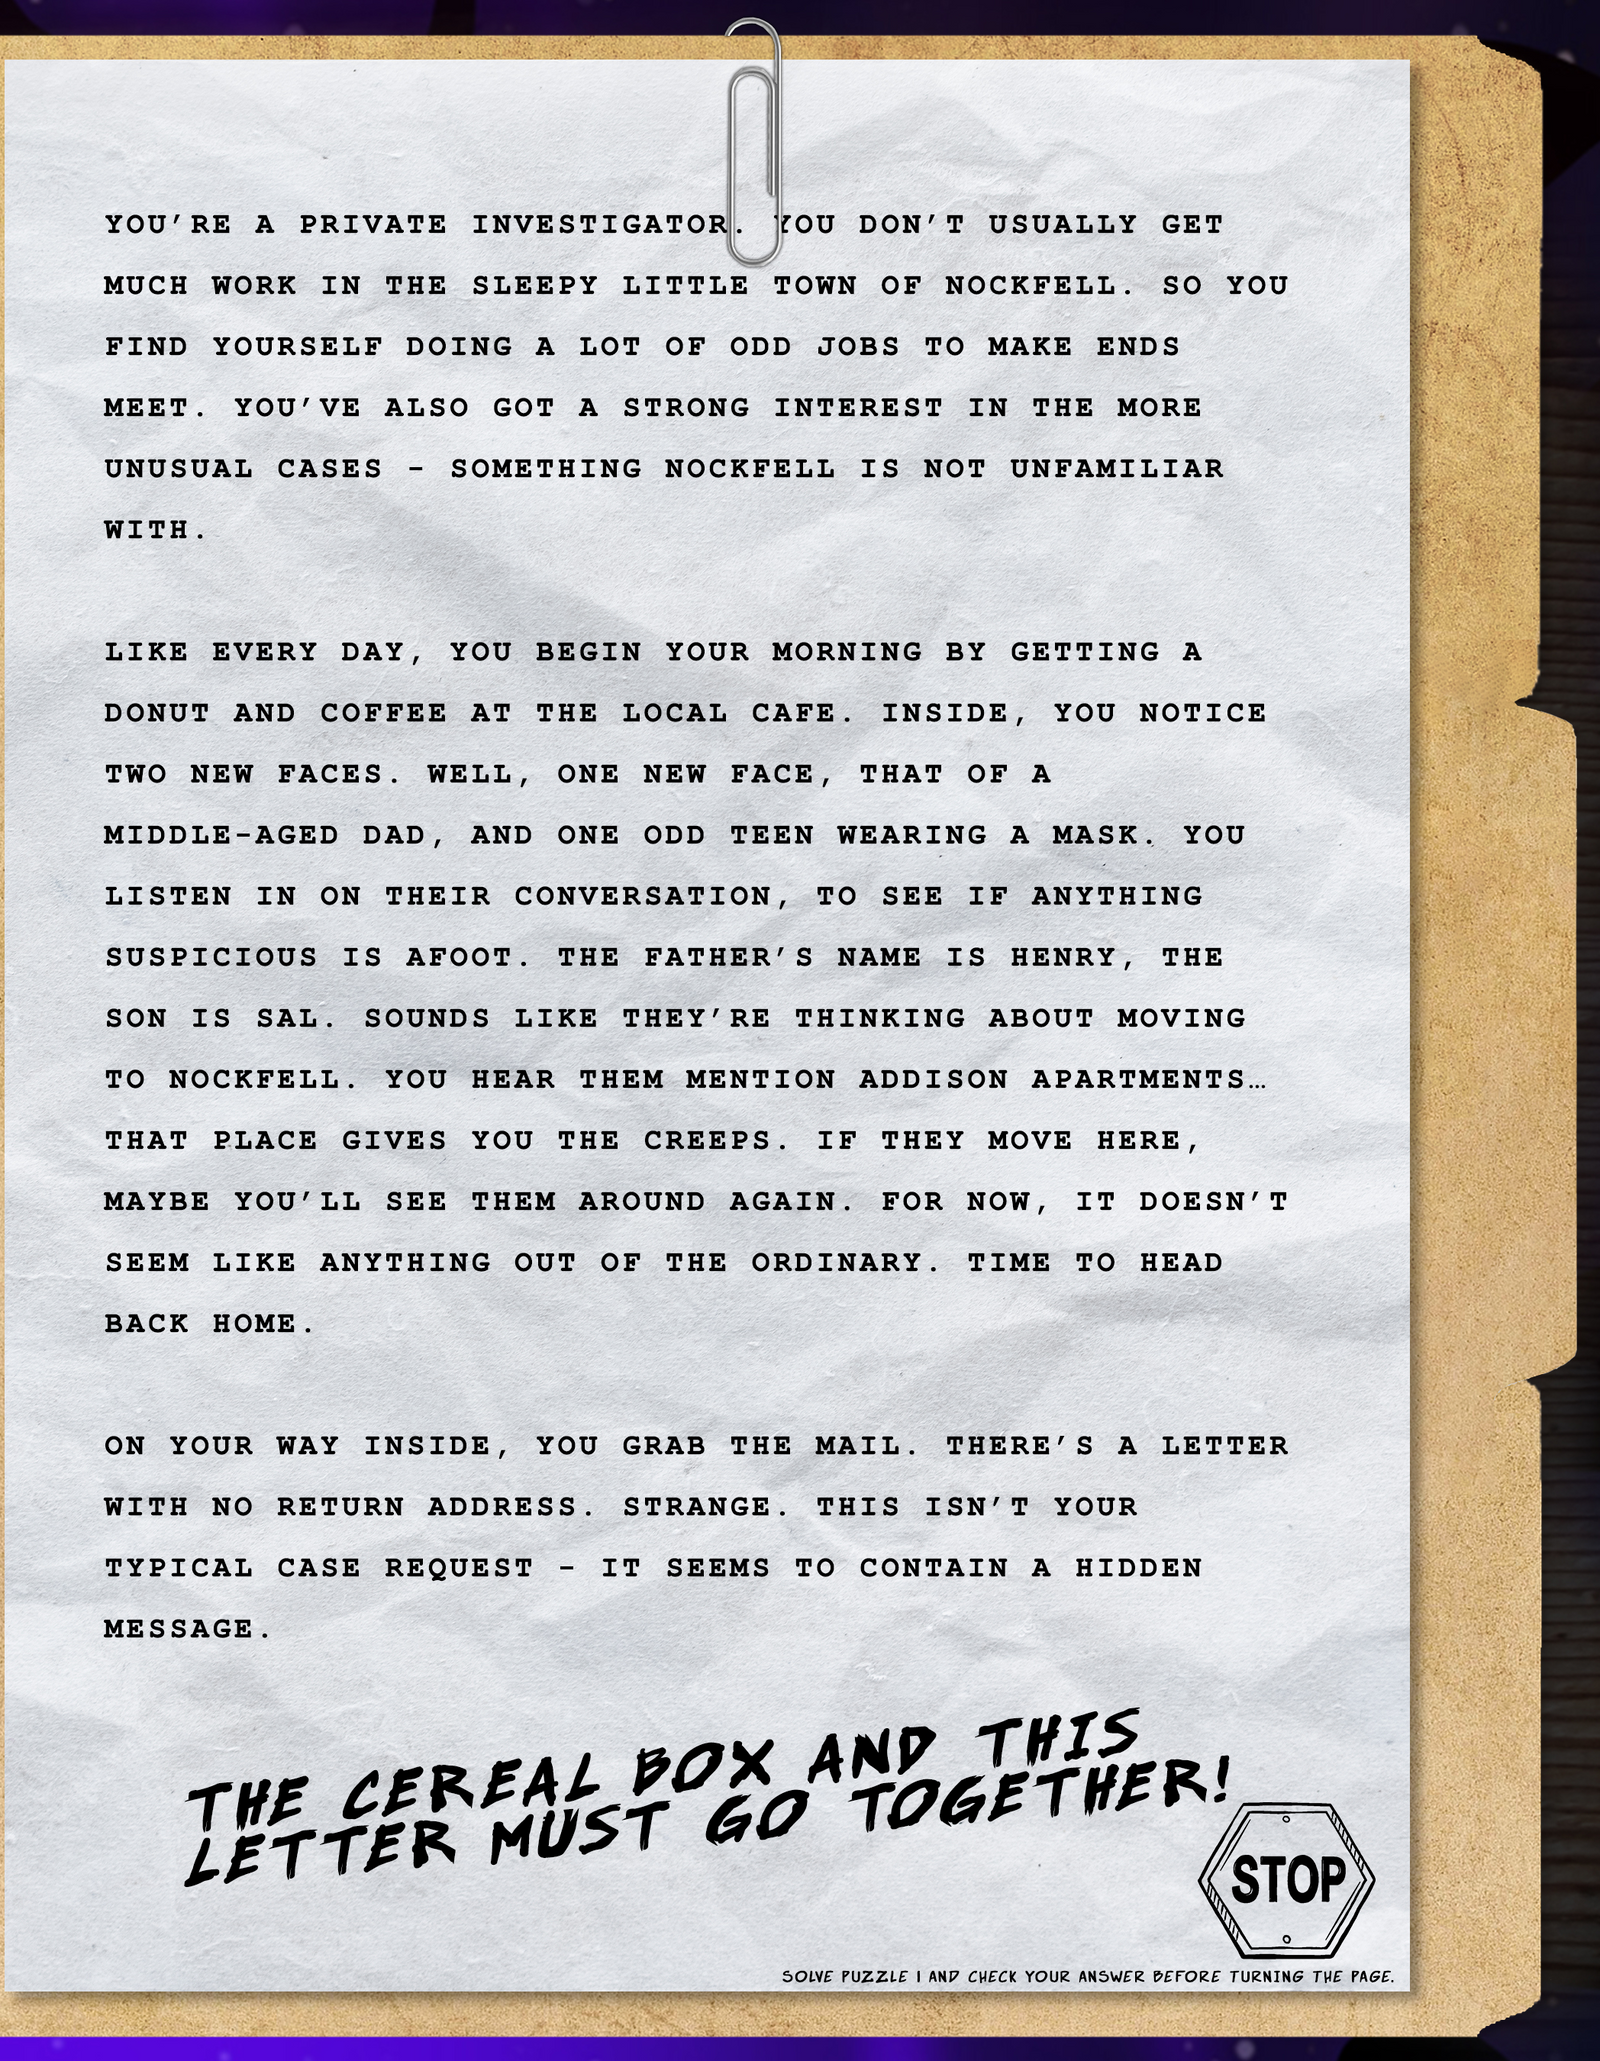
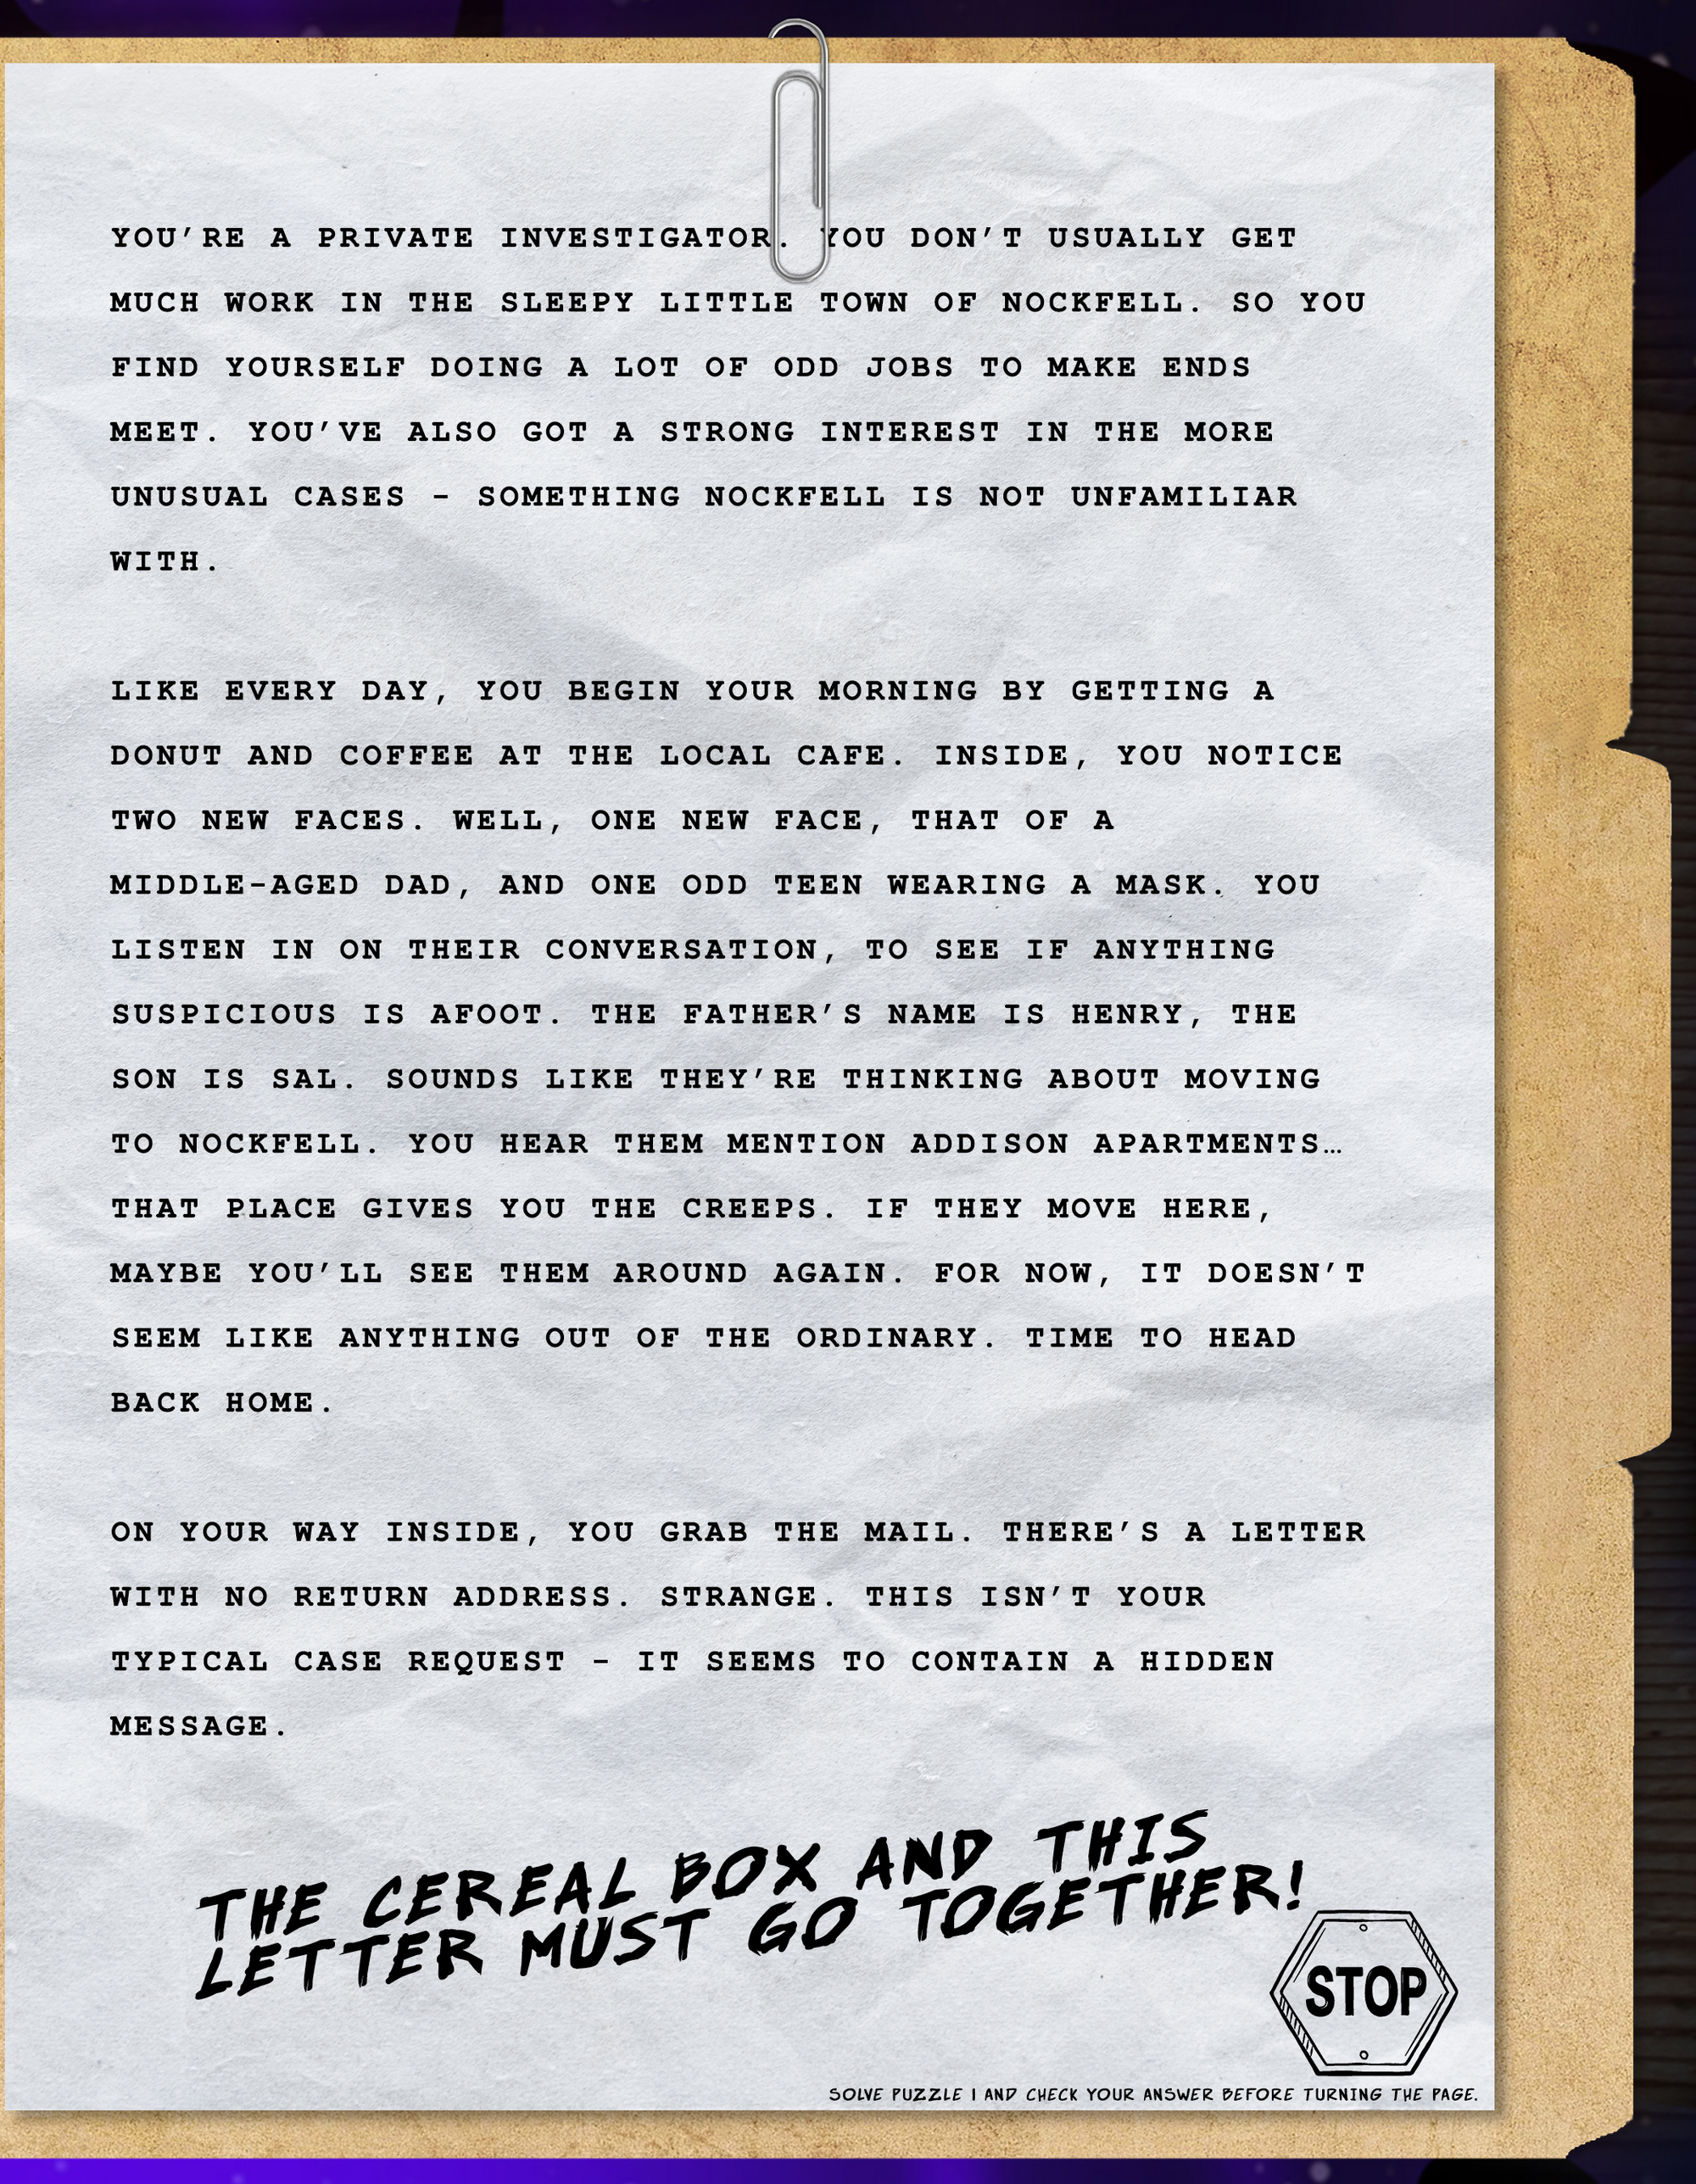
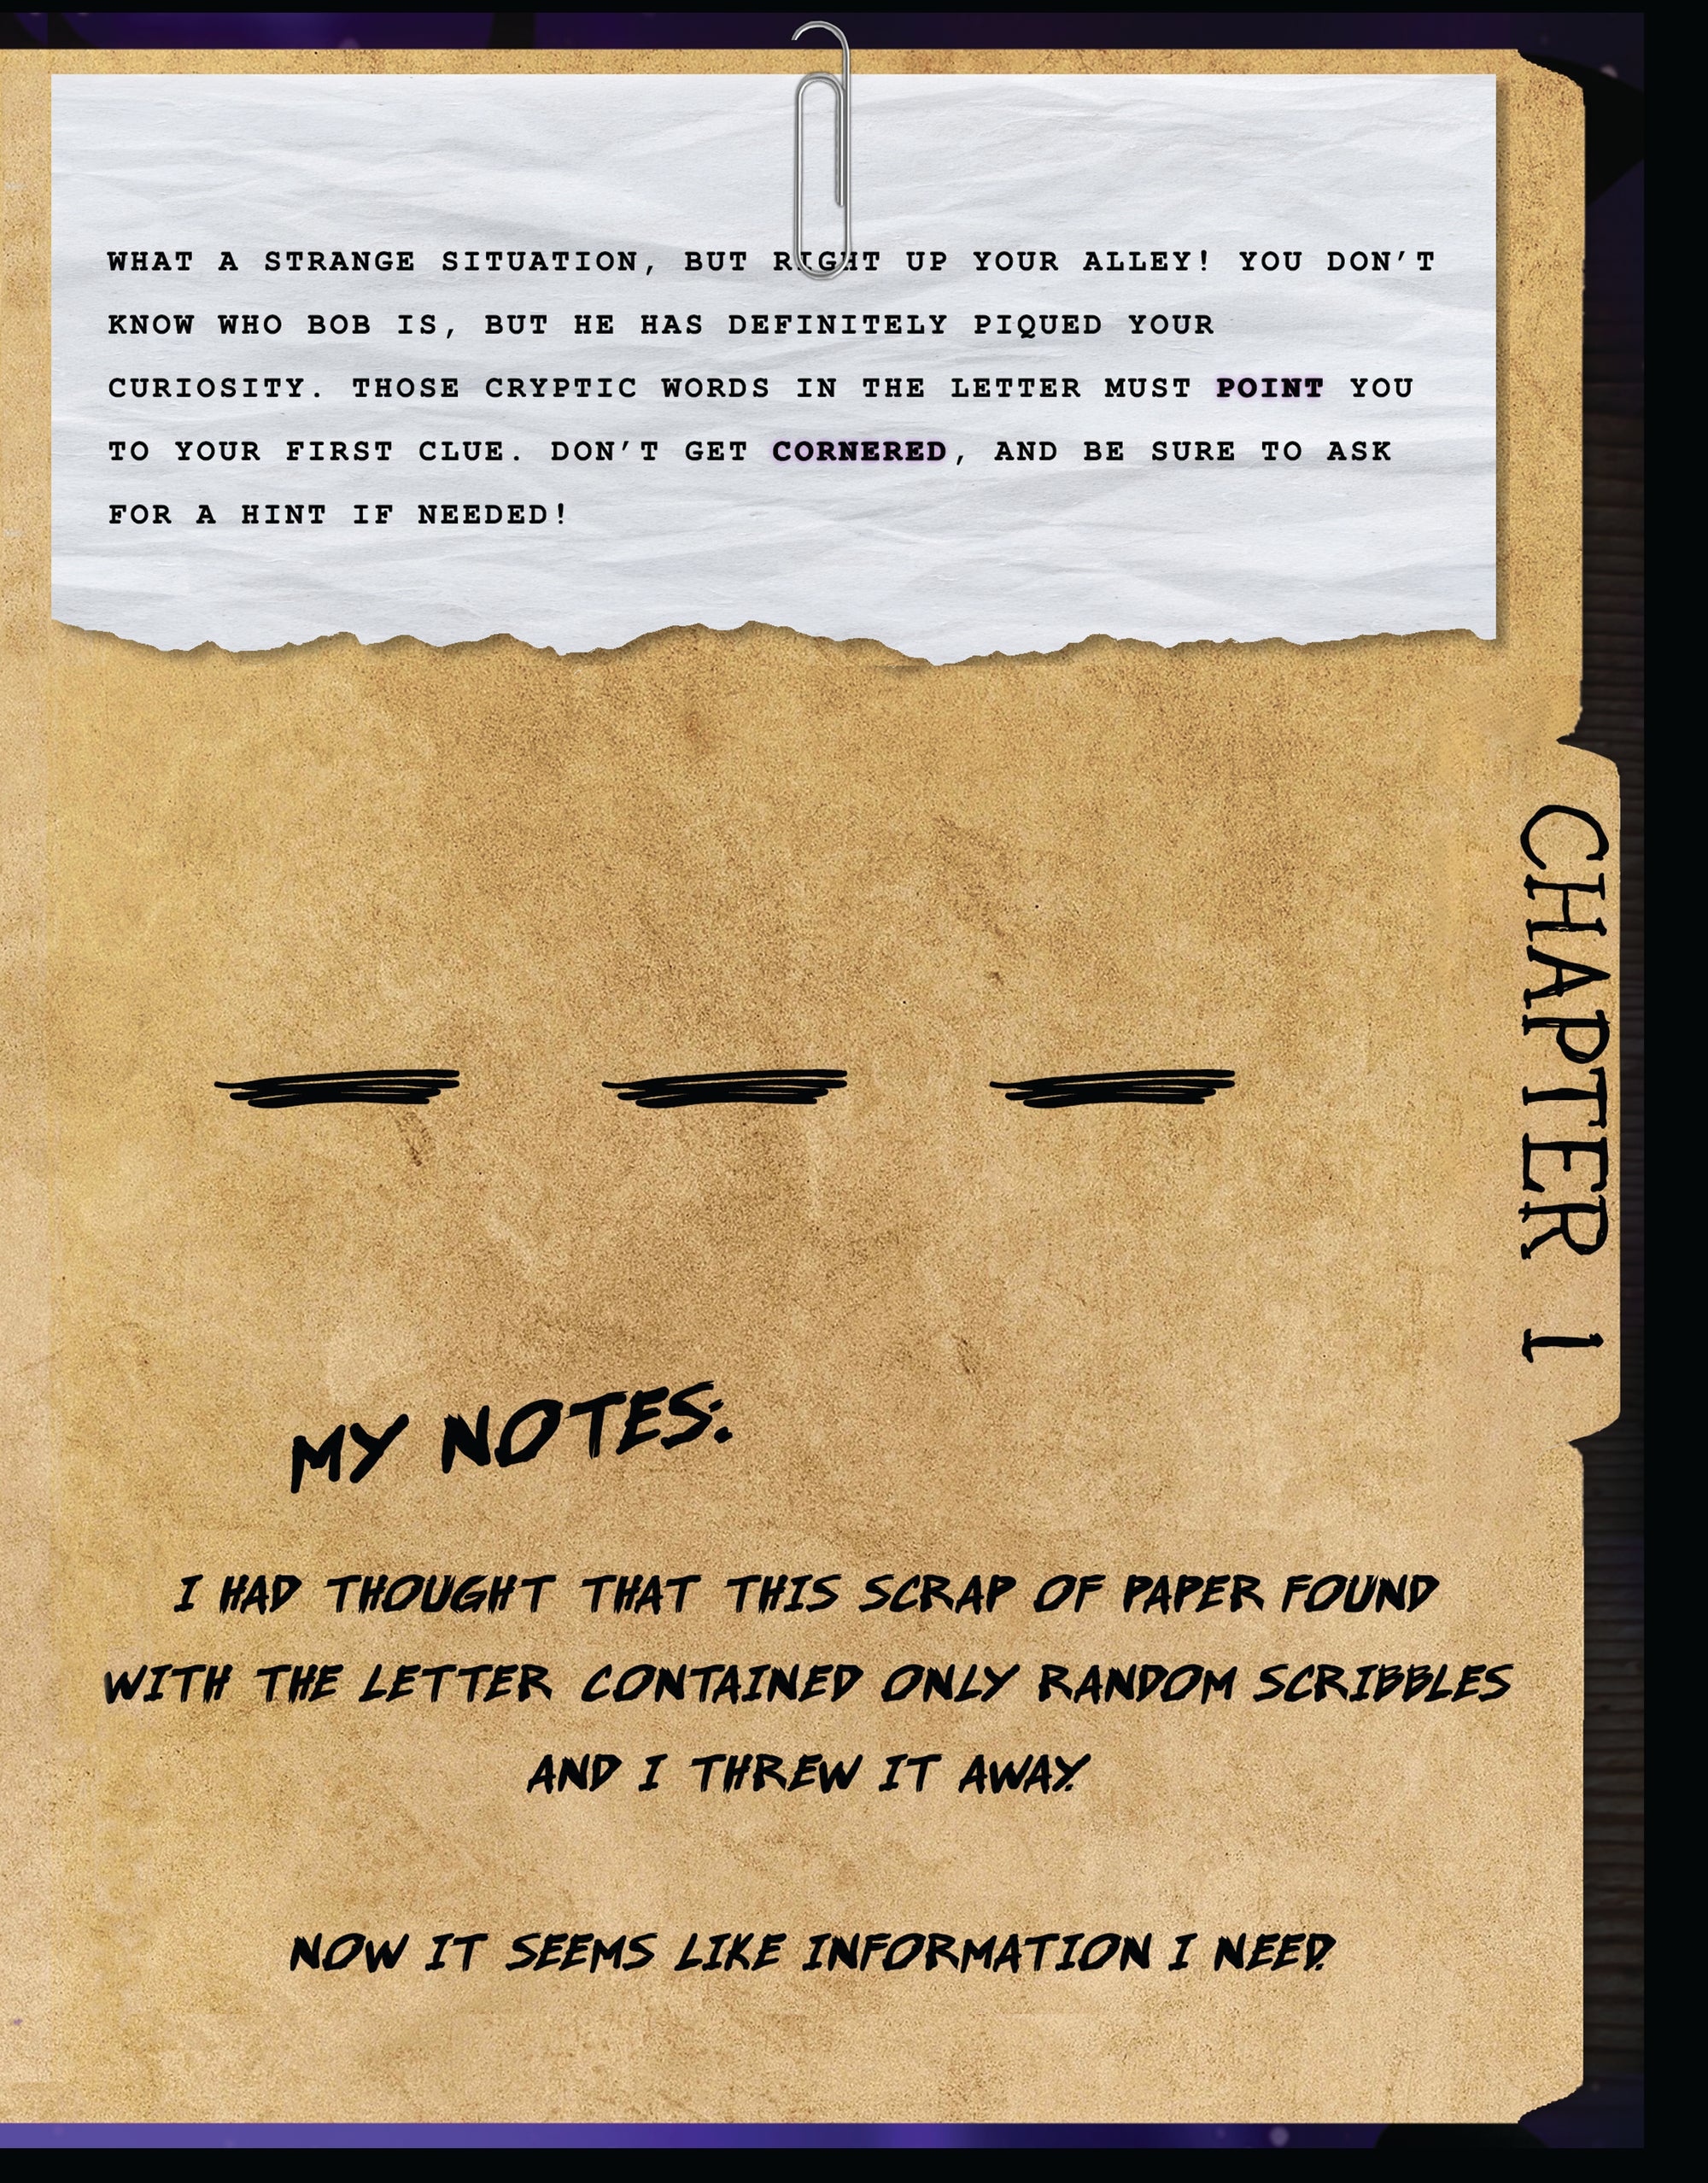
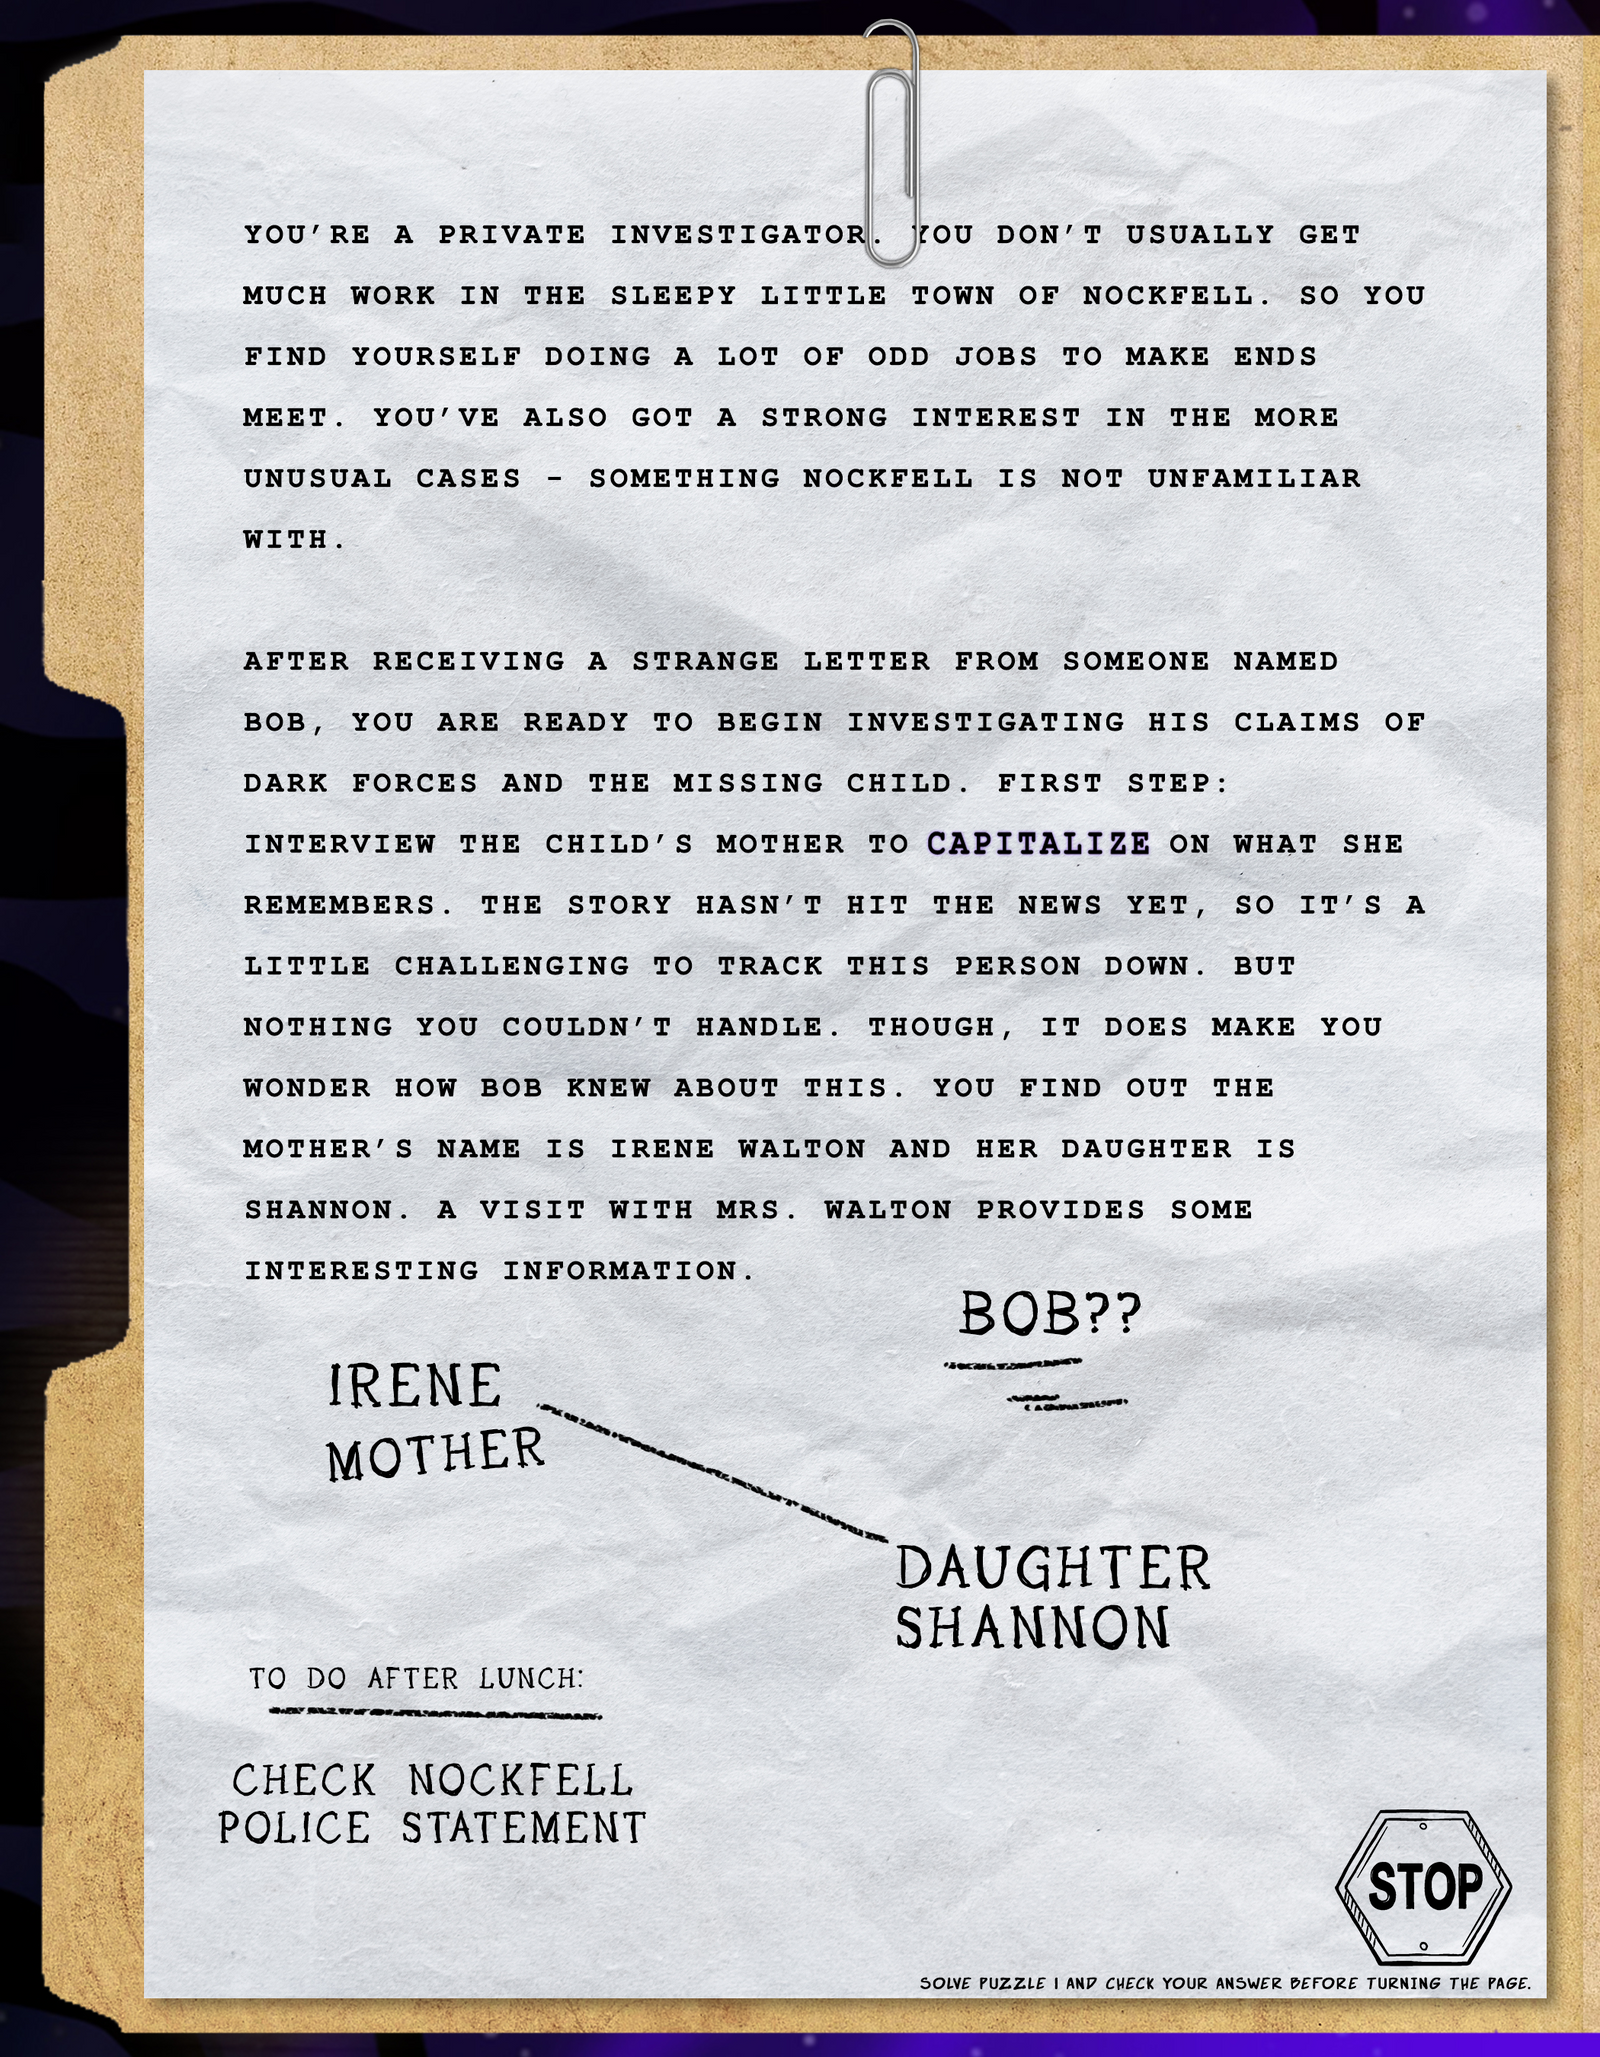
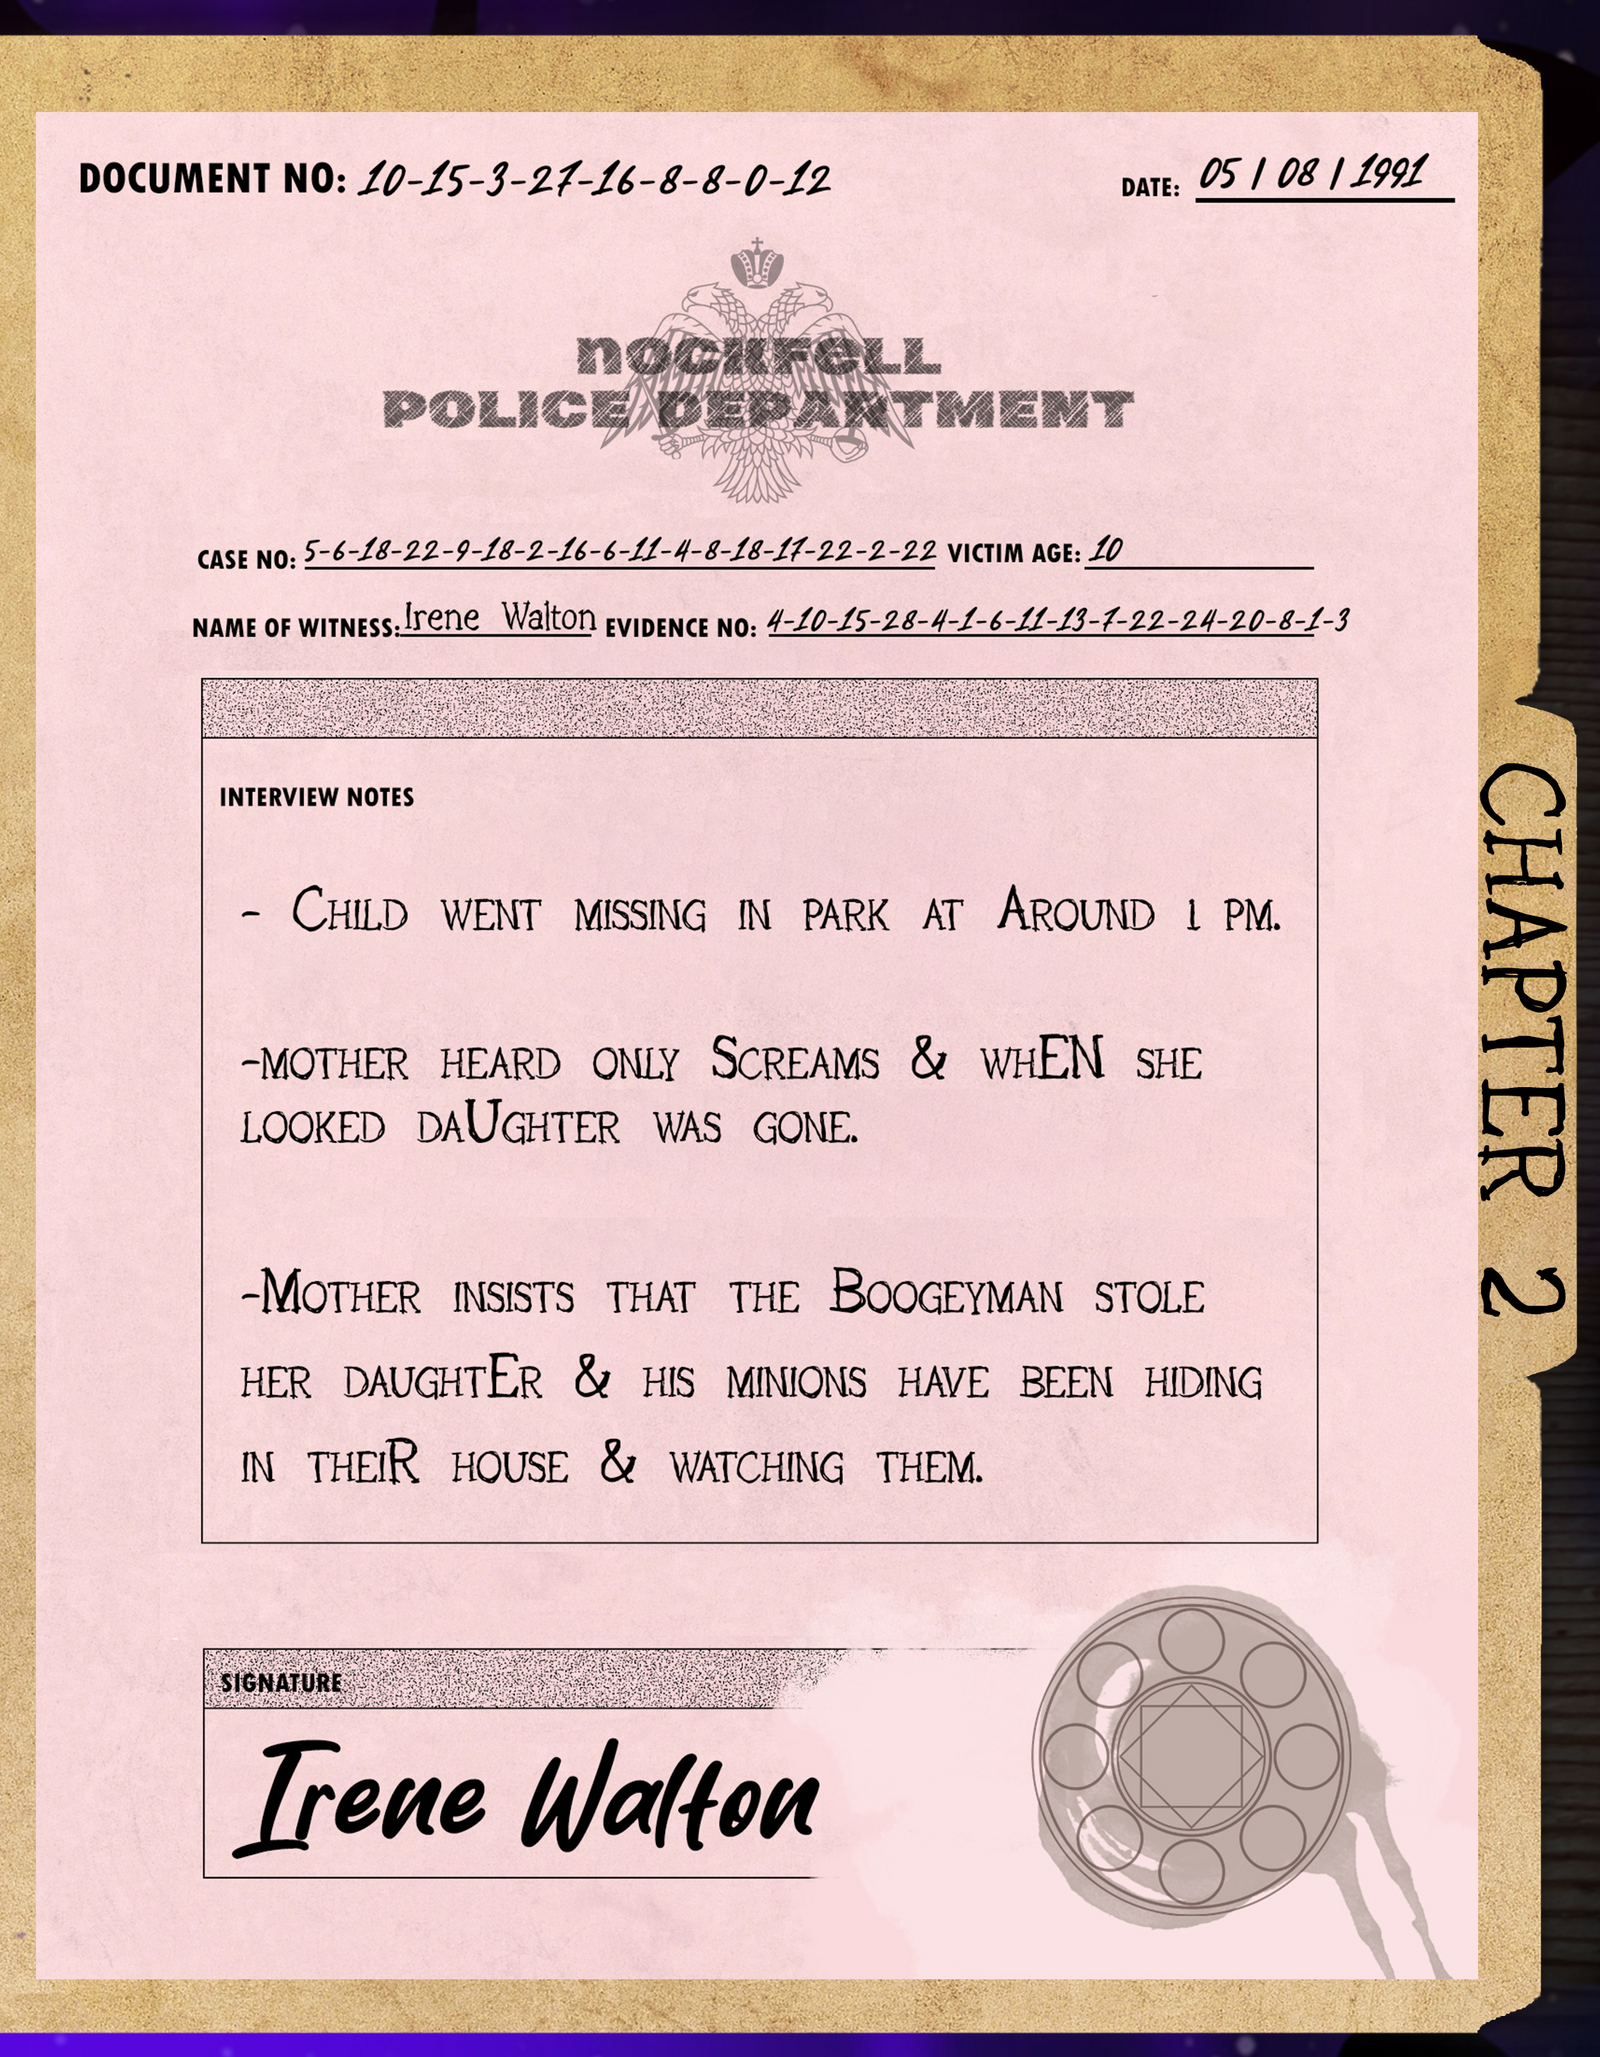
Read all of the capital letters in order. The solution is CASE NUMBER.
Puzzle 2 - Hint 1
Puzzle 2 - Hint 2
Puzzle 2 - Hint 3
Puzzle 2 - Hint 4
Puzzle 2 - Solution
Use the numbers in the Case Number field to find the correct letters in the phrase on the wristband. For example, 5 references the fifth letter in “Keep fighting the darkness”, so the first letter of the solution is F.
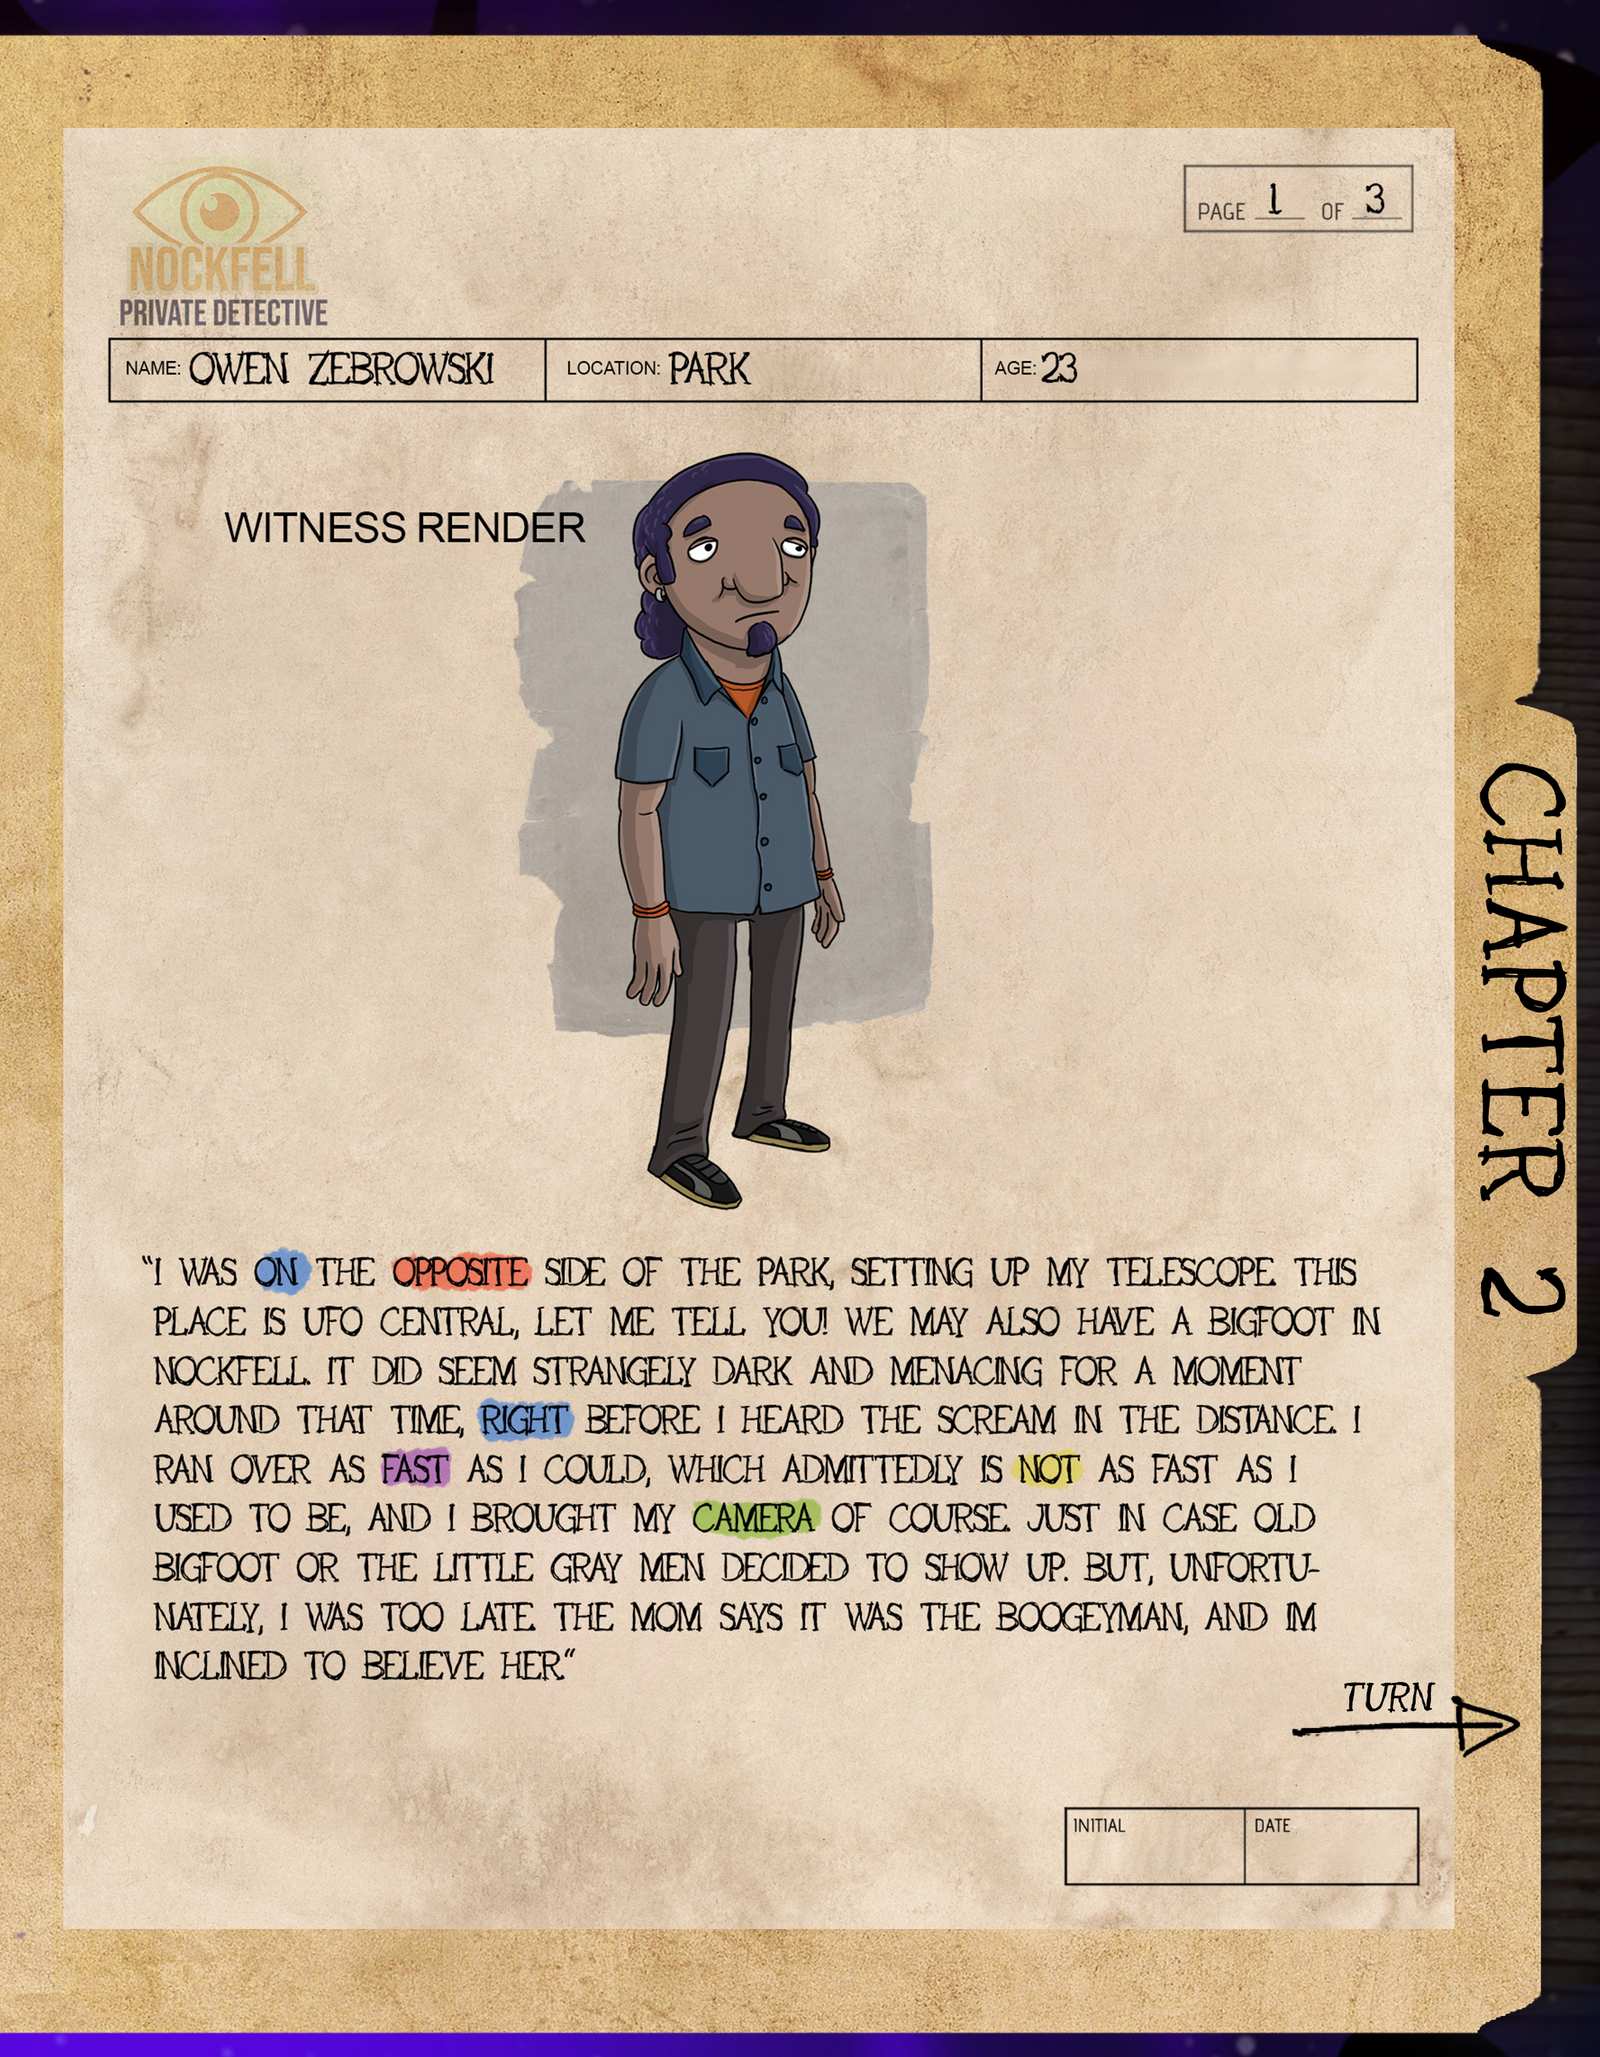
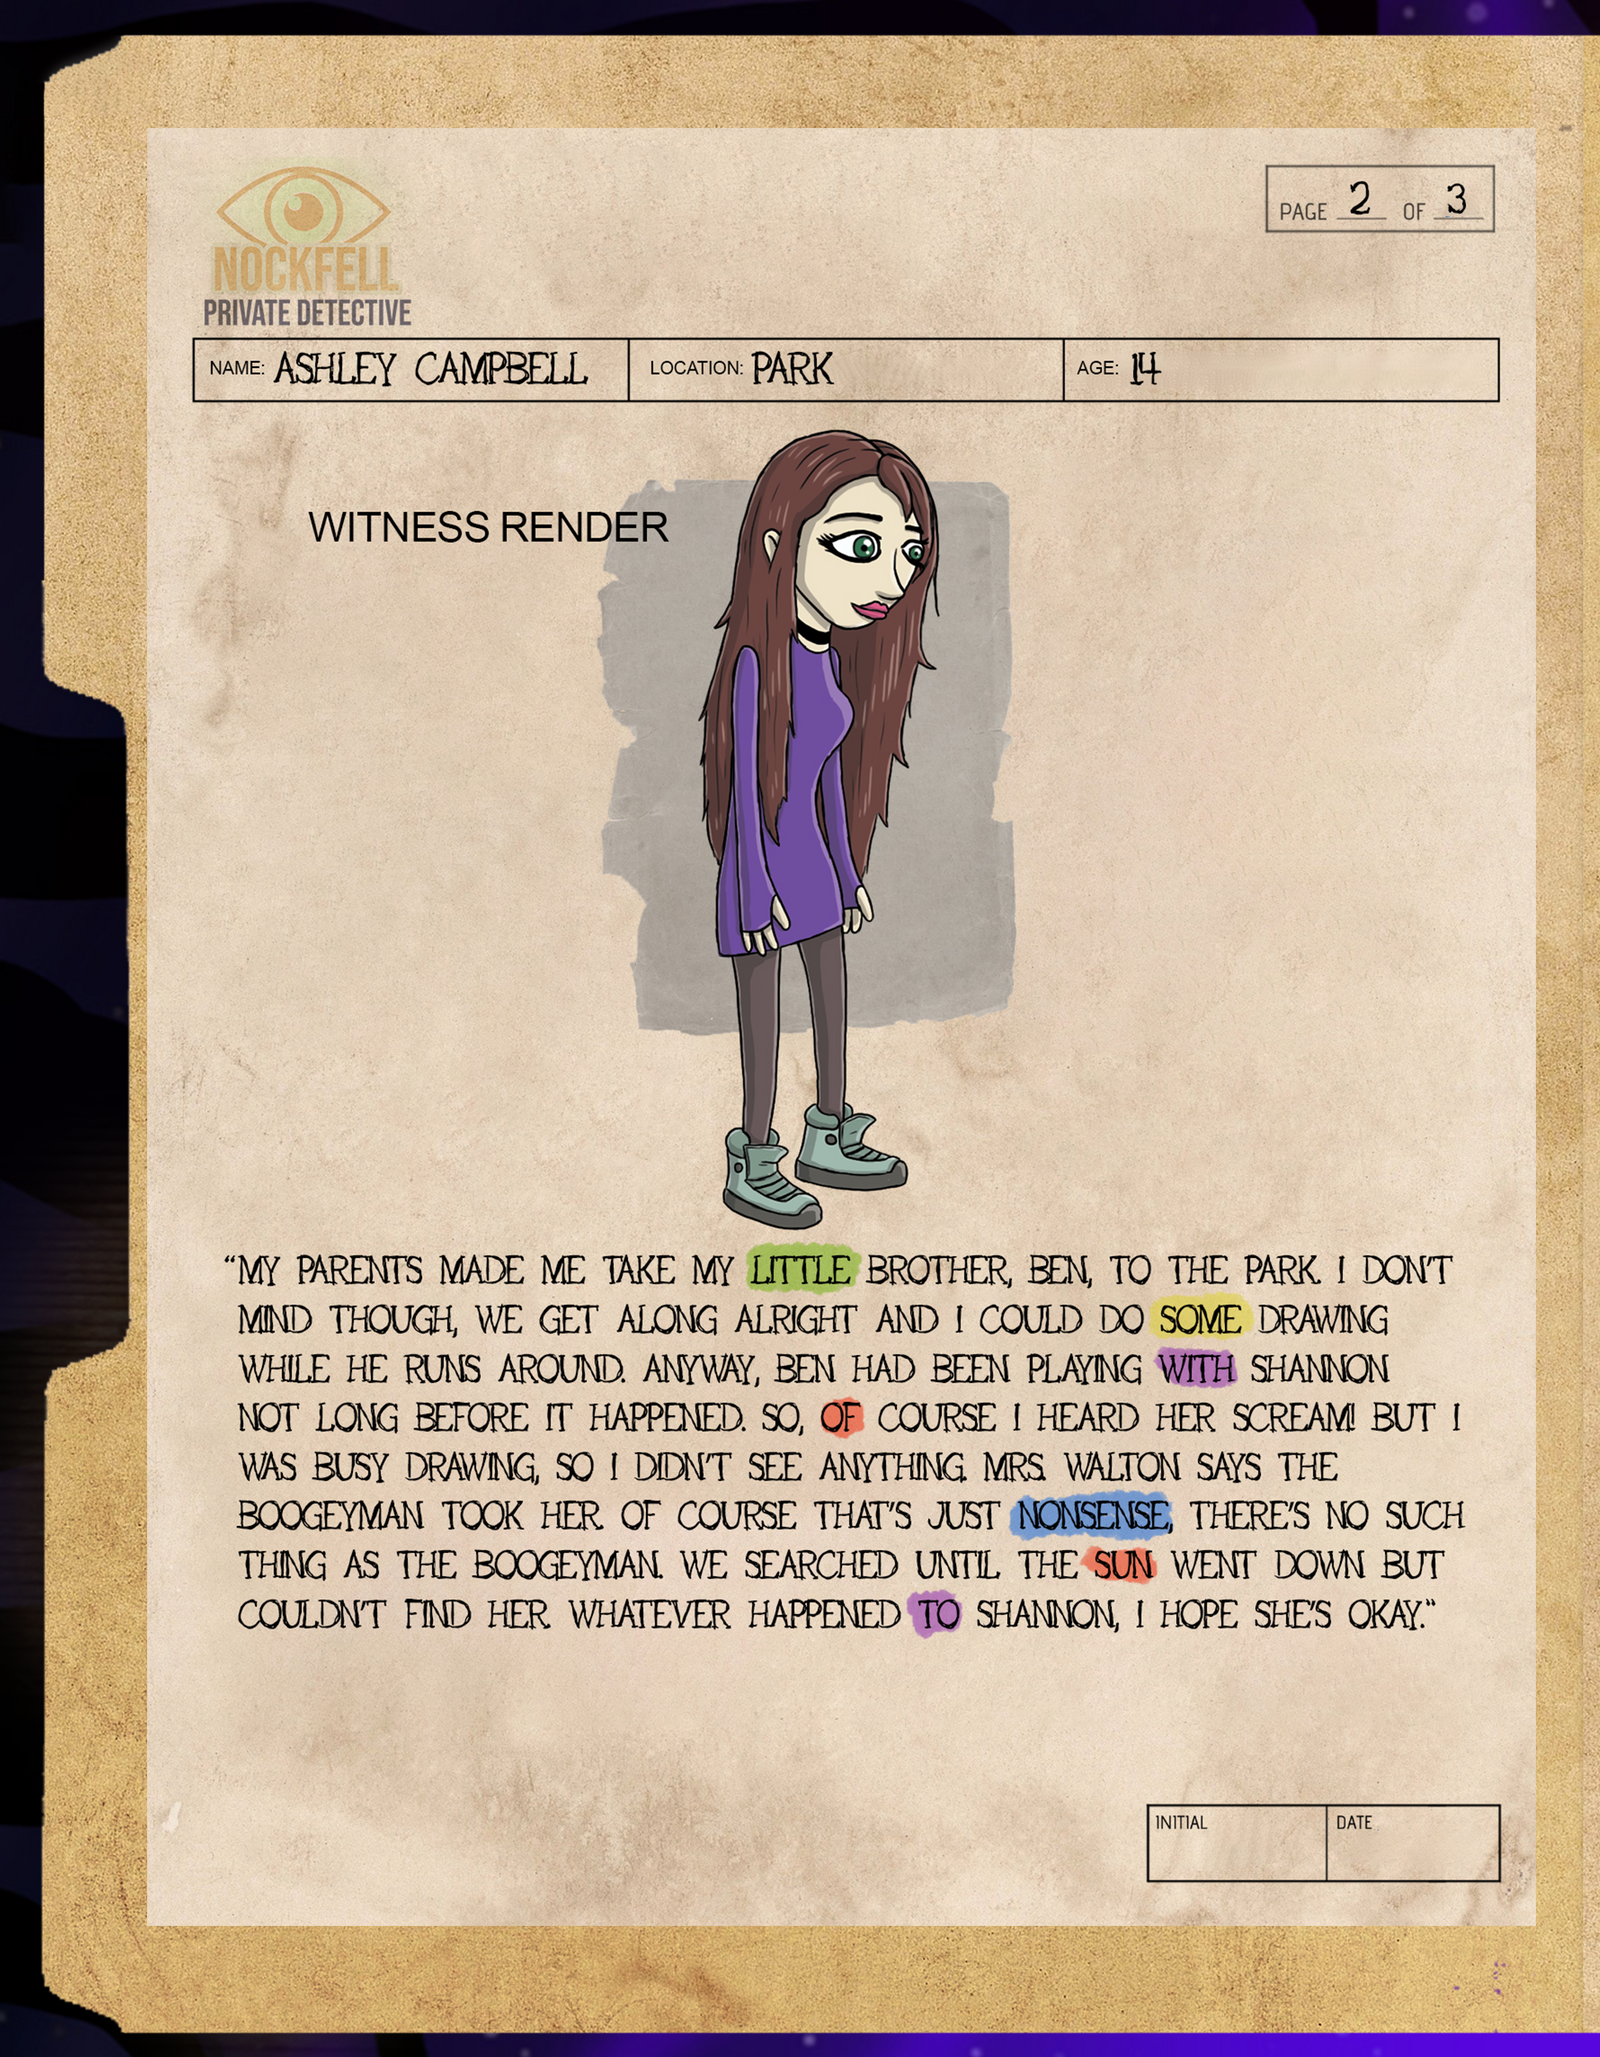
The solution is FIRST RED IN PHRASES.
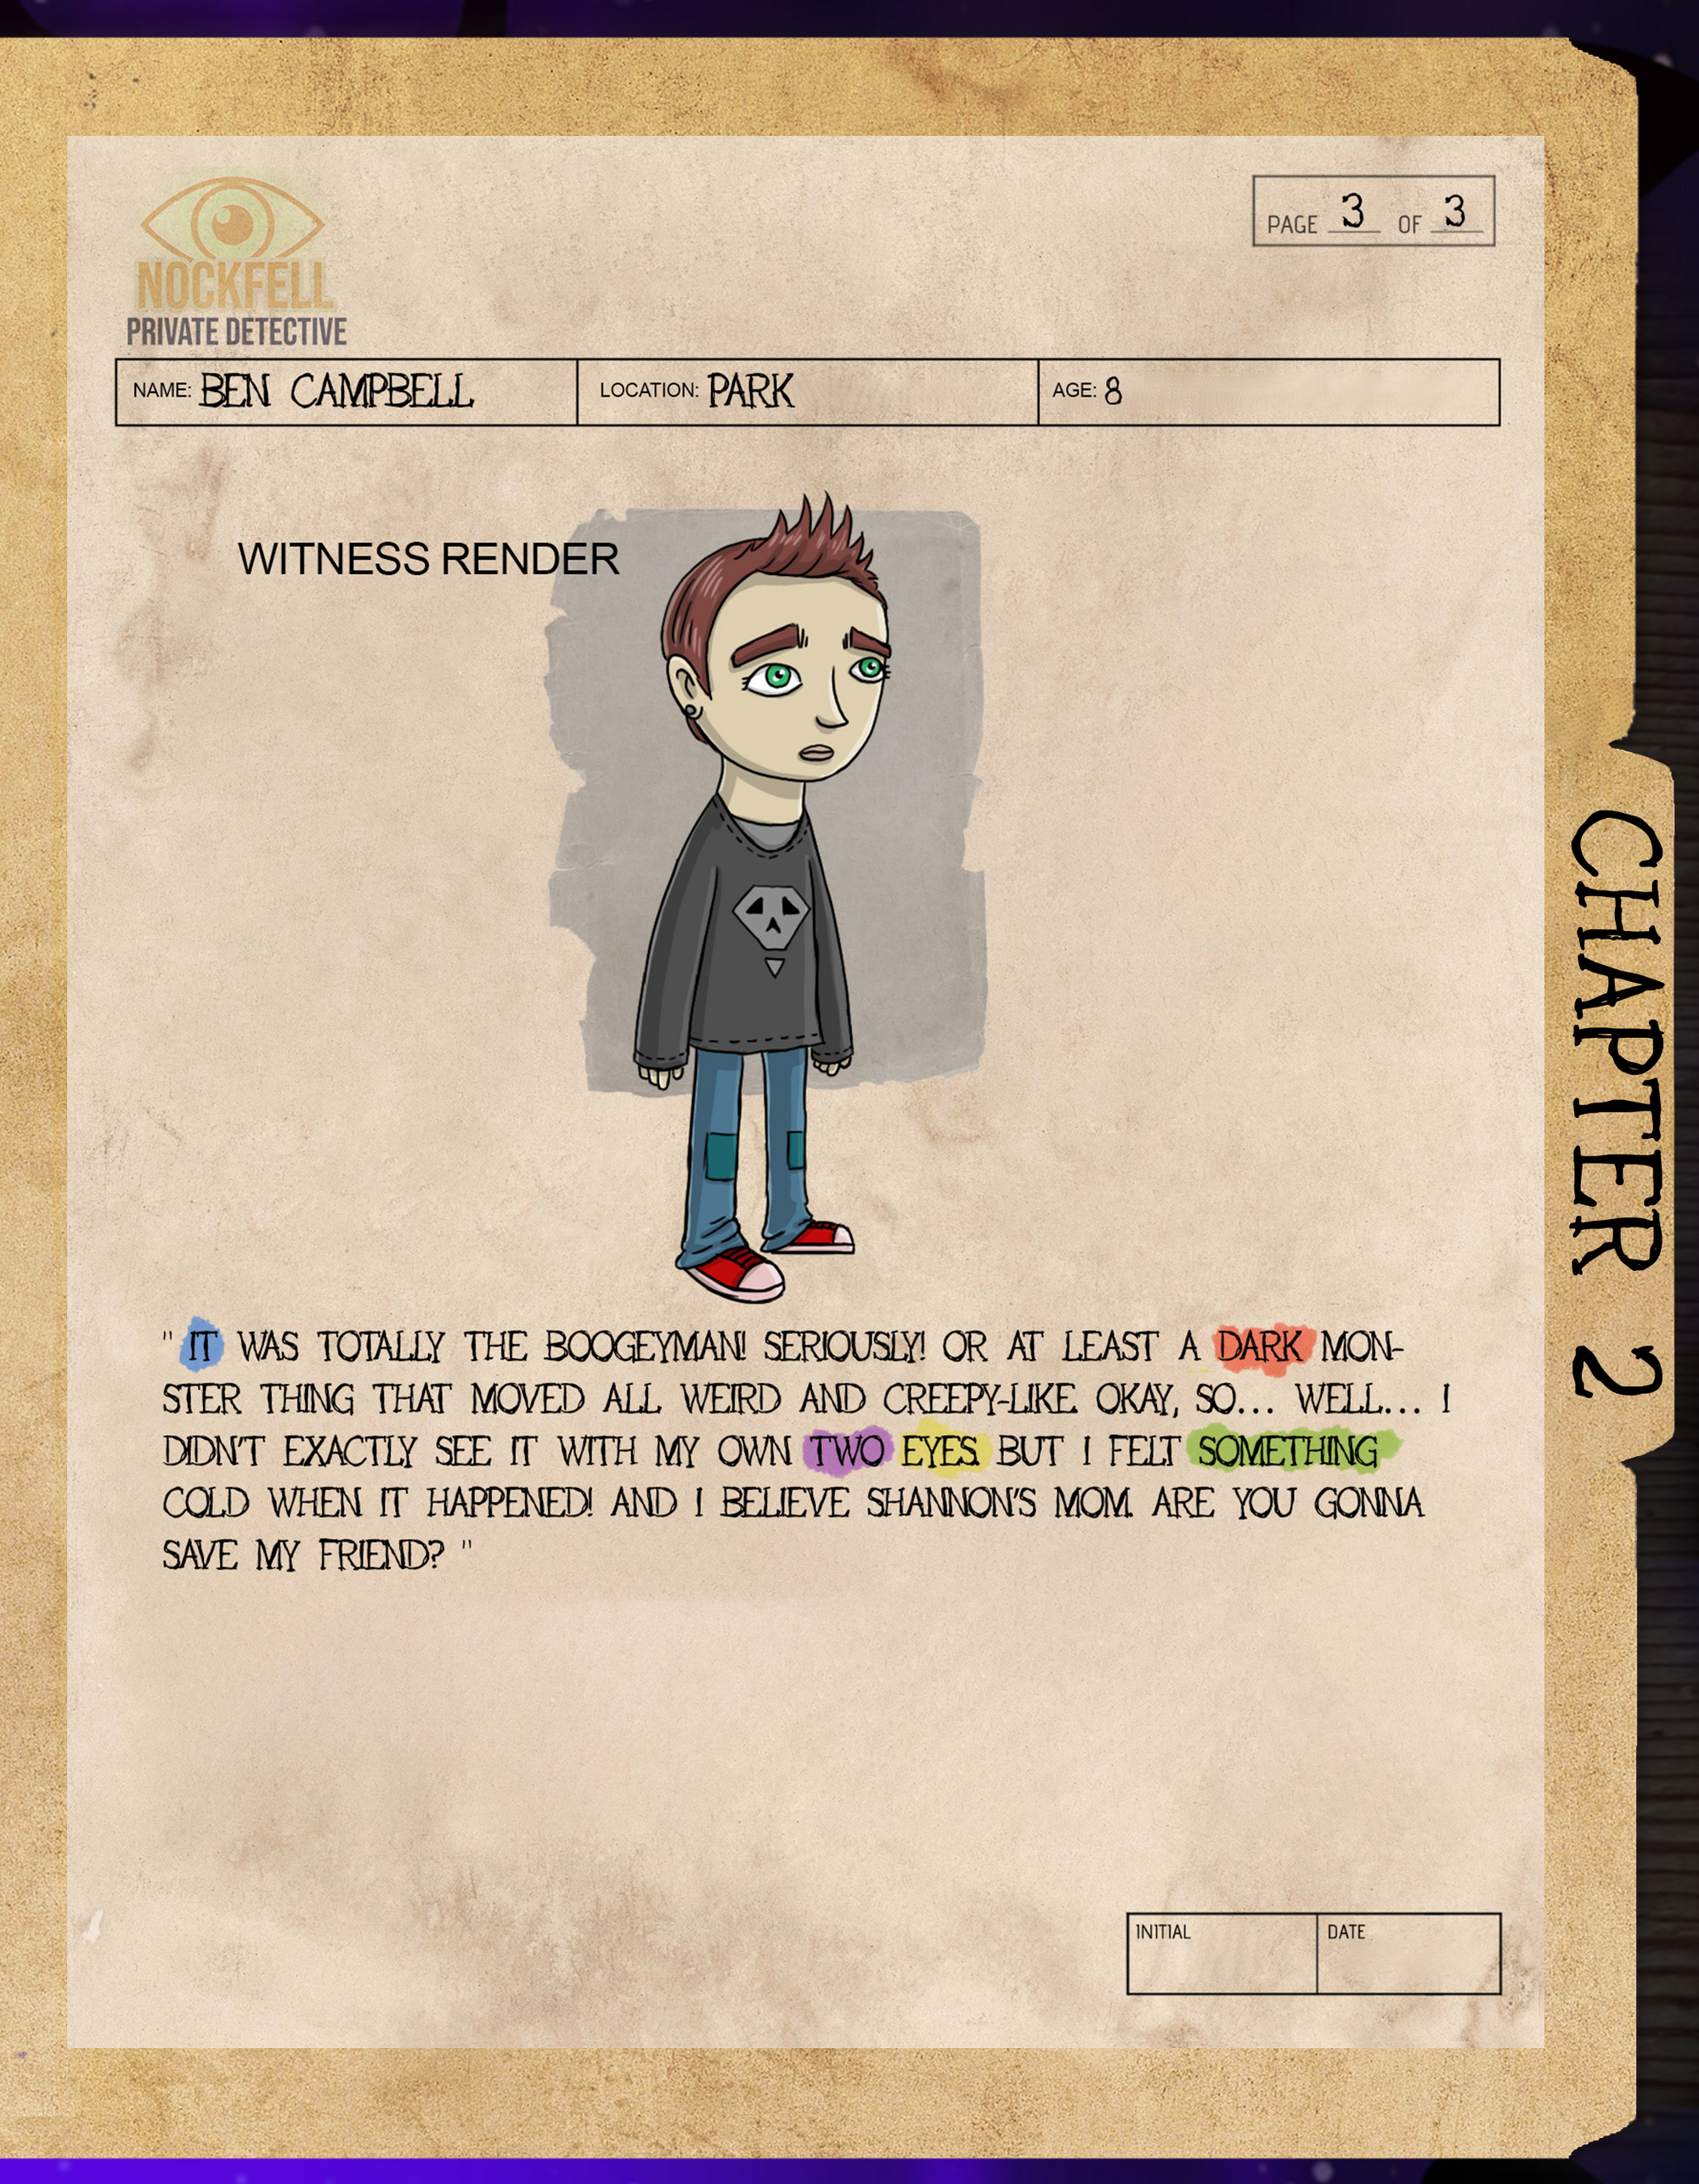
Puzzle 3 - Hint 1
Puzzle 3 - Hint 2
Puzzle 3 - Hint 3
Puzzle 3 - Solution
Find the first red word in each witness statement. This gives you OPPOSITE OF DARK. What is the opposite of dark? The final solution is
LIGHT
Your intuition says something big is happening here, and you’re determined to get to the bottom of it. For now, your soft pillow is calling to you. It’s been a long day. Tomorrow, you’ll search the woods yourself.
BOX 3 PUZZLES


Puzzle 1 - Hint 1
Puzzle 1 - Hint 2
Puzzle 1 - Hint 3
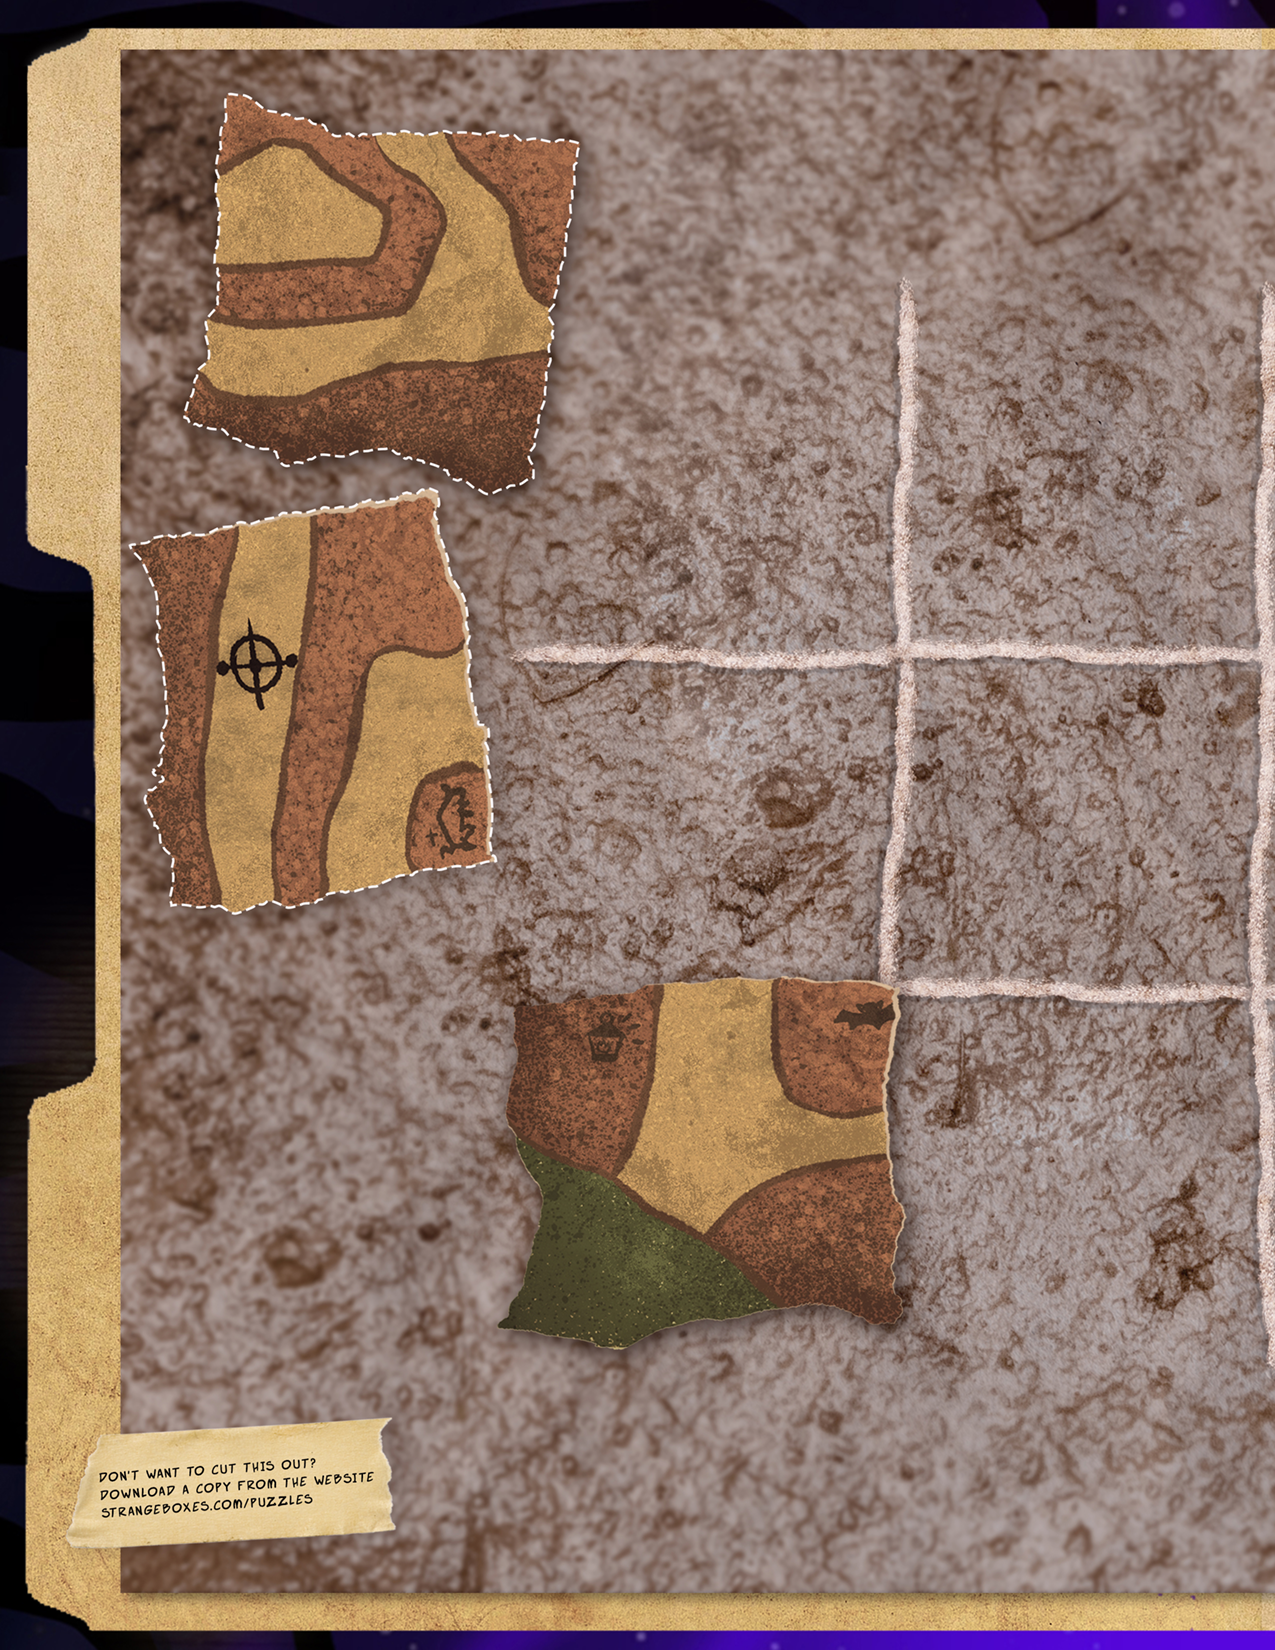
Puzzle 1 - Solution
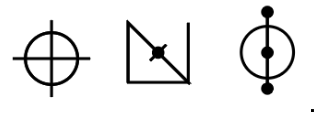
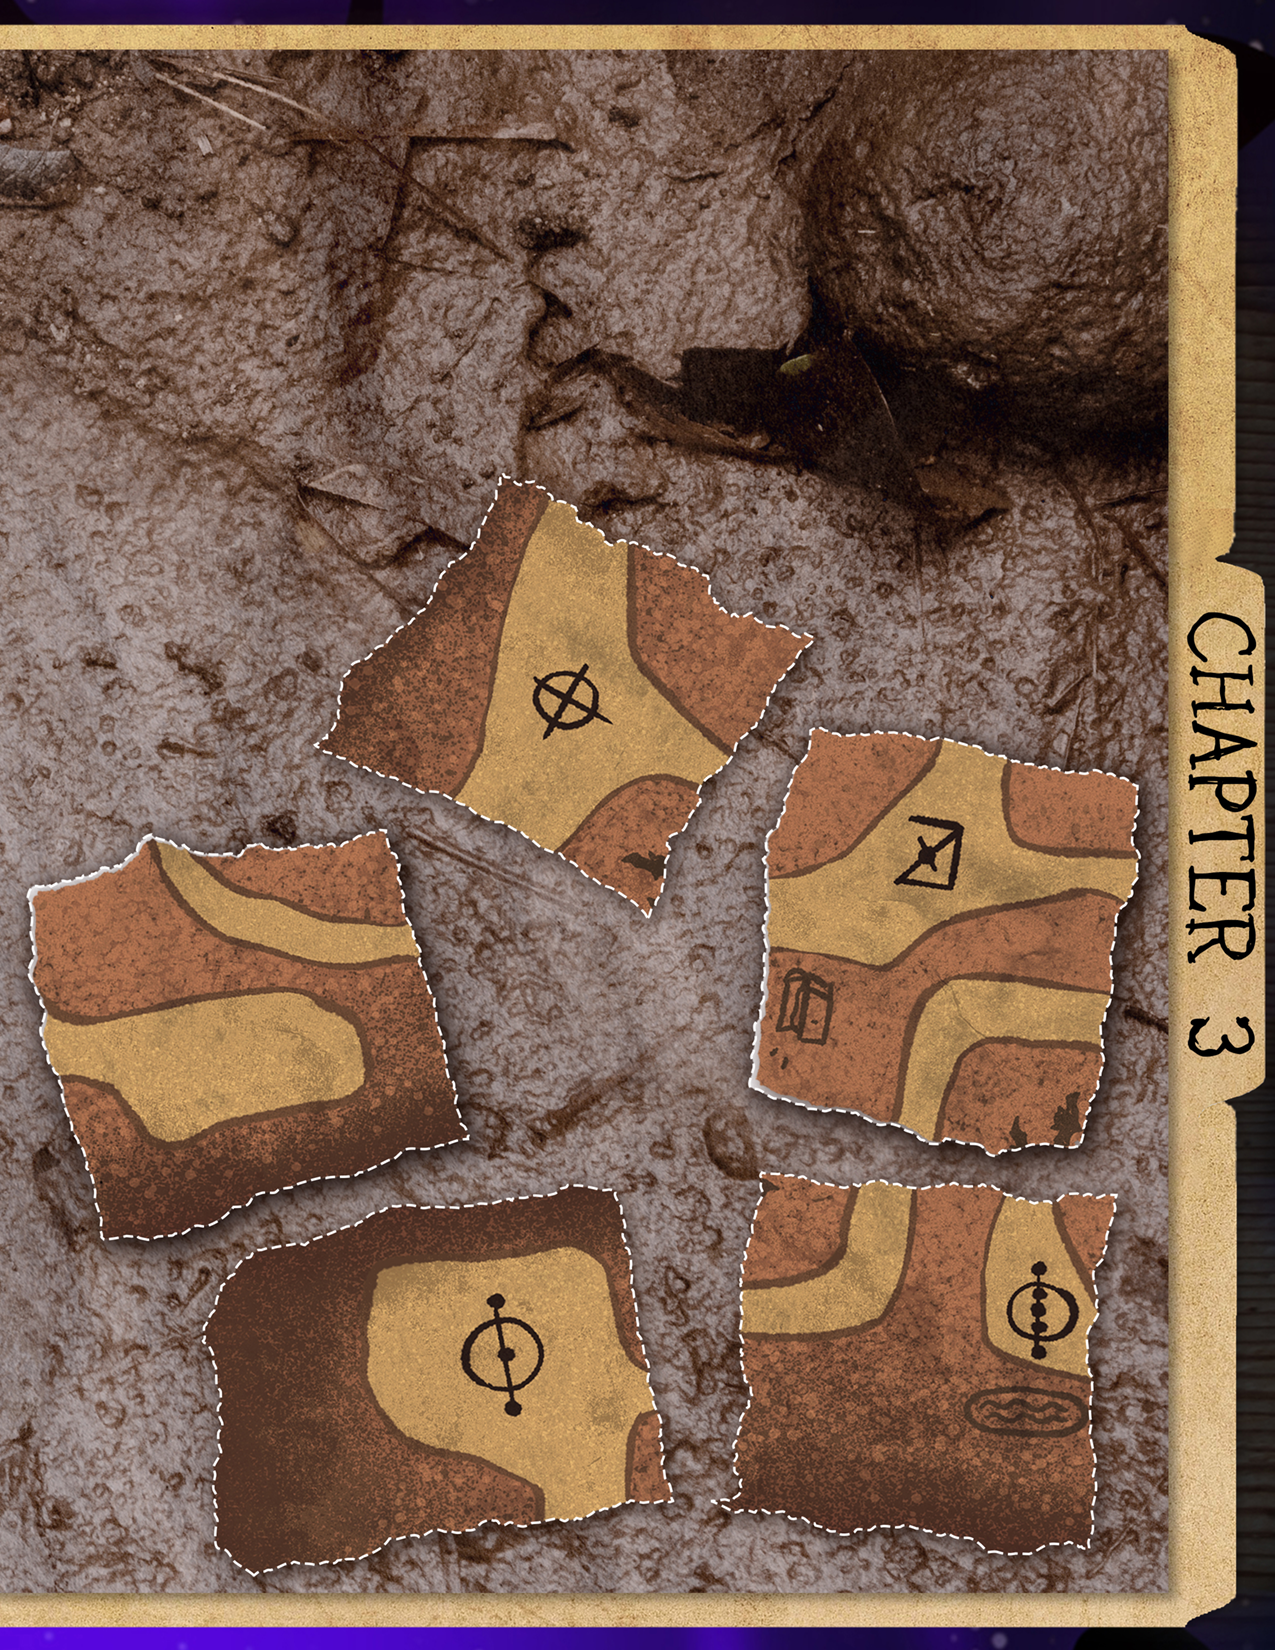
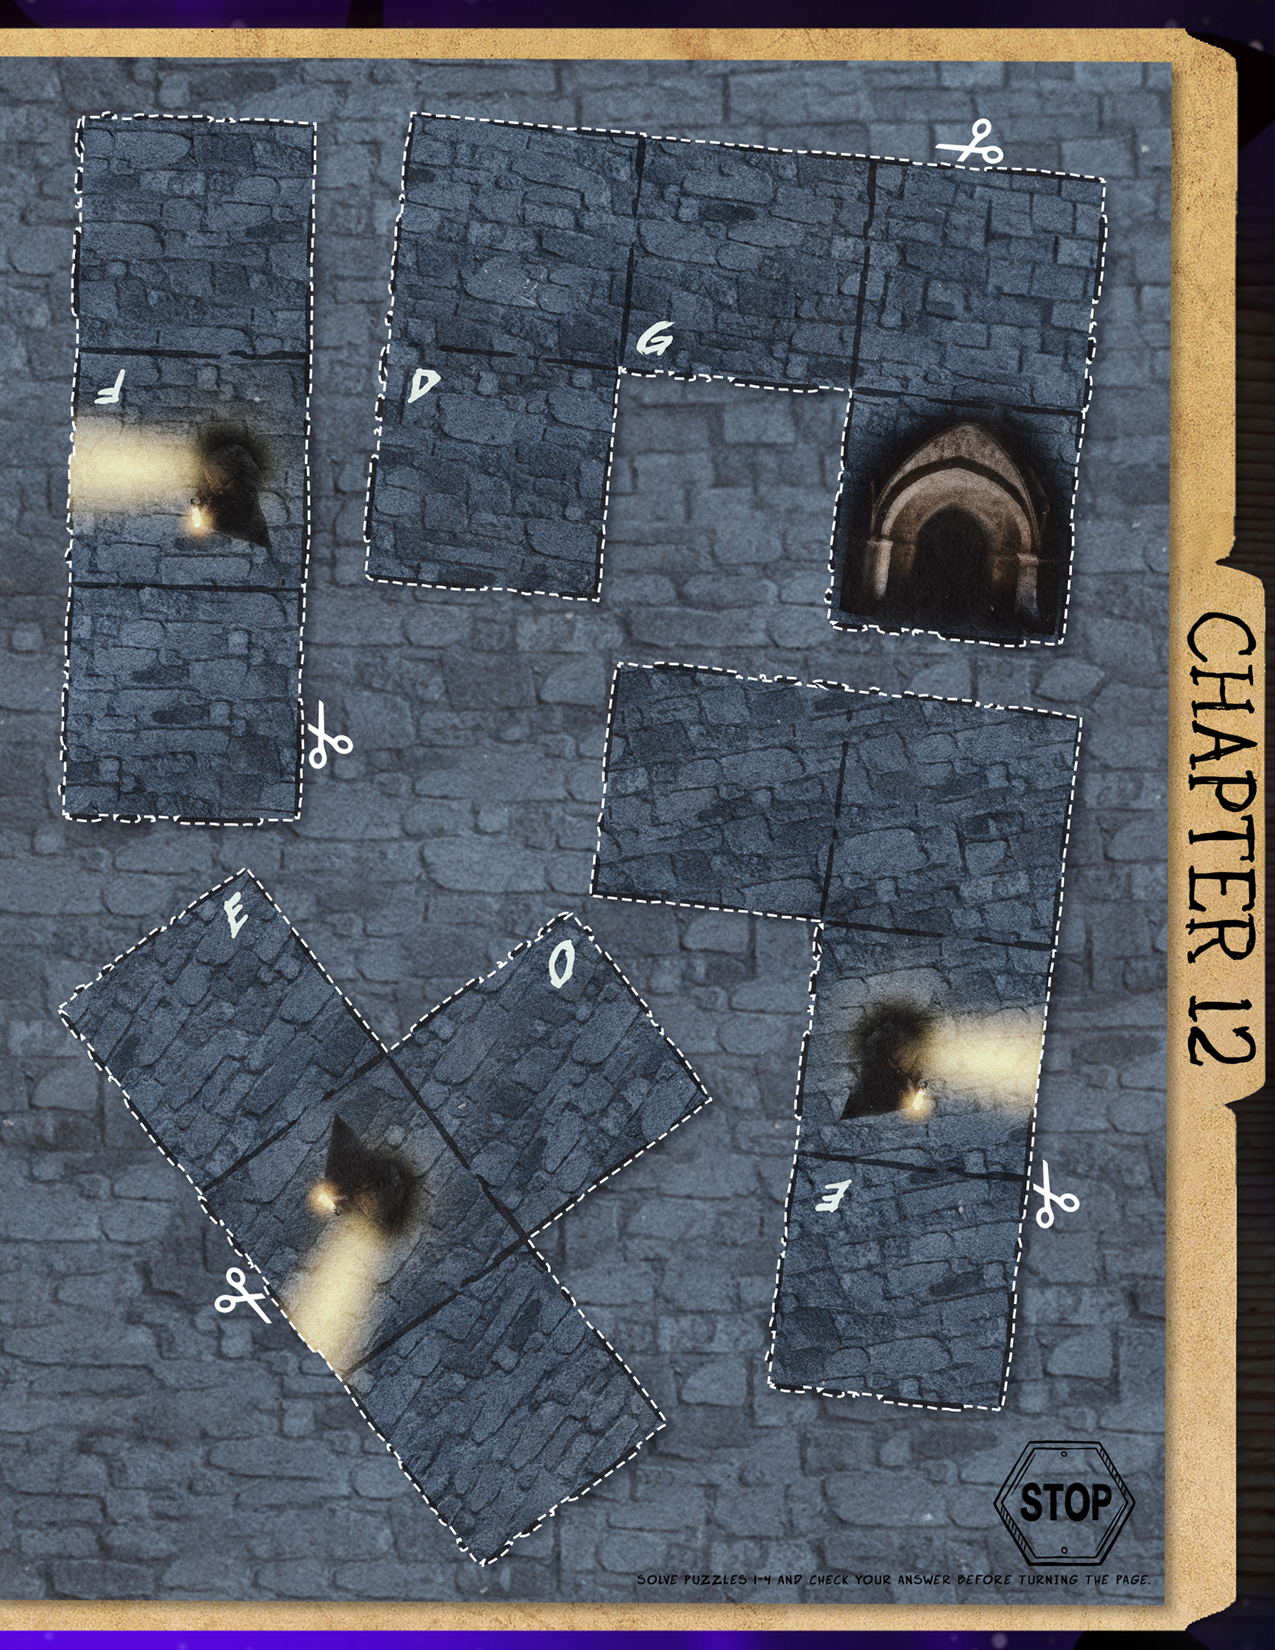
This is the final arrangement of the cave tiles: [insert picture of the completed diagram]. Following the direct route from the entrance to the final cave will pass 3 symbols. The solution is
Puzzle 2 - Hint 1


Puzzle 2 - Hint 2
Puzzle 2 - Hint 3
Puzzle 2 - Solution
Driver
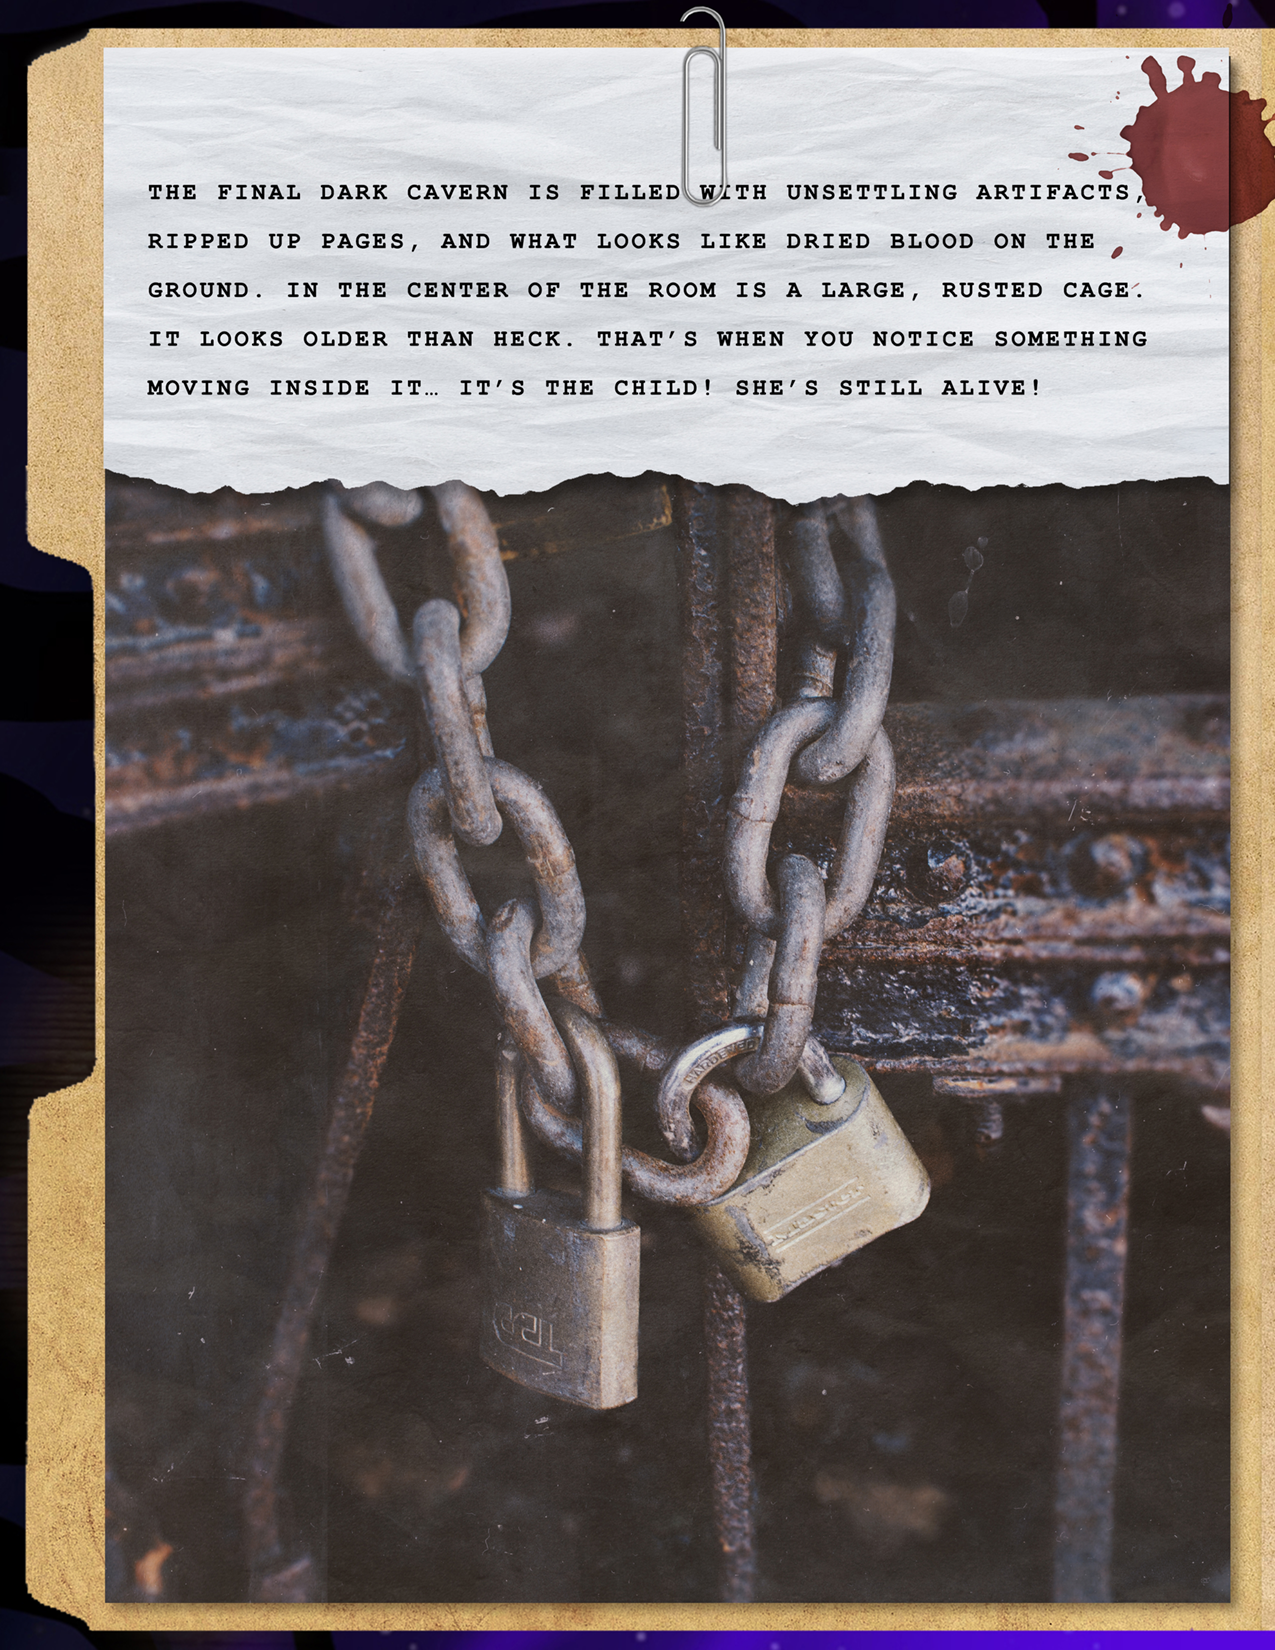
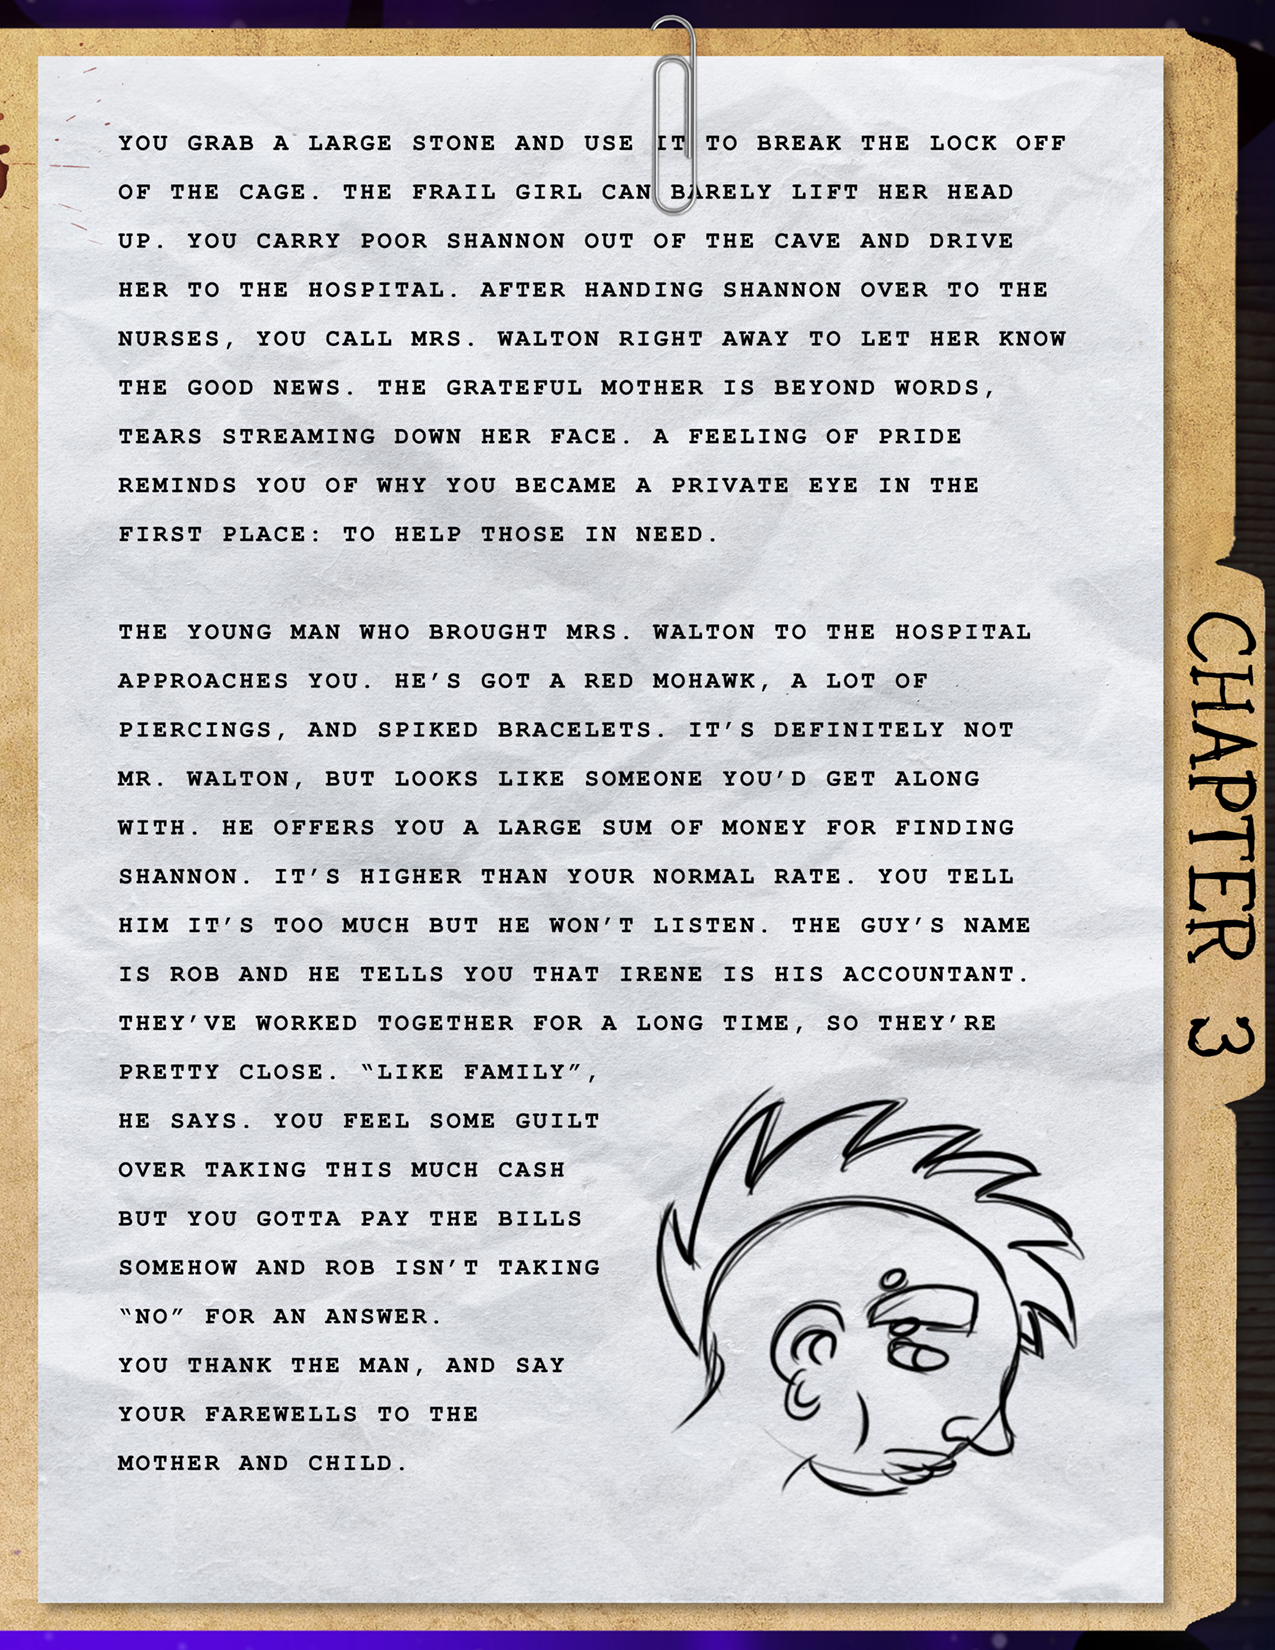
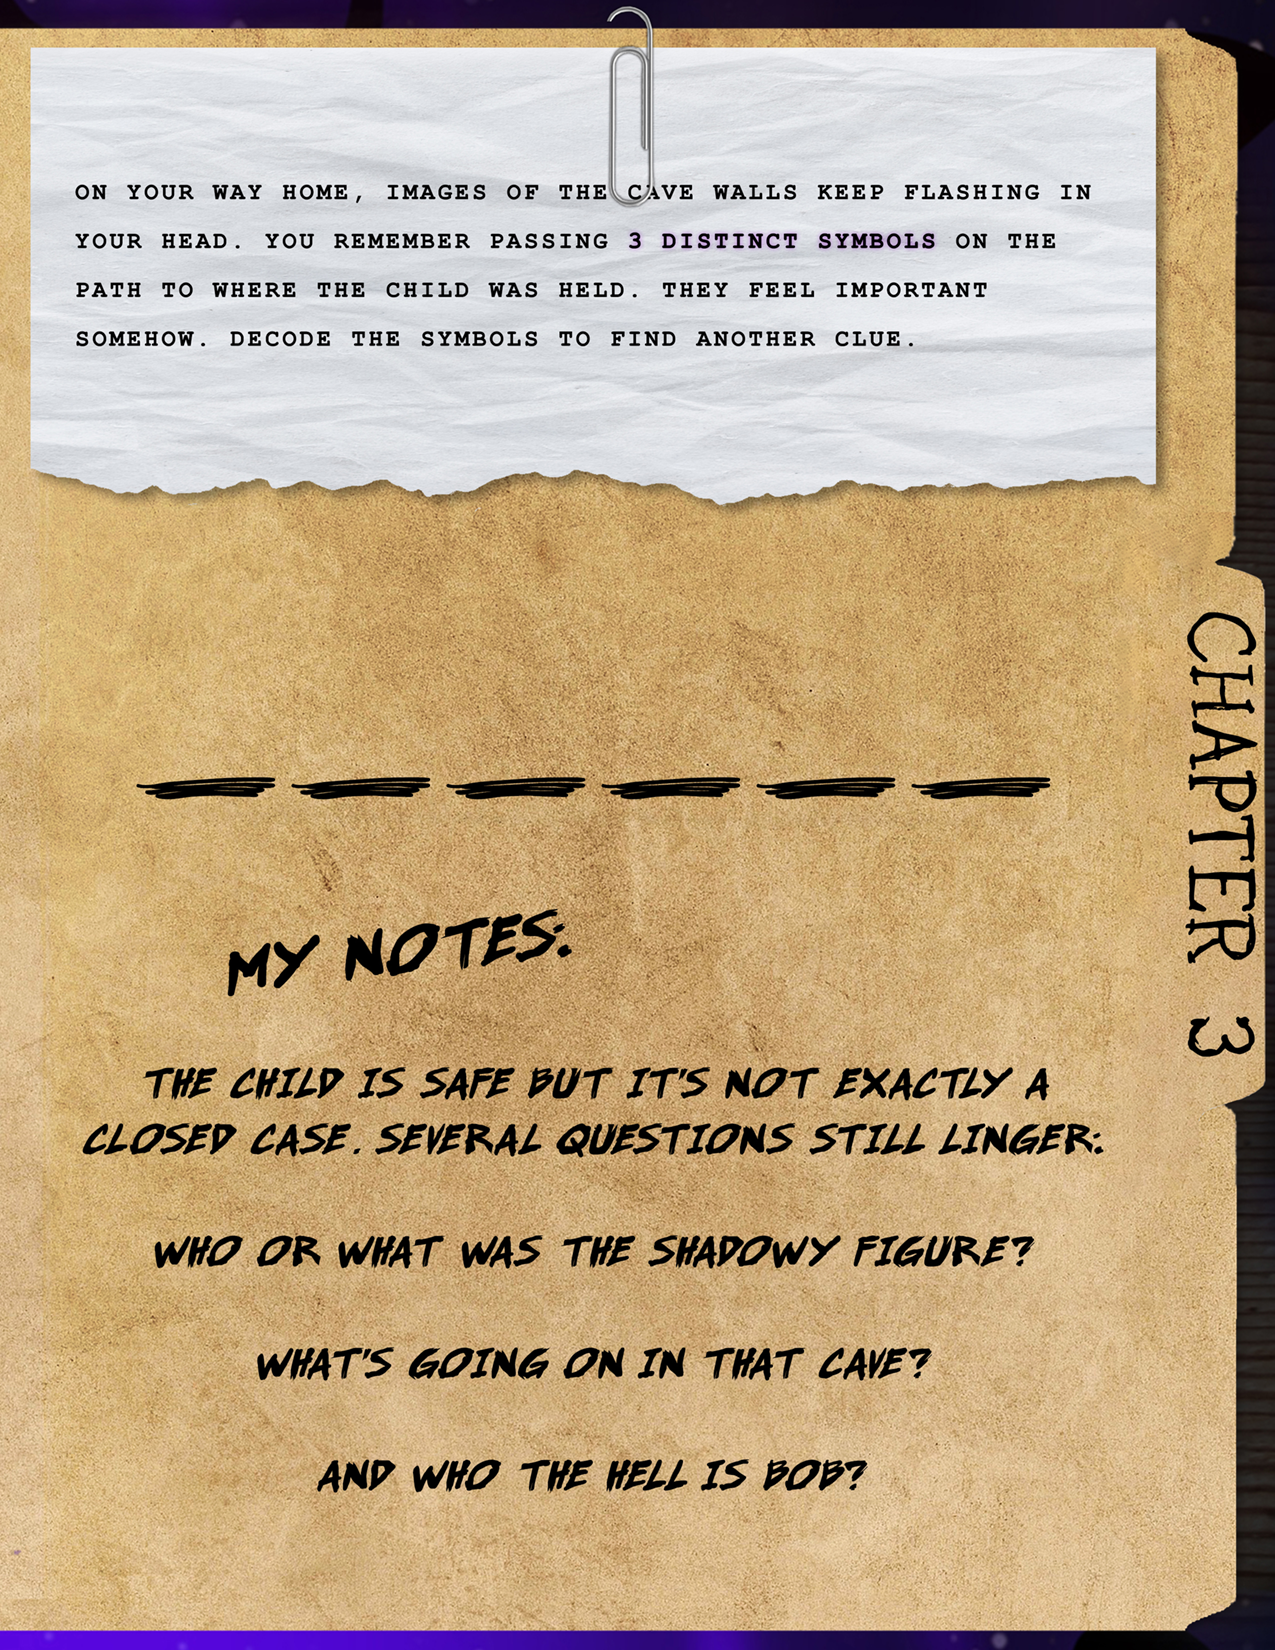
The child is safe but it’s not exactly a closed case. Several questions still linger: Who or what was the shadowy figure? What’s going on in that cave? And who the hell is Bob?
BOX 4 PUZZLES


Puzzle 1 - Hint 1
Puzzle 1 - Hint 2
Puzzle 1 - Solution
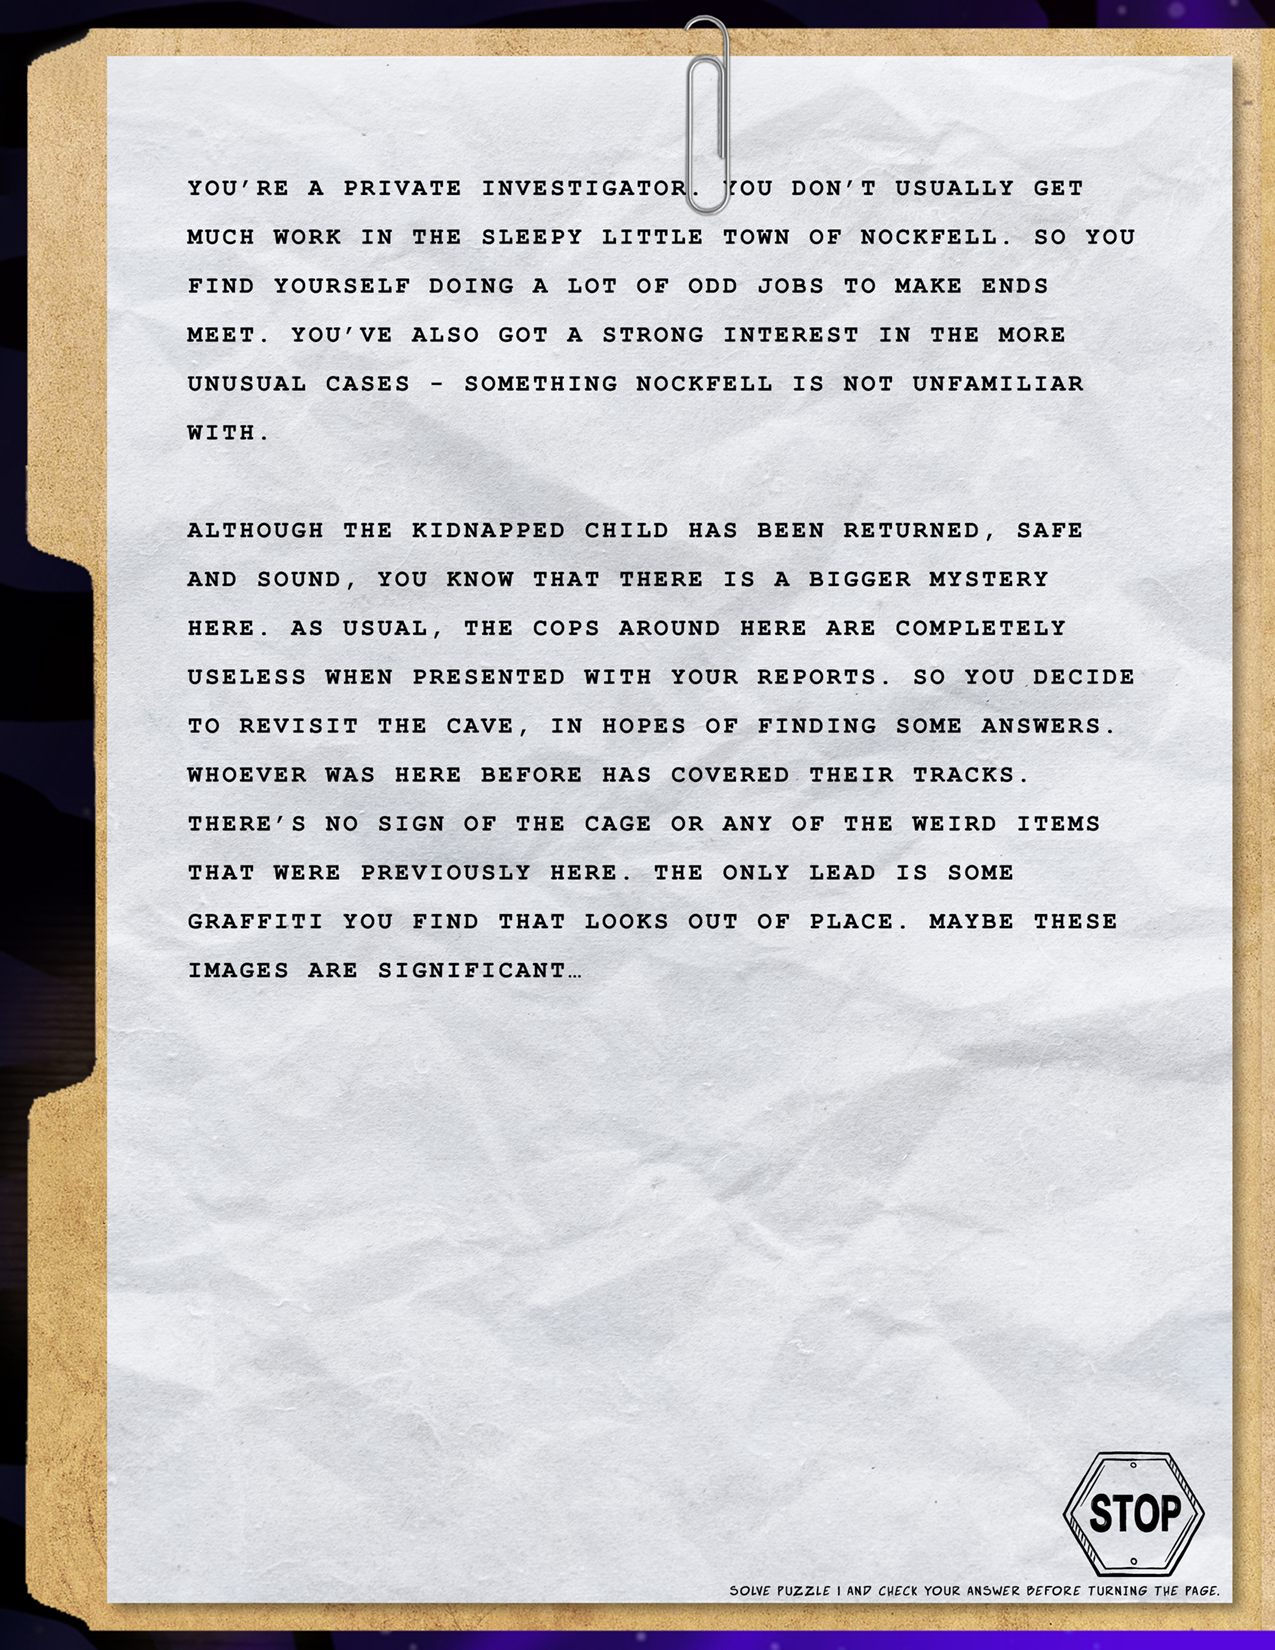
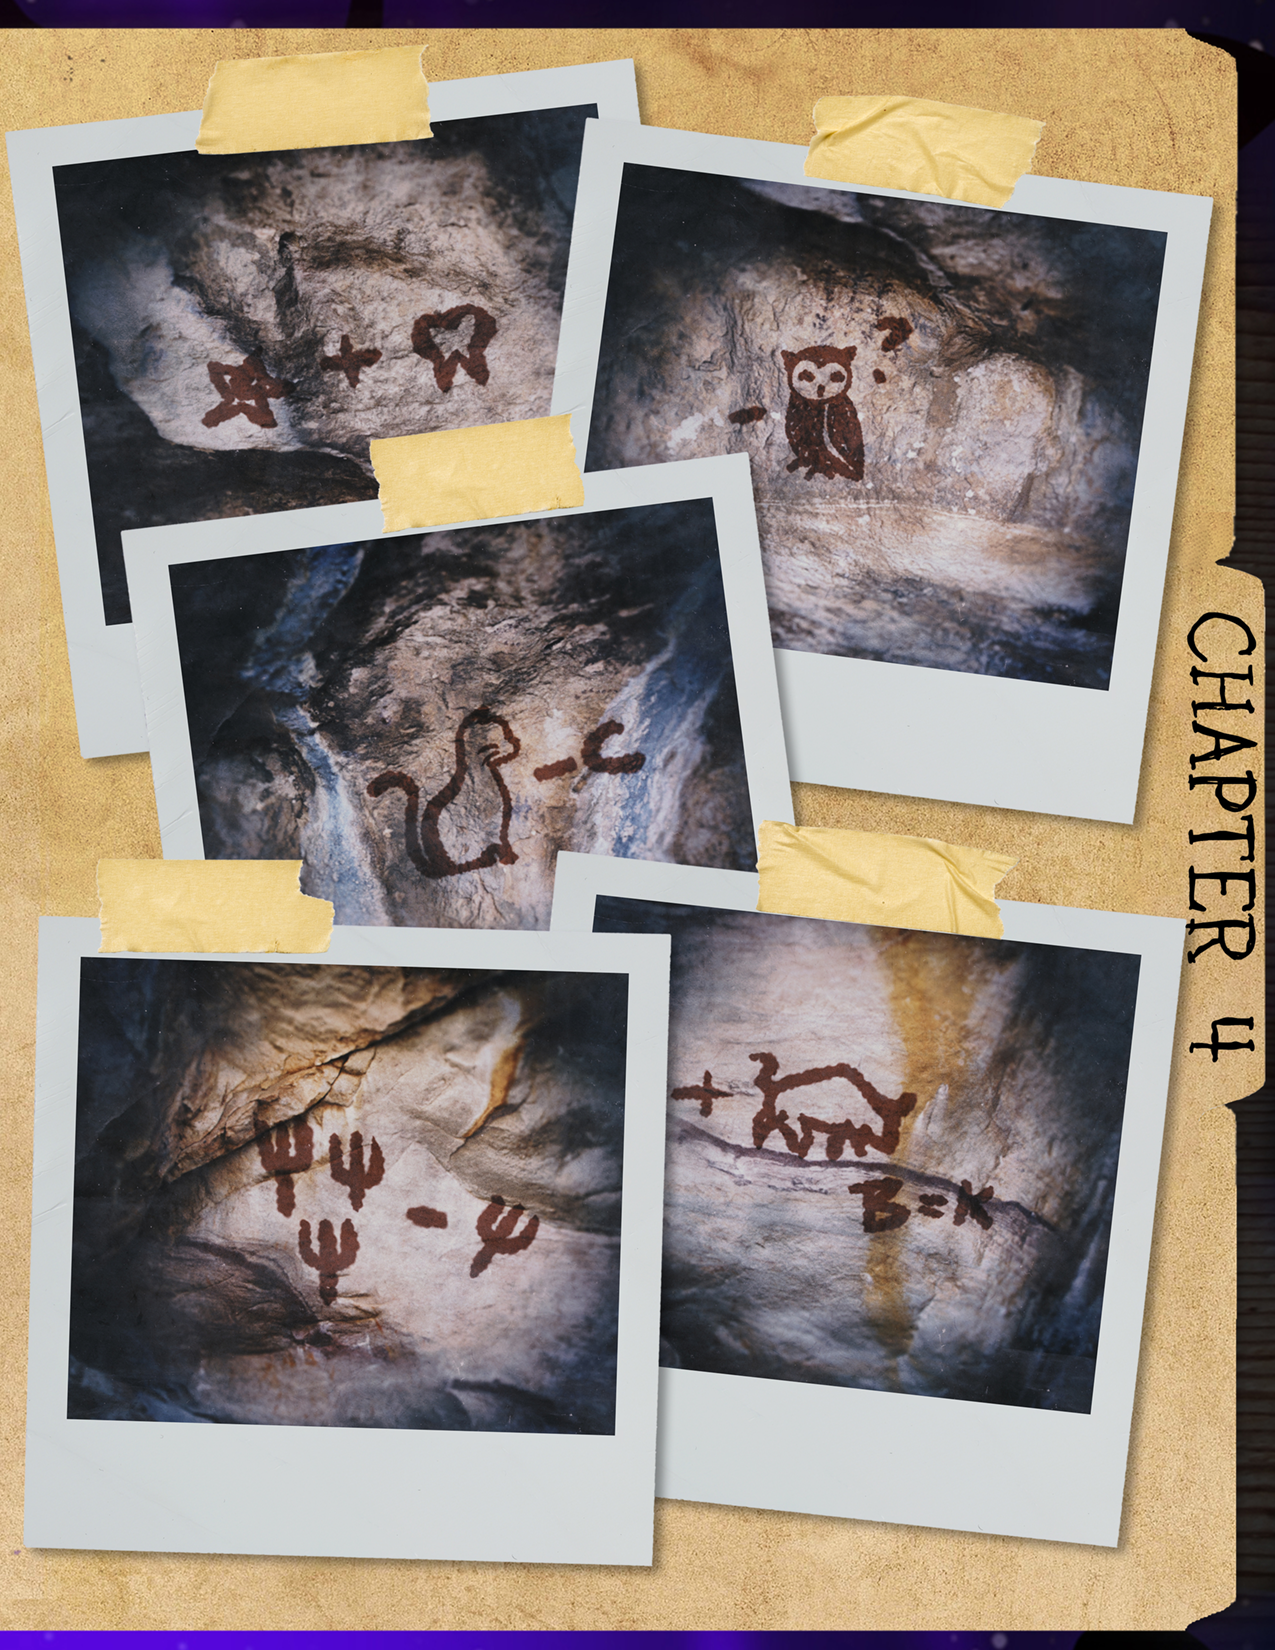
This is called a rebus puzzle. Each image represents one or more letters that are combined to form words.
The first equation is STAR plus TOOTH minus HOOT, which becomes START. The second equation is CAT minus the C, which becomes AT. The third equation is FORKS minus FORK plus BULL where B equals K, which becomes SKULL.
The solution put together is
START AT SKULL.
Puzzle 2 - Hint 1
Puzzle 2 - Hint 2
Puzzle 2 - Hint 3
Puzzle 2 - Hint 4
Puzzle 2 - Hint 5
Puzzle 2 - Final Solution
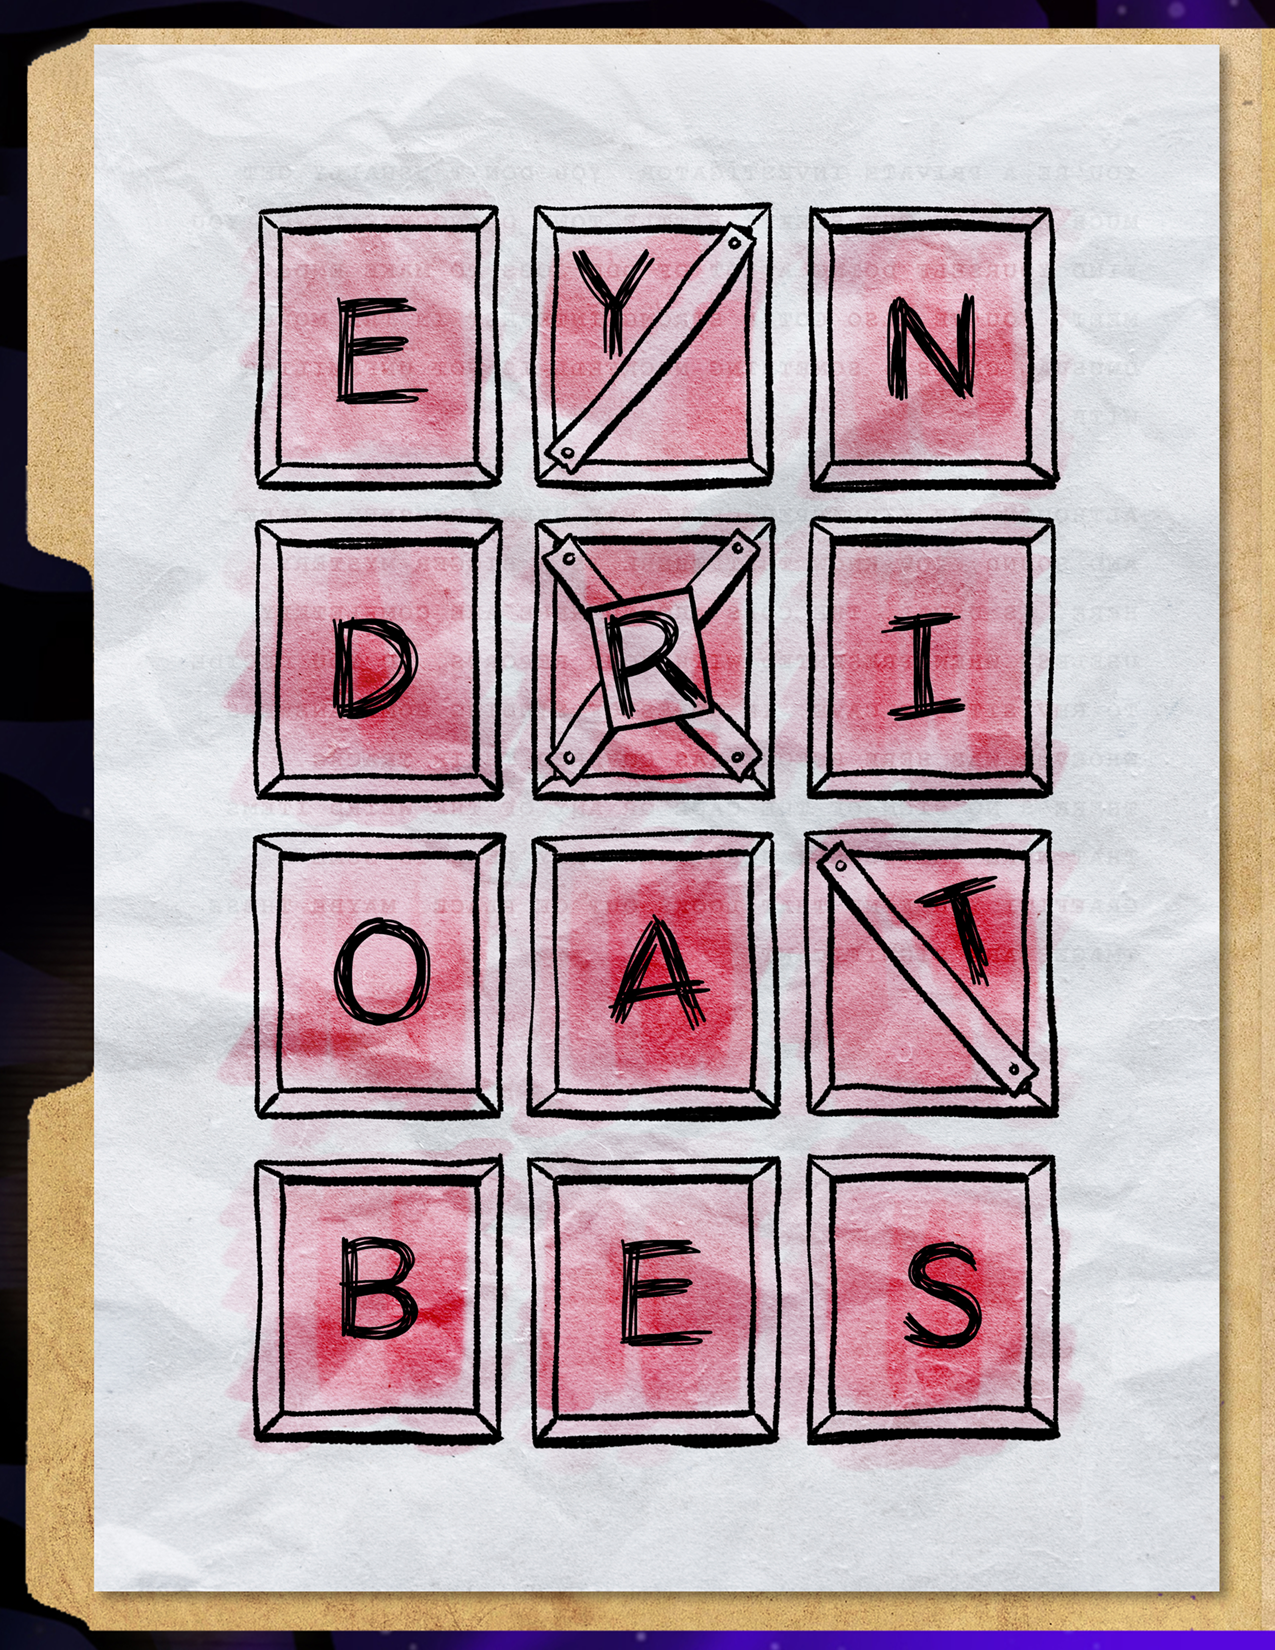
The grid of letters in the booklet is the same dimensions as the windows on the apartment building, as depicted on the art print and t-shirt. There is also a skull on the building as in the solution from the previous puzzle. In the dialogue, the characters mention 5 directions: RIGHT, UP, RIGHT, UP, LEFT. When you start to the bottom left of the letter grid (where the skull is in the art), following the directions takes you to the letters B O A R D.
The final solution is BOARD.
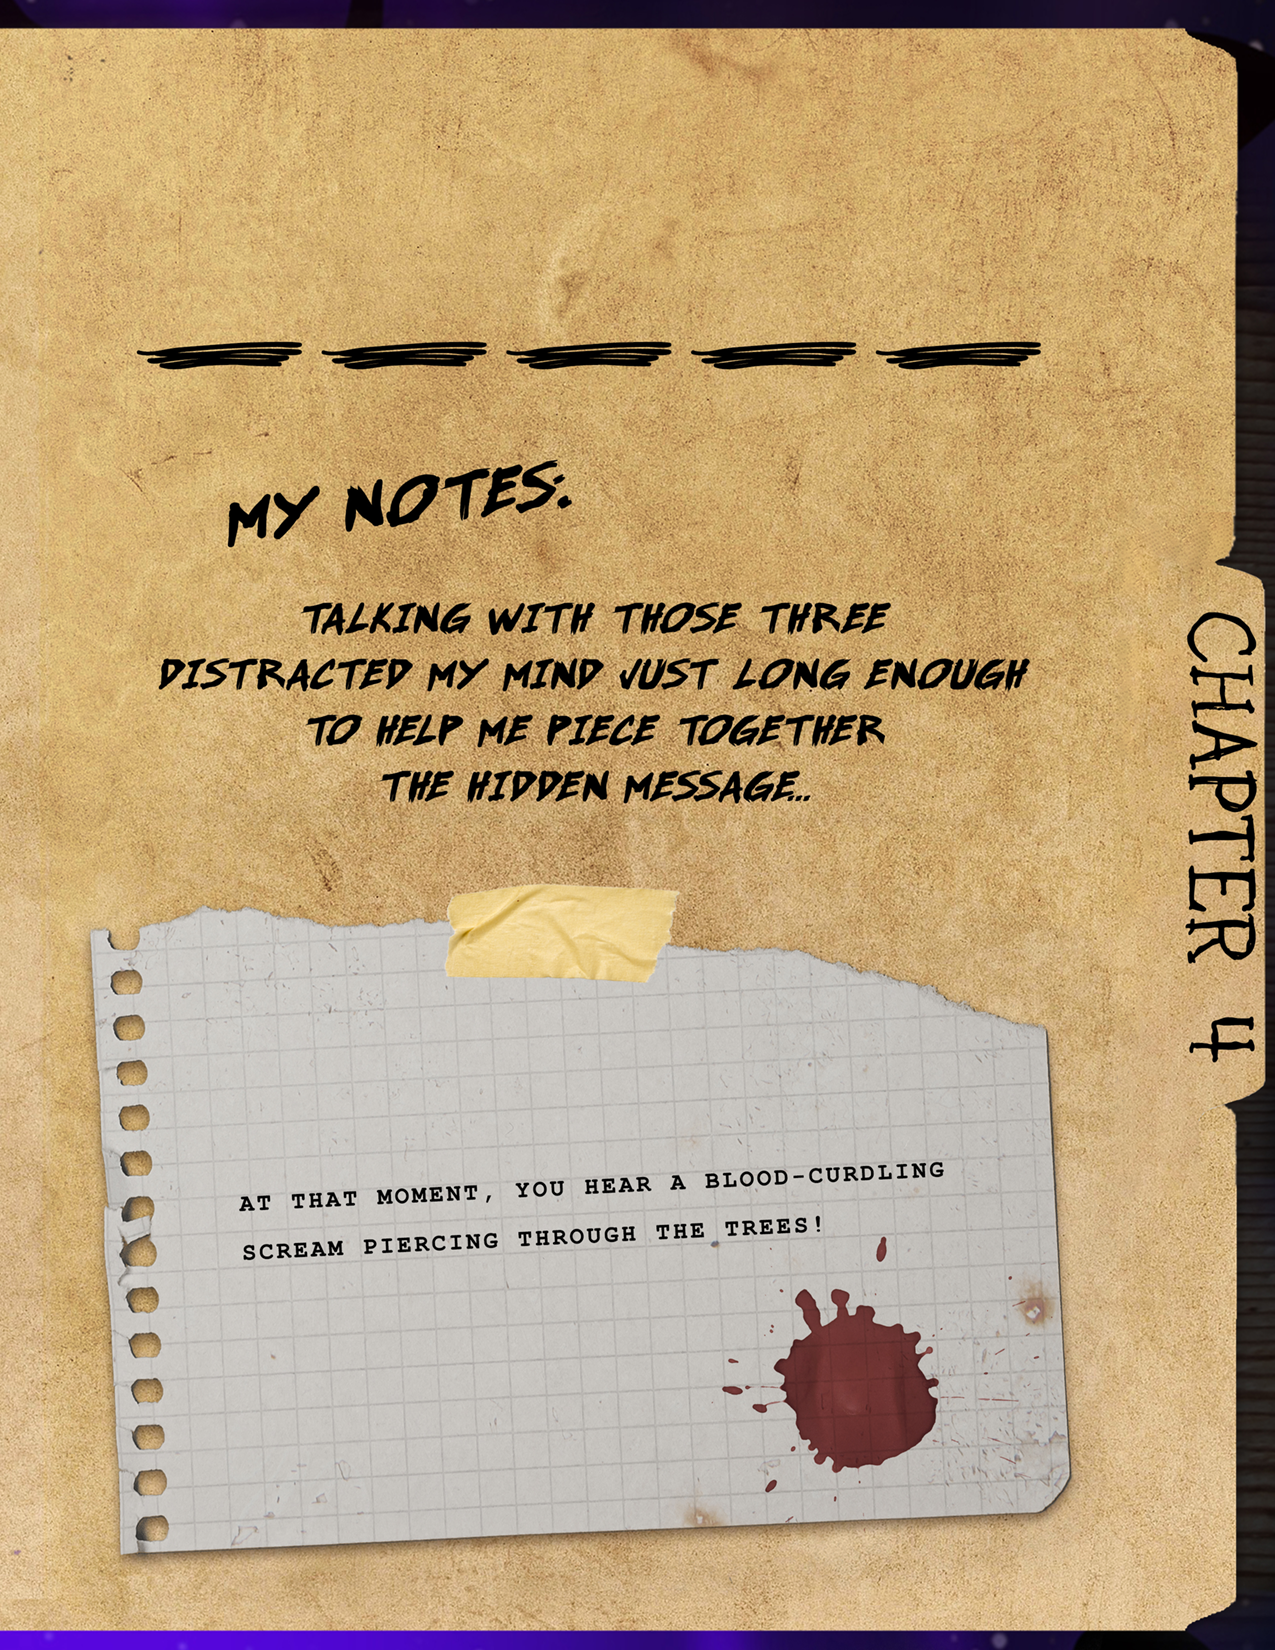
Final Story: Talking with those three distracted your mind just long enough to help you piece together the hidden message. At that moment, you hear a blood-curdling scream piercing through the trees!
BOX 5 PUZZLES


Puzzle 1 - Hint 1
Puzzle 1 - Hint 2
Puzzle 1 - Hint 3
Puzzle 1 - Solution
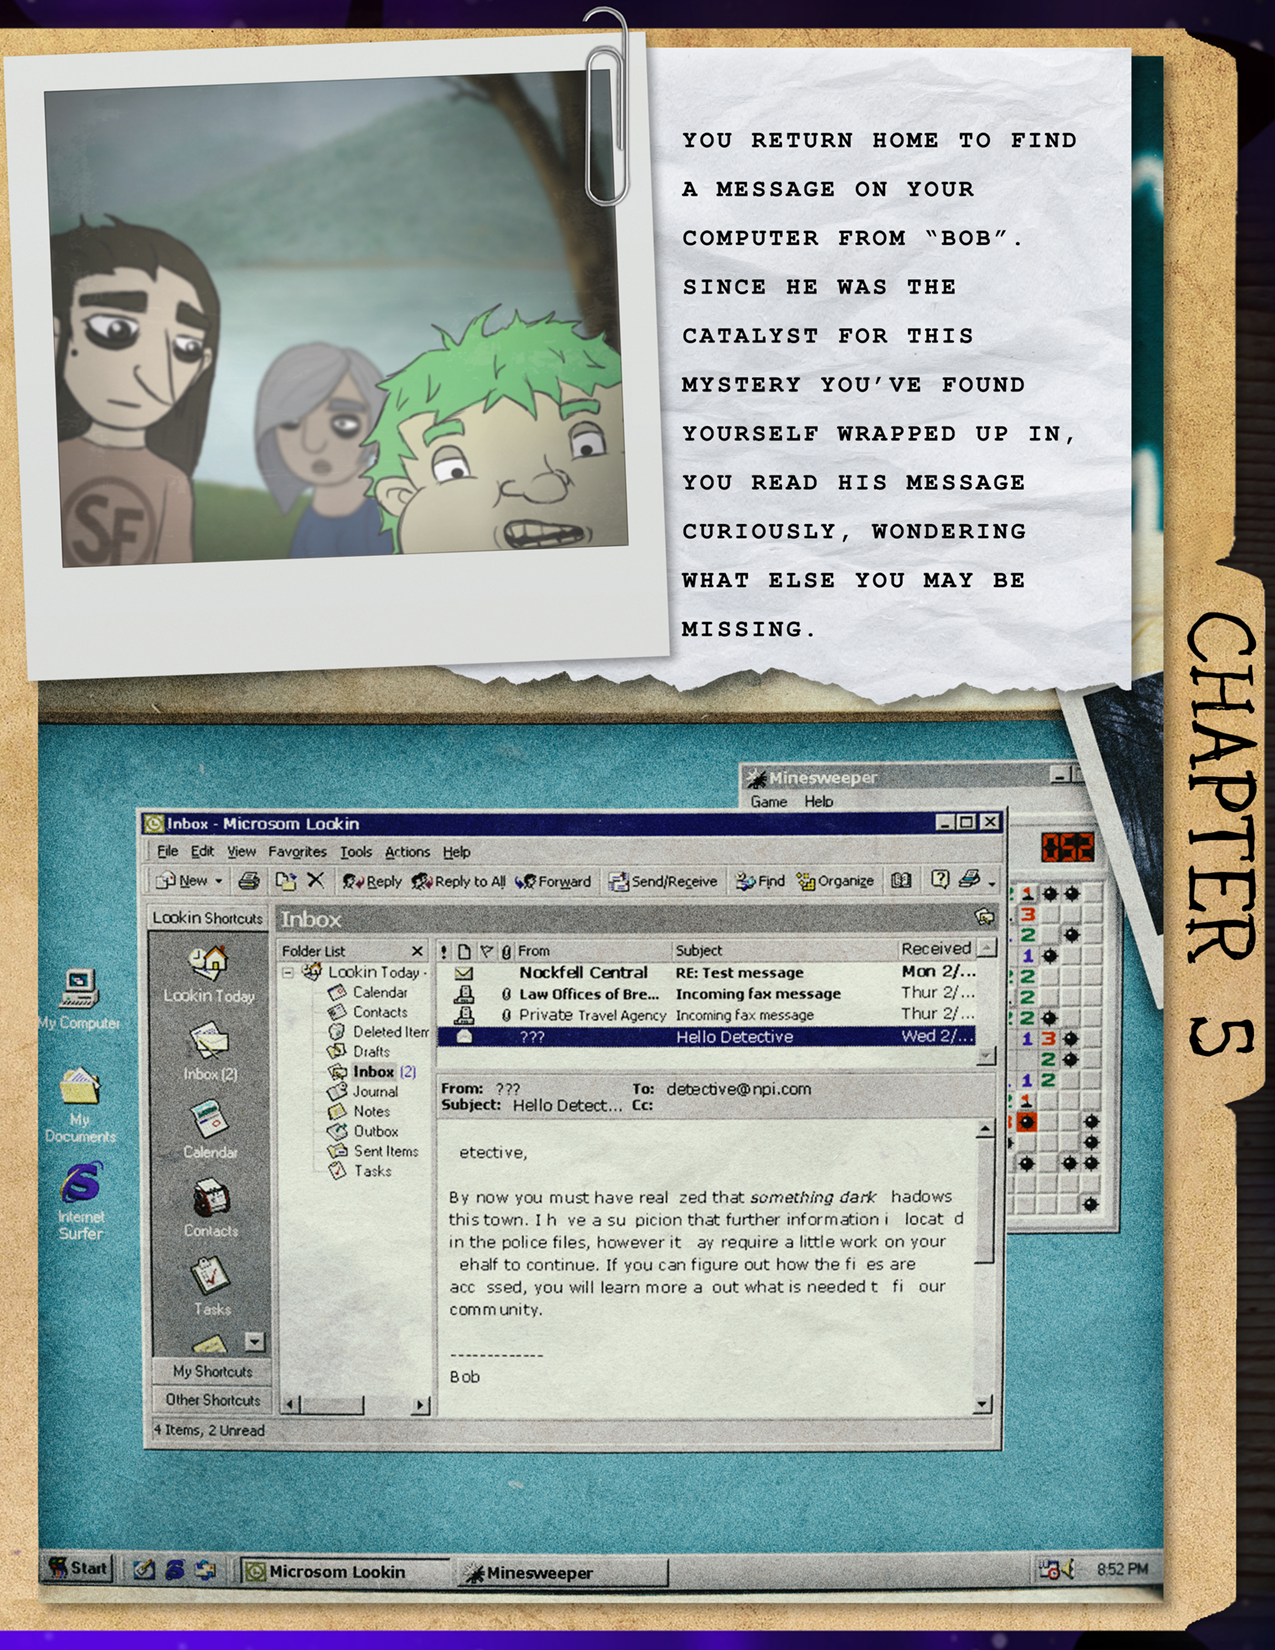
Find all the missing letters in the email. In order they read the solution, which is DISASSEMBLE BOX.
Puzzle 2 - Hint 1
Puzzle 2 - Hint 2
Puzzle 2 - Hint 3
Puzzle 2 - Hint 4
Puzzle 2 - Hint 5
Puzzle 2 - Final Solution
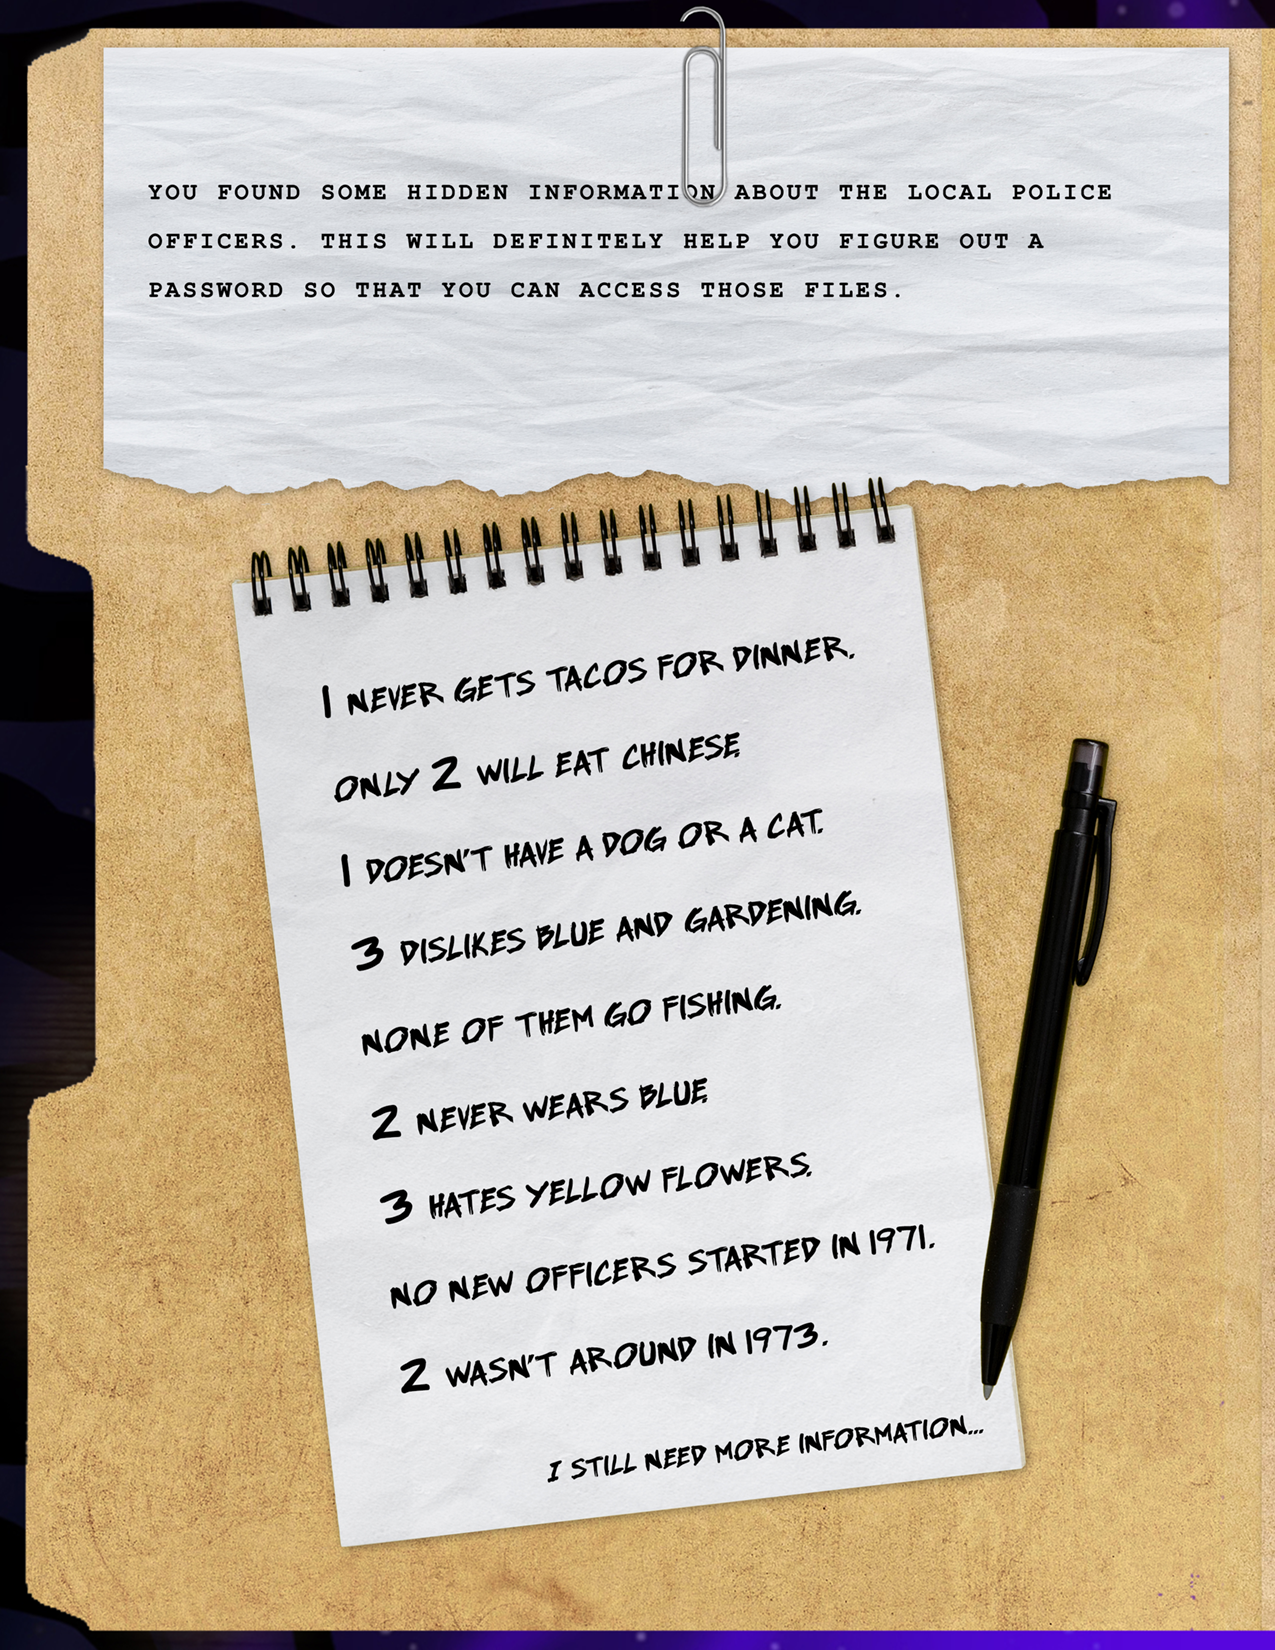
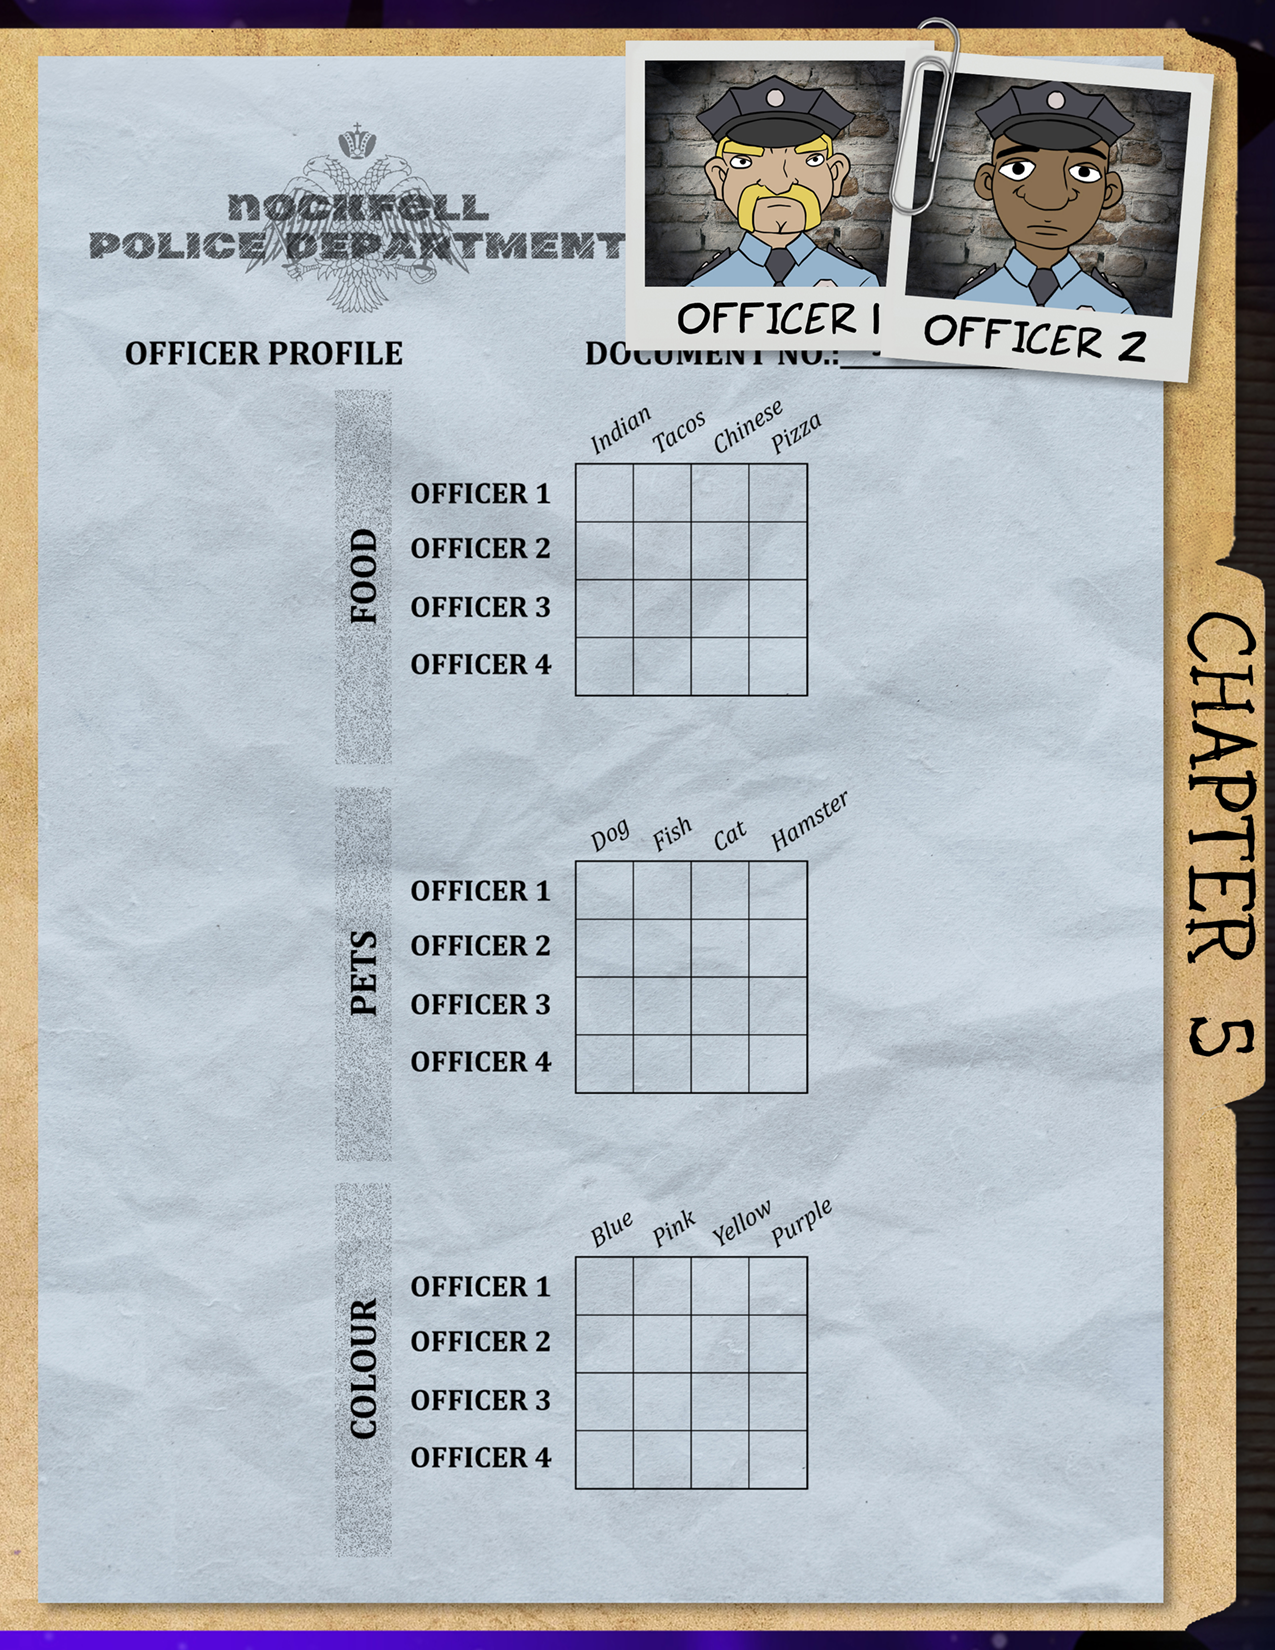
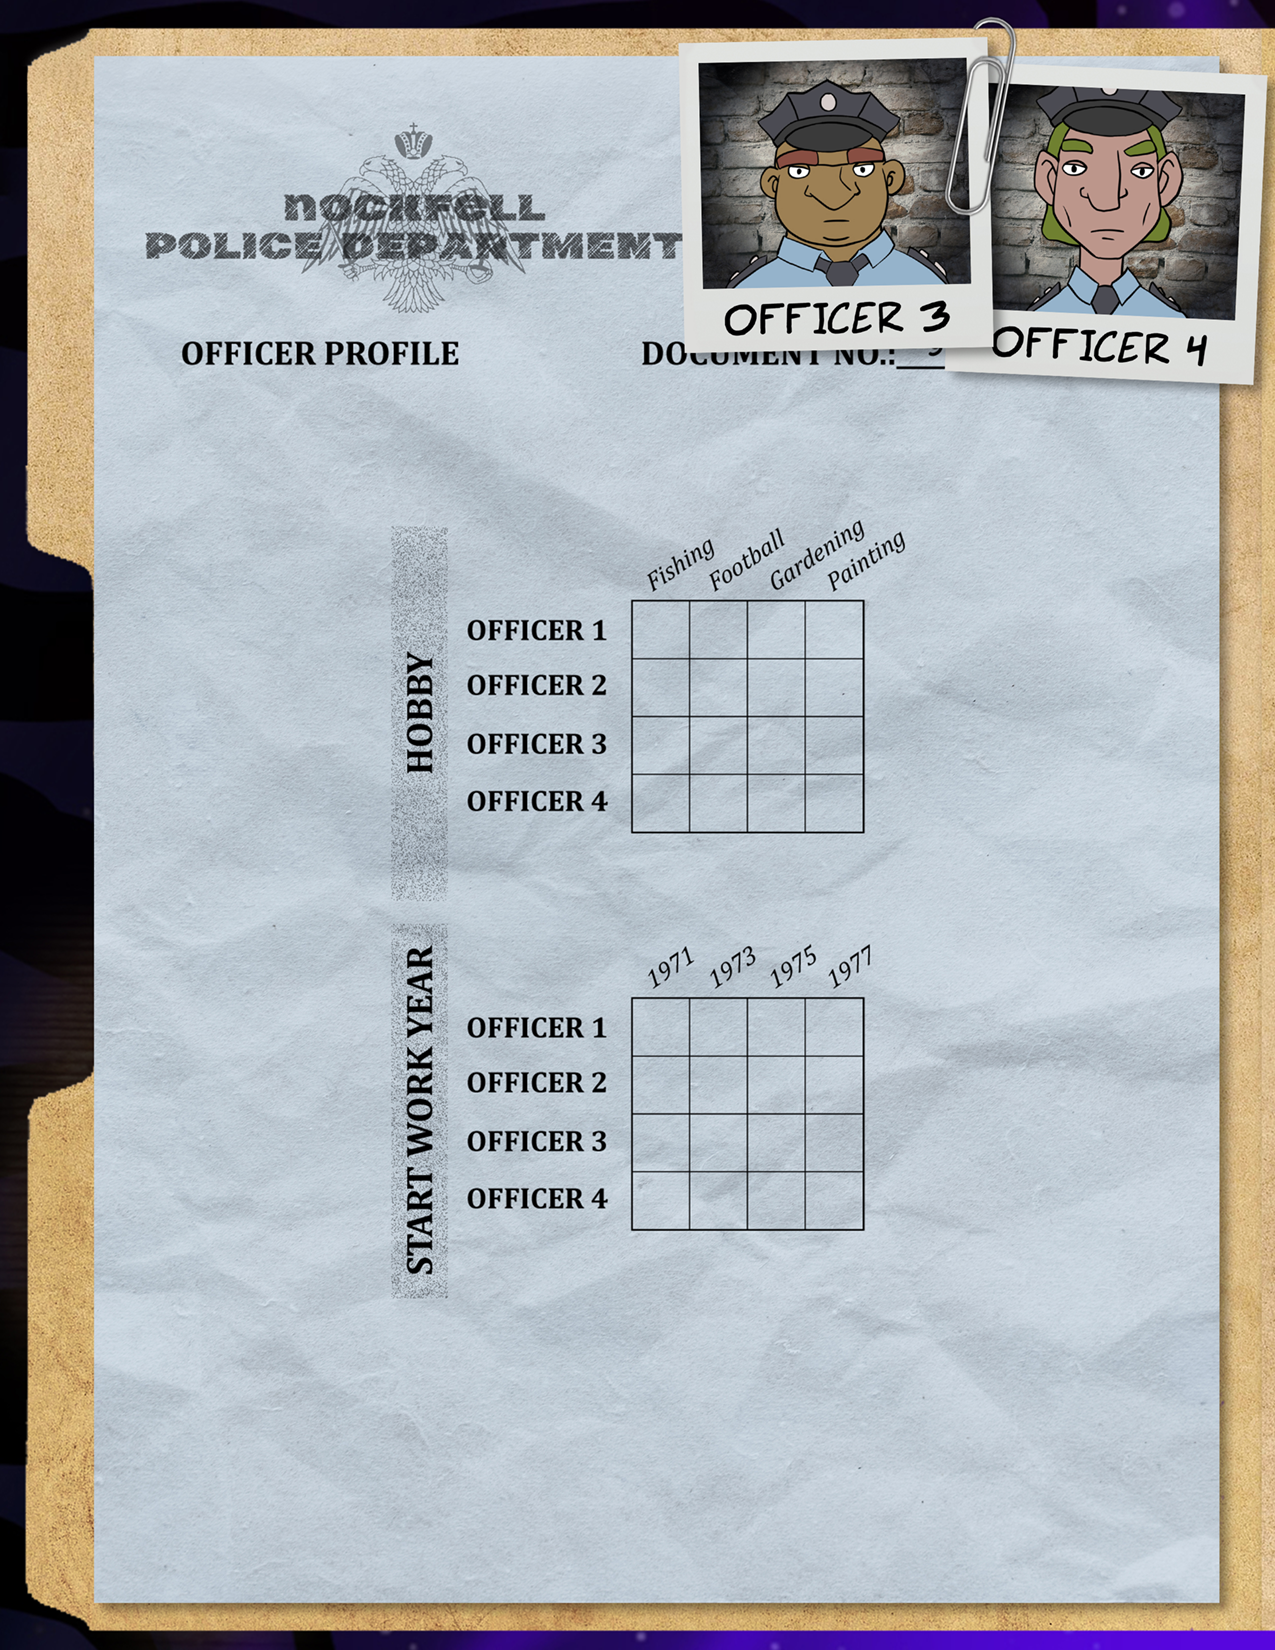
Disassemble the entire box to find the other half of the clues. Go through these clues and the clues in the booklet, crossing off on the grids when an officer DOESN’T do something. I.e. If an officer doesn’t eat tacos, they get an X under tacos. After all clues are filled out, each grid should have X’s in the shape of a letter.
The final solution is STONE.
Final Story: You hack into the locked files to see several reports of missing children and creature sightings that seem to have been covered up. What is happening here? What is the source of all of this?
BOX 6 PUZZLES


Puzzle 1 - Hint 1
Puzzle 1 - Hint 2
Puzzle 1 - Hint 3
Puzzle 1 - Hint 4
Puzzle 1 - Hint 5
Puzzle 1 - Hint 6
Puzzle 1 - Hint 7
Puzzle 1 - Solution
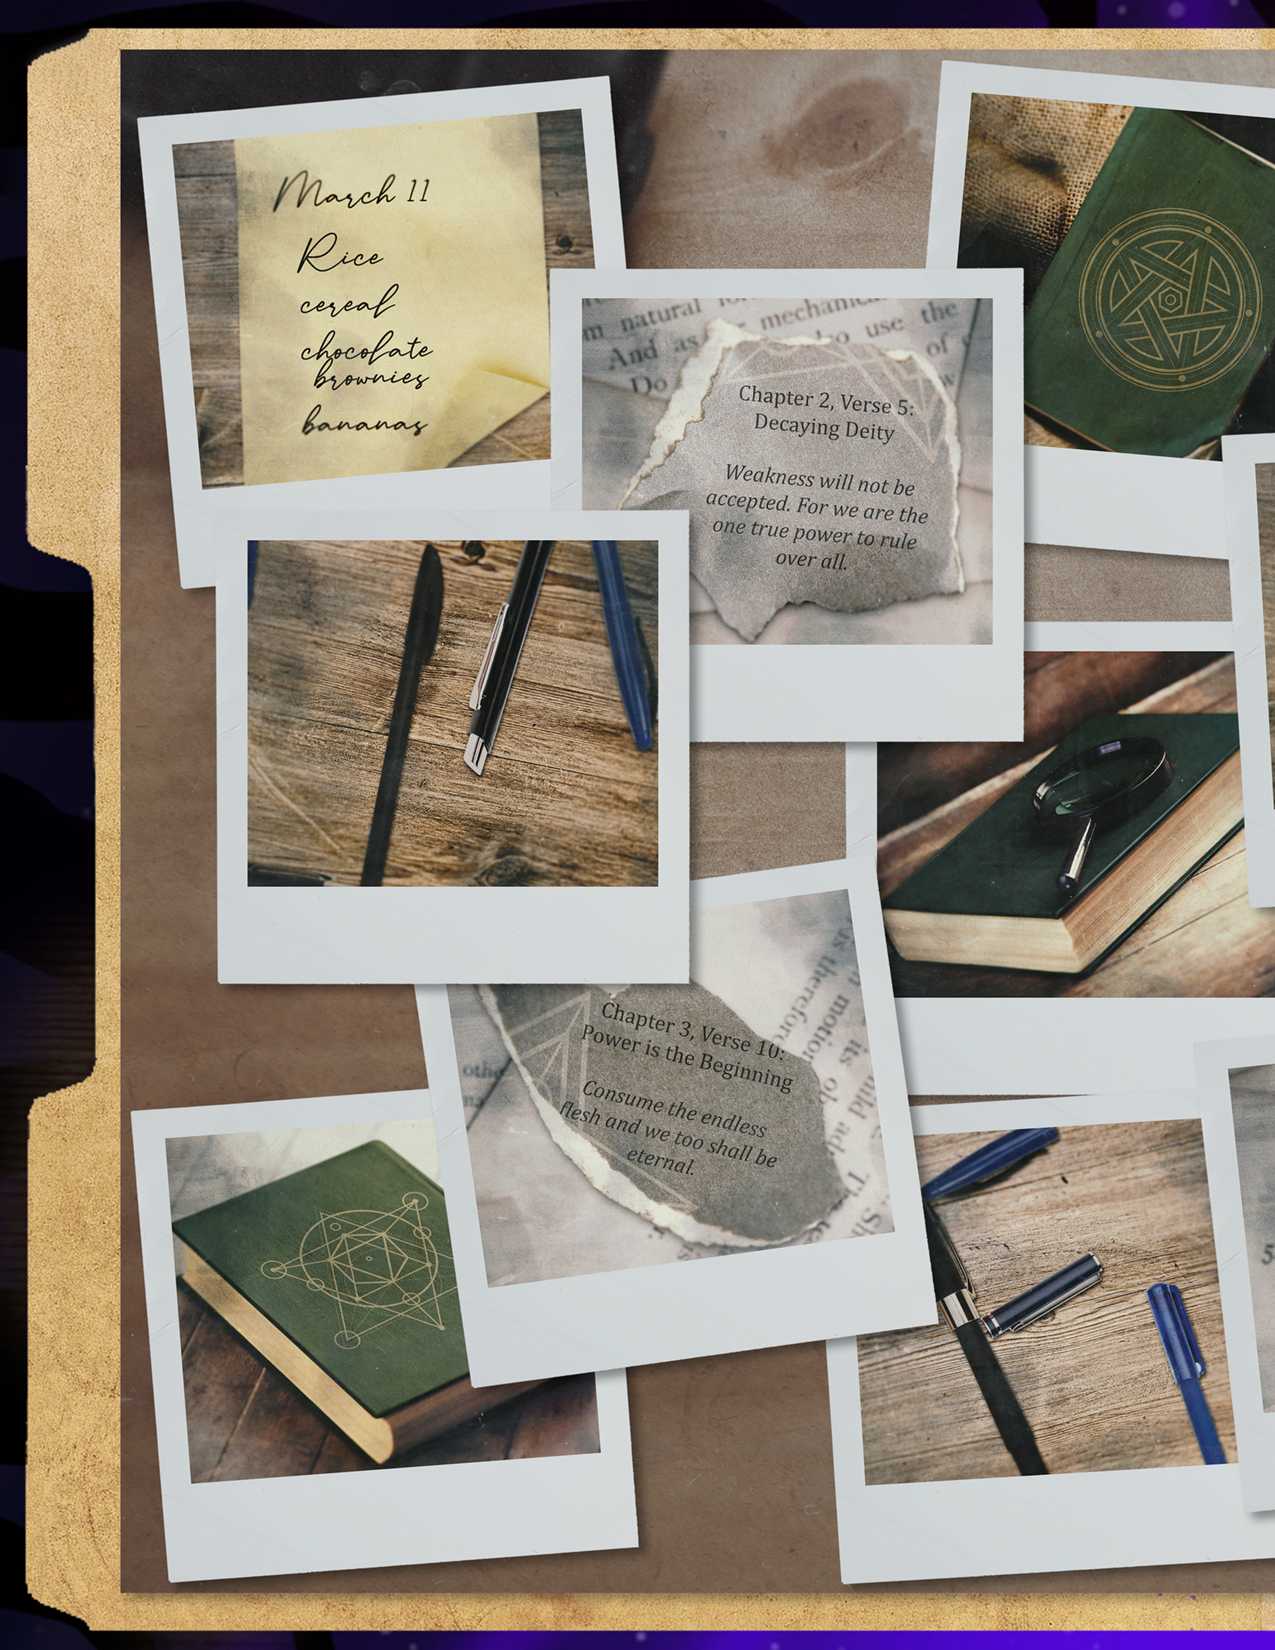
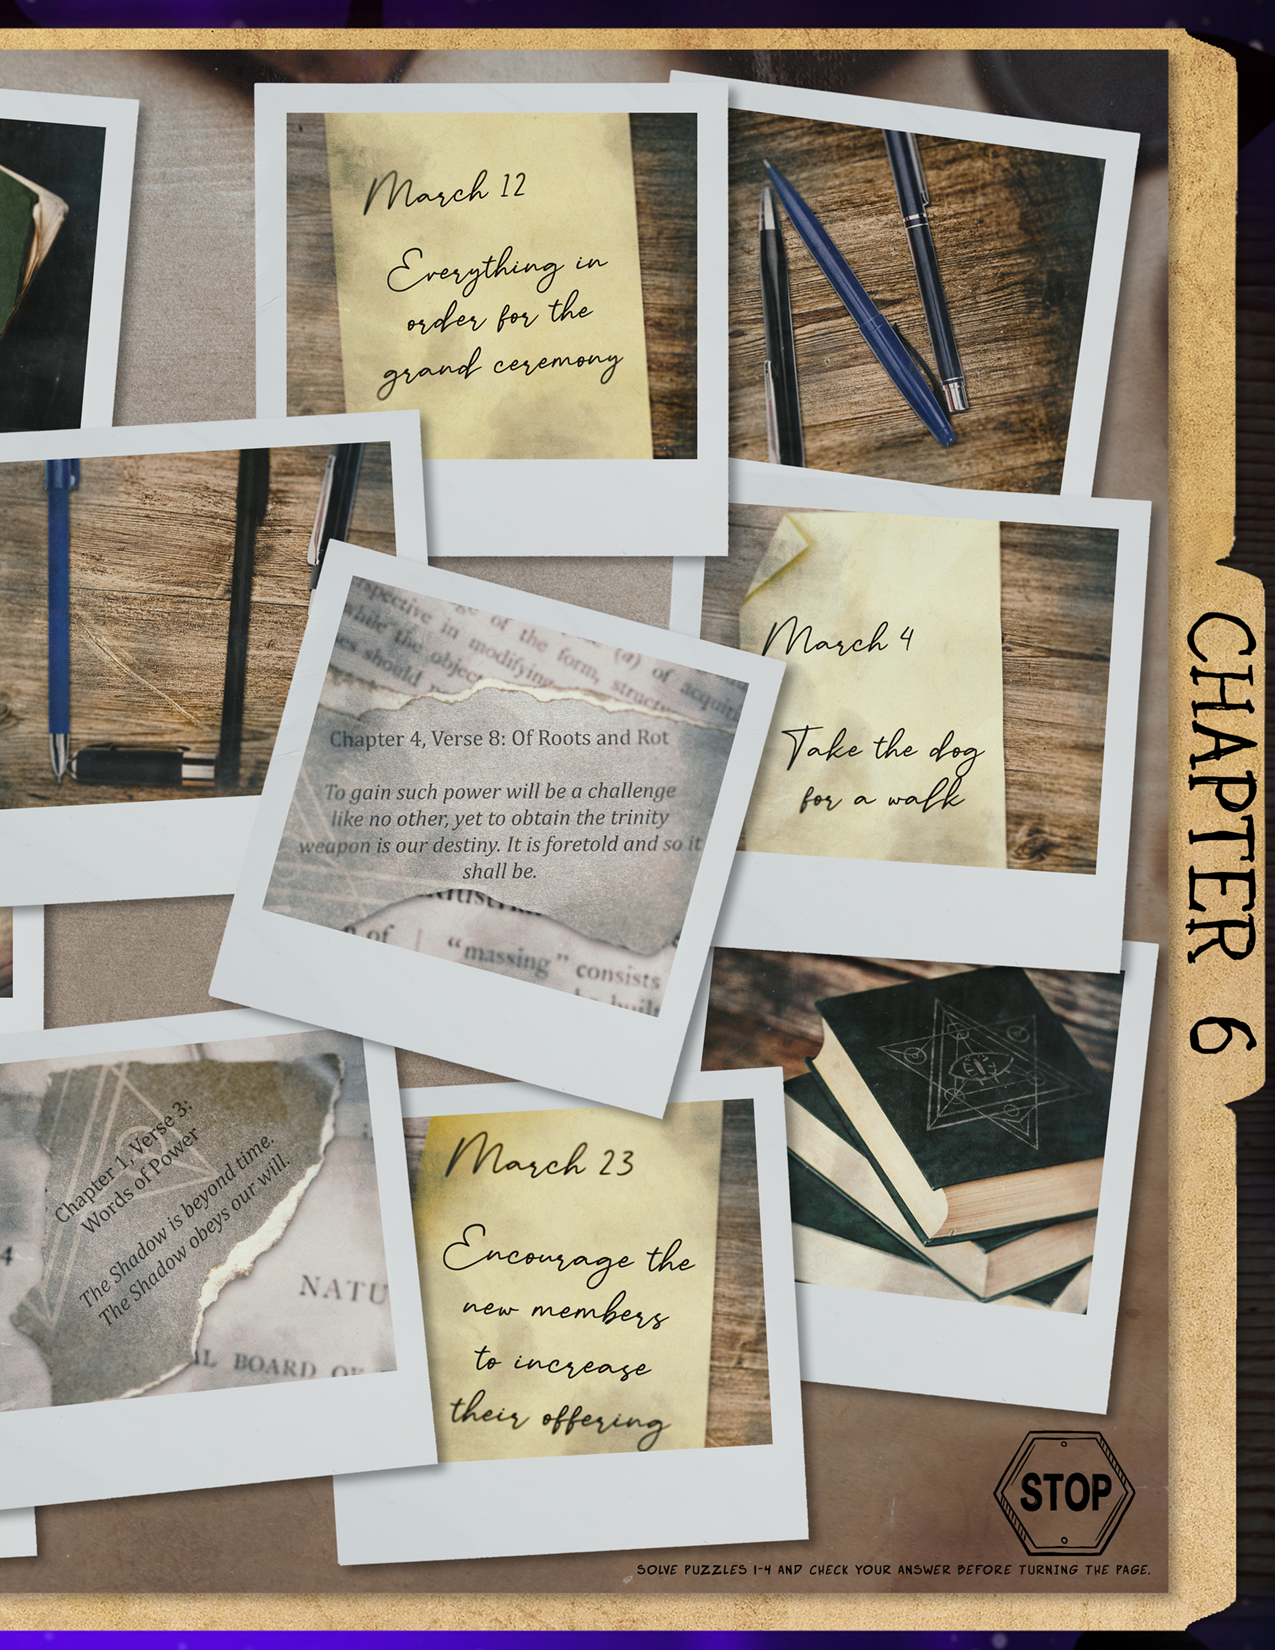
Group the photographs into 4 groups of 4 images. Each group has a one-word solution.
Group 1: Books - All of the books are GREEN.
Group 2: Scripture Passages - Each passage contains the word POWER.
Group 3: Writing Implements - The arrangement of the implements forms the shape of letters, creating the word FUN.
Group 4: To Do Lists - Order the lists by date. The first letter of the lists is the only uppercase letter and spells TREE.
Puzzle 2 - Hint 1
Puzzle 2 - Hint 2
Puzzle 2 - Final Solution
GREEN, POWER, FUN and TREE can all be followed by the final solution, HOUSE.
BOX 7 PUZZLES


Puzzle 1 - Hint 1
Puzzle 1 - Hint 2
Puzzle 1 - Hint 3
Puzzle 1 - Solution
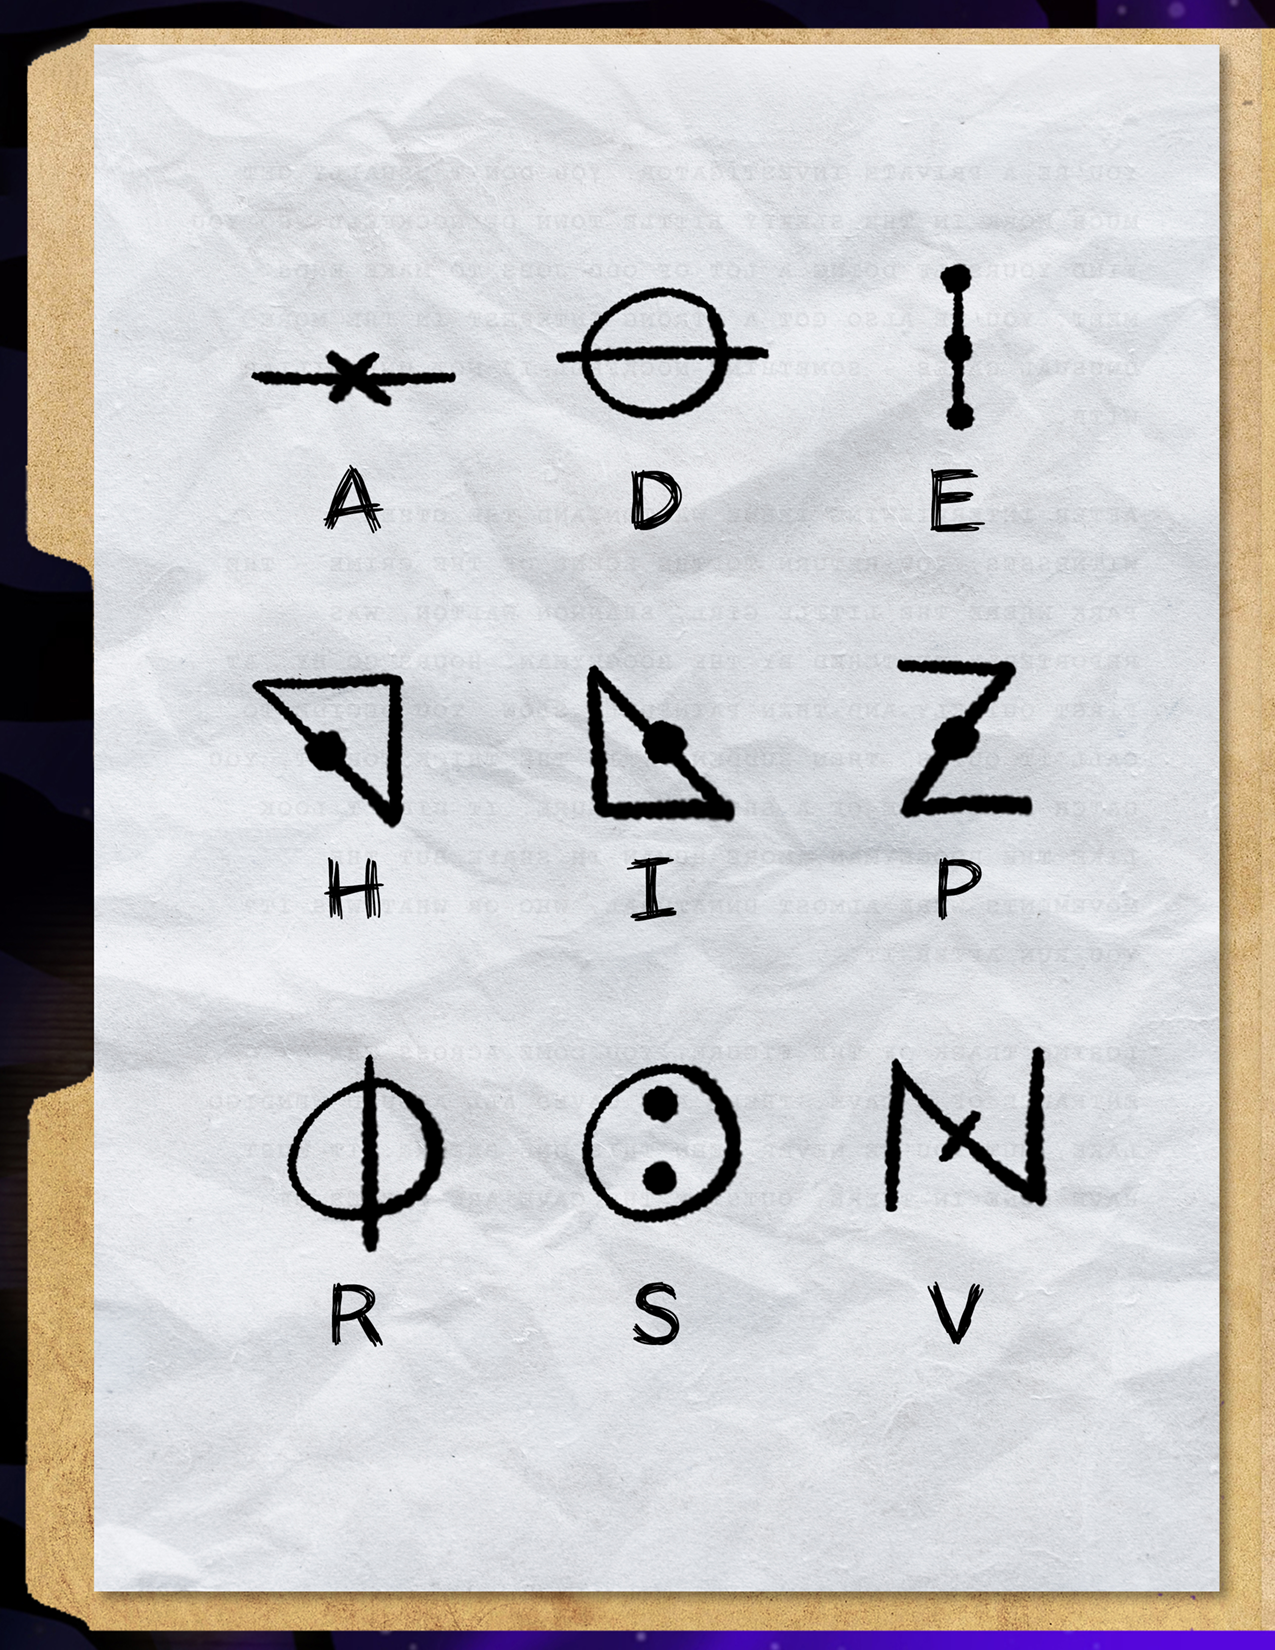
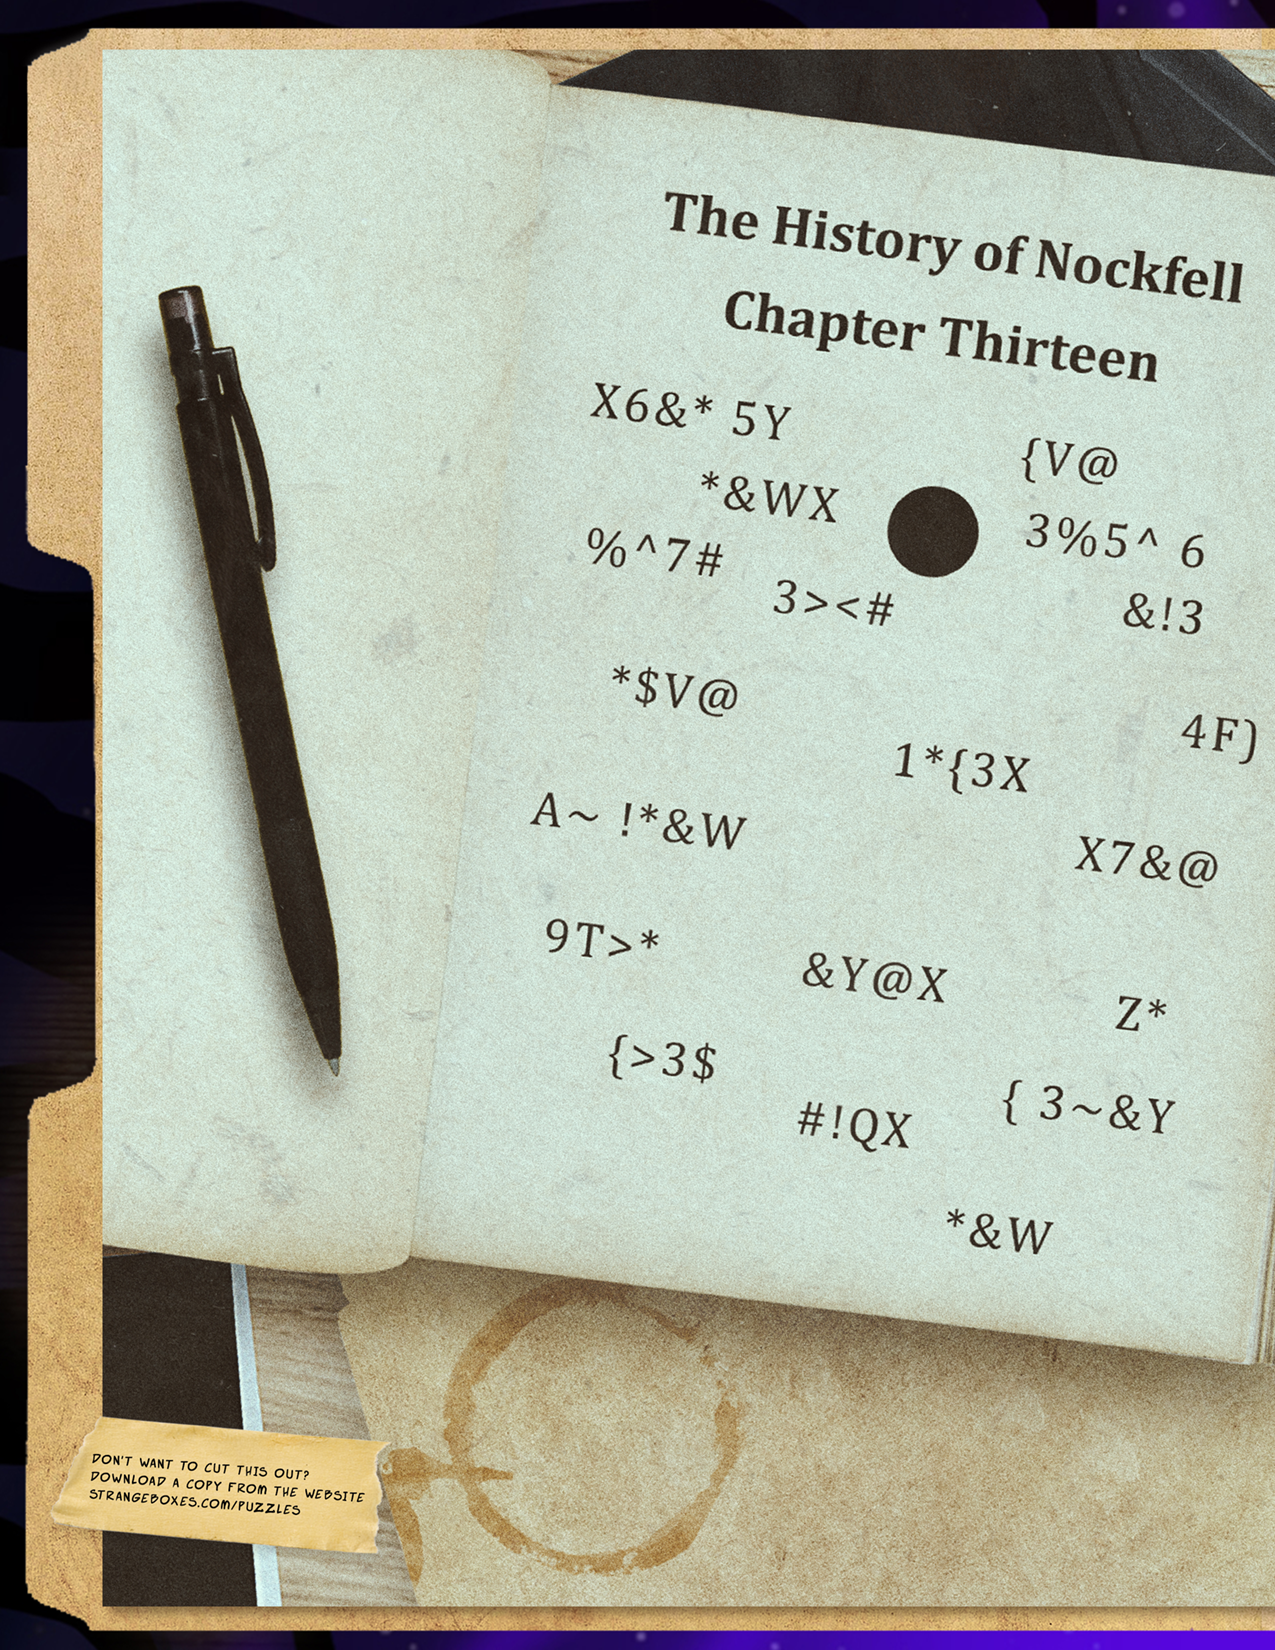
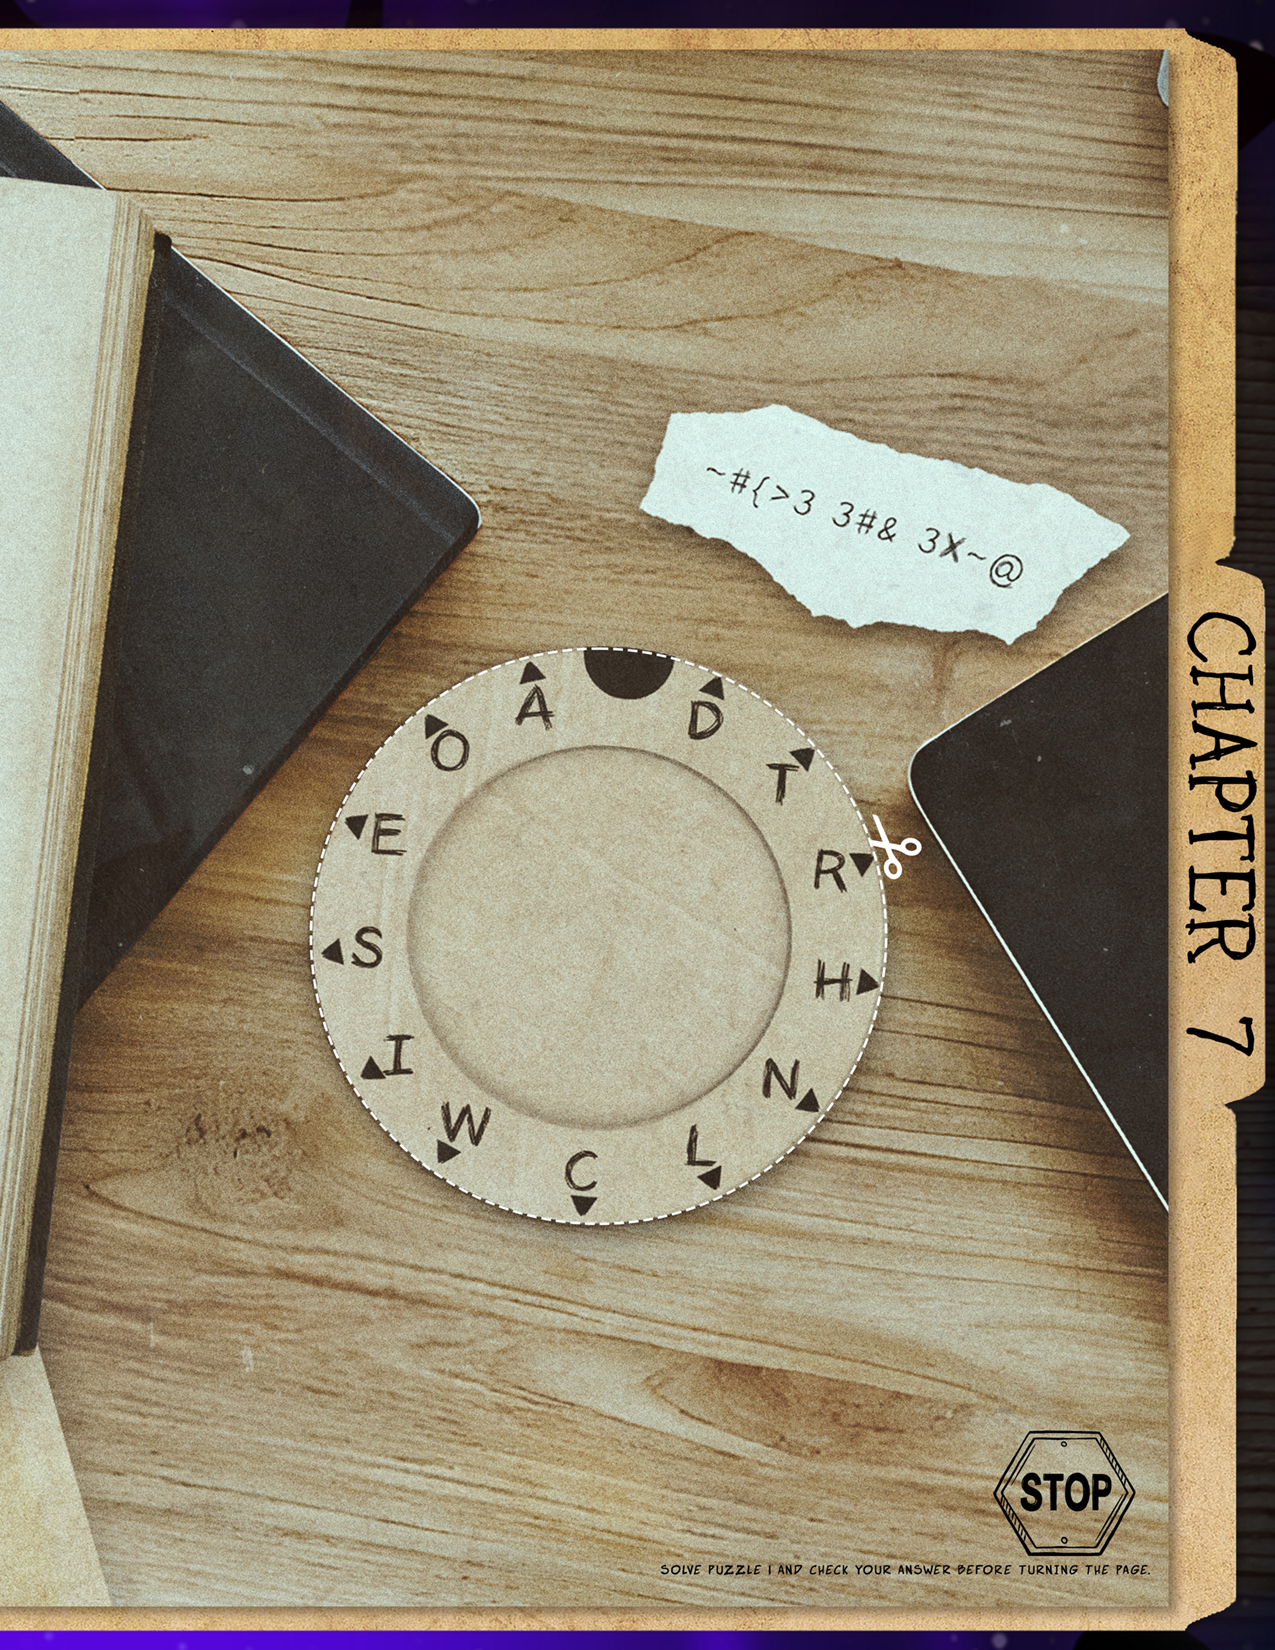
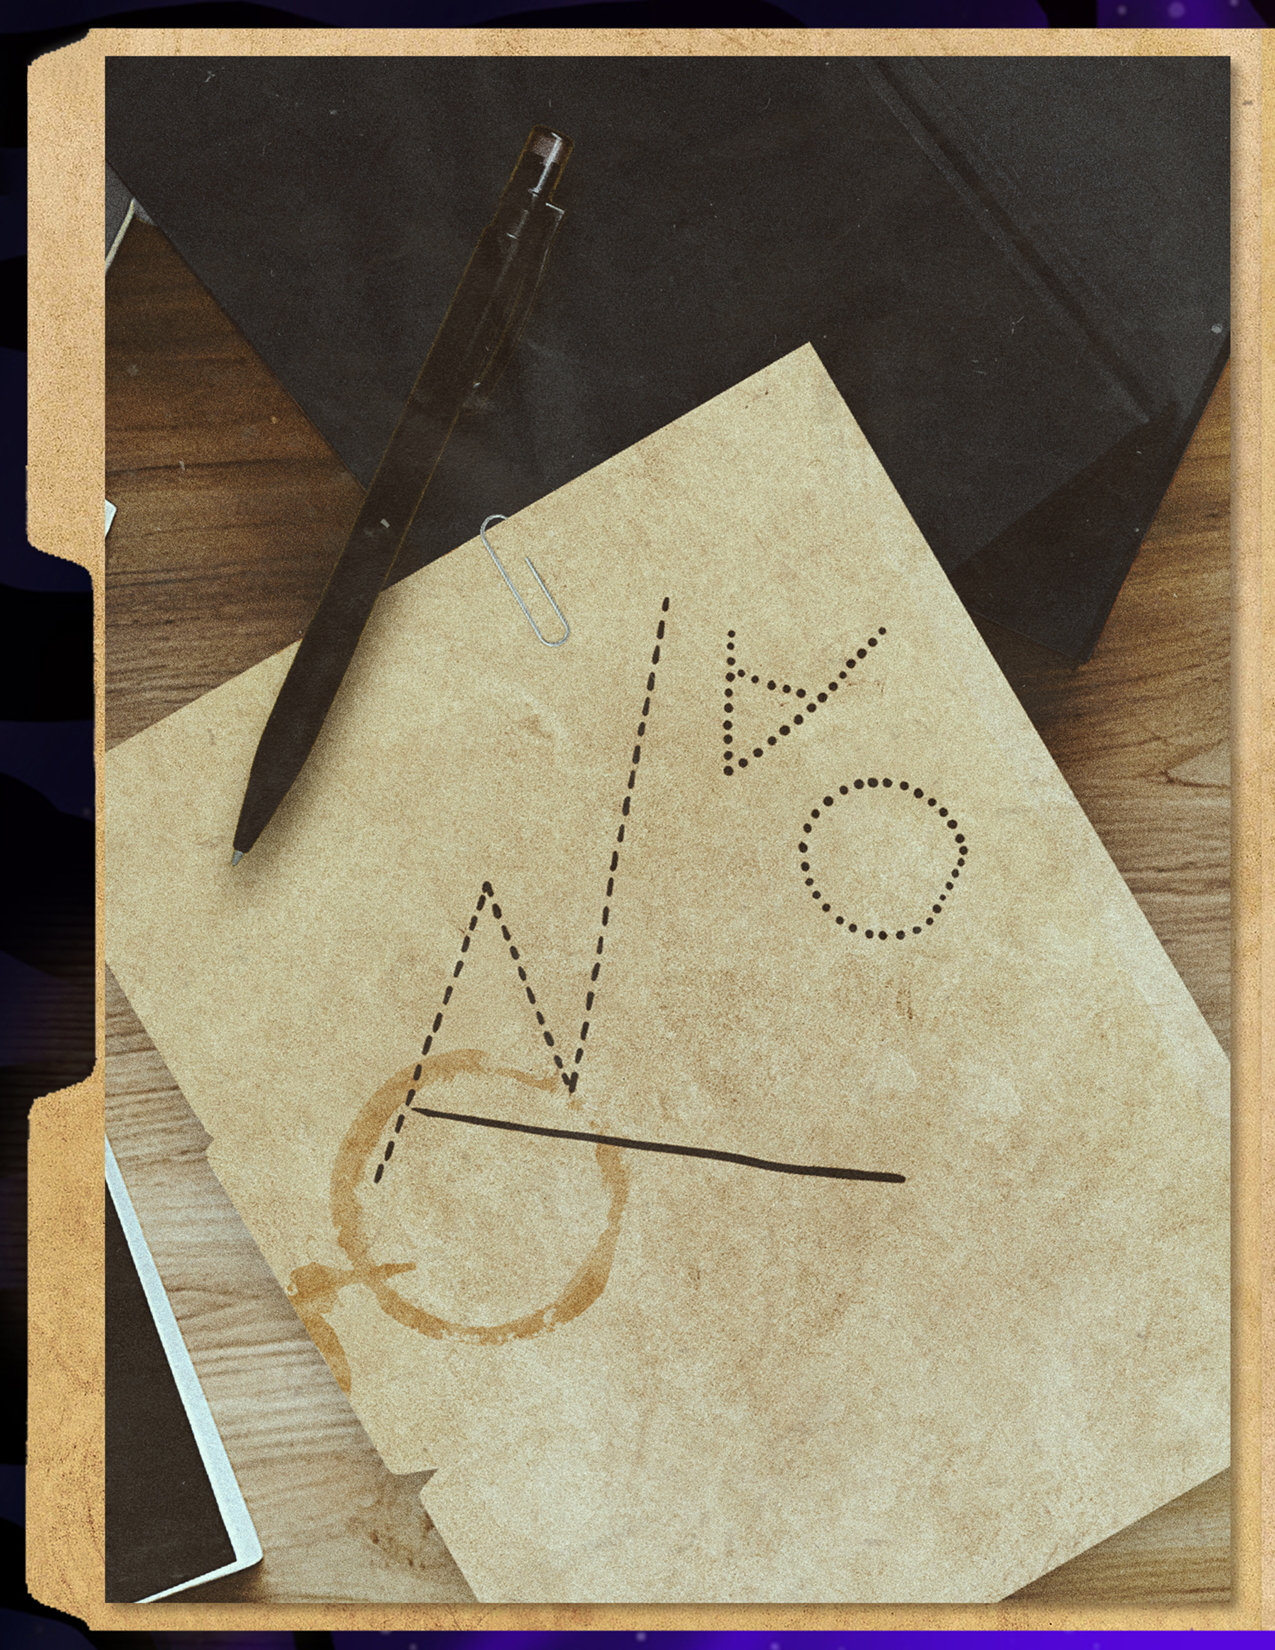
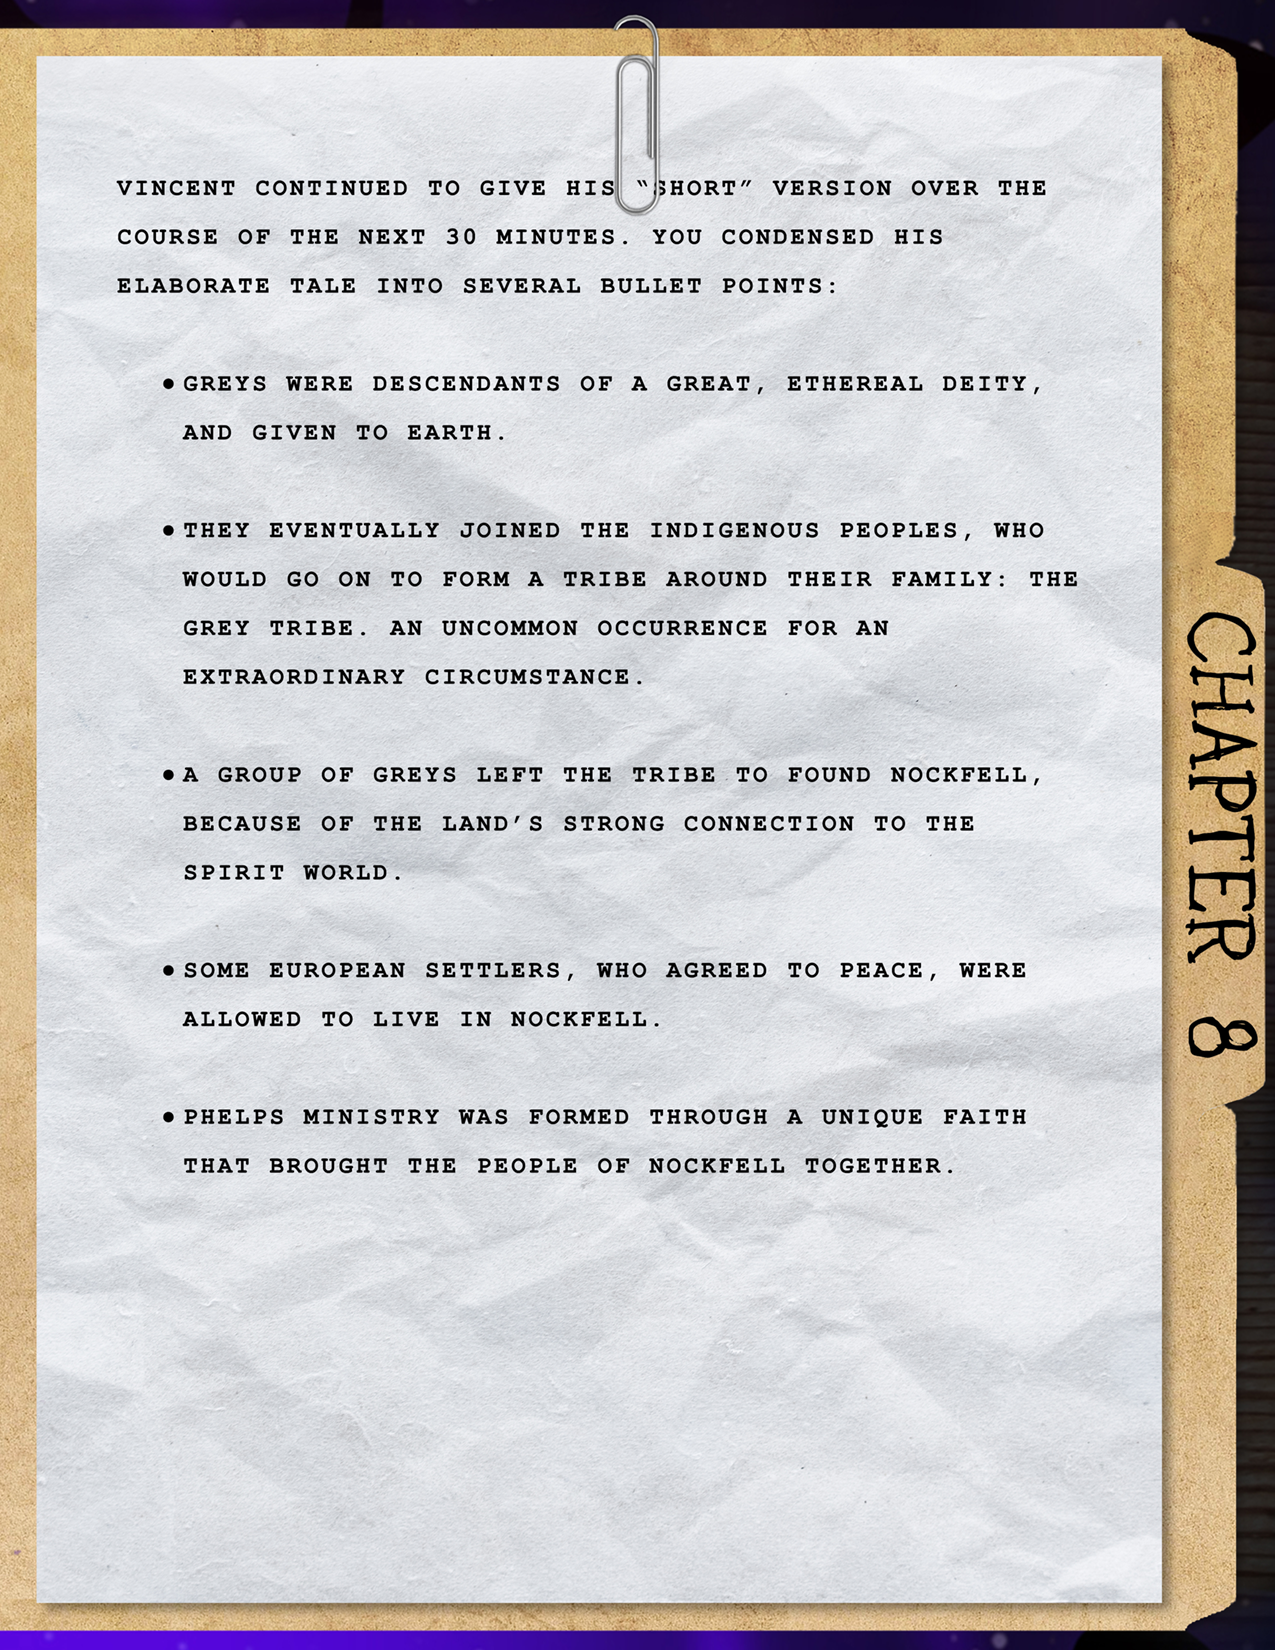
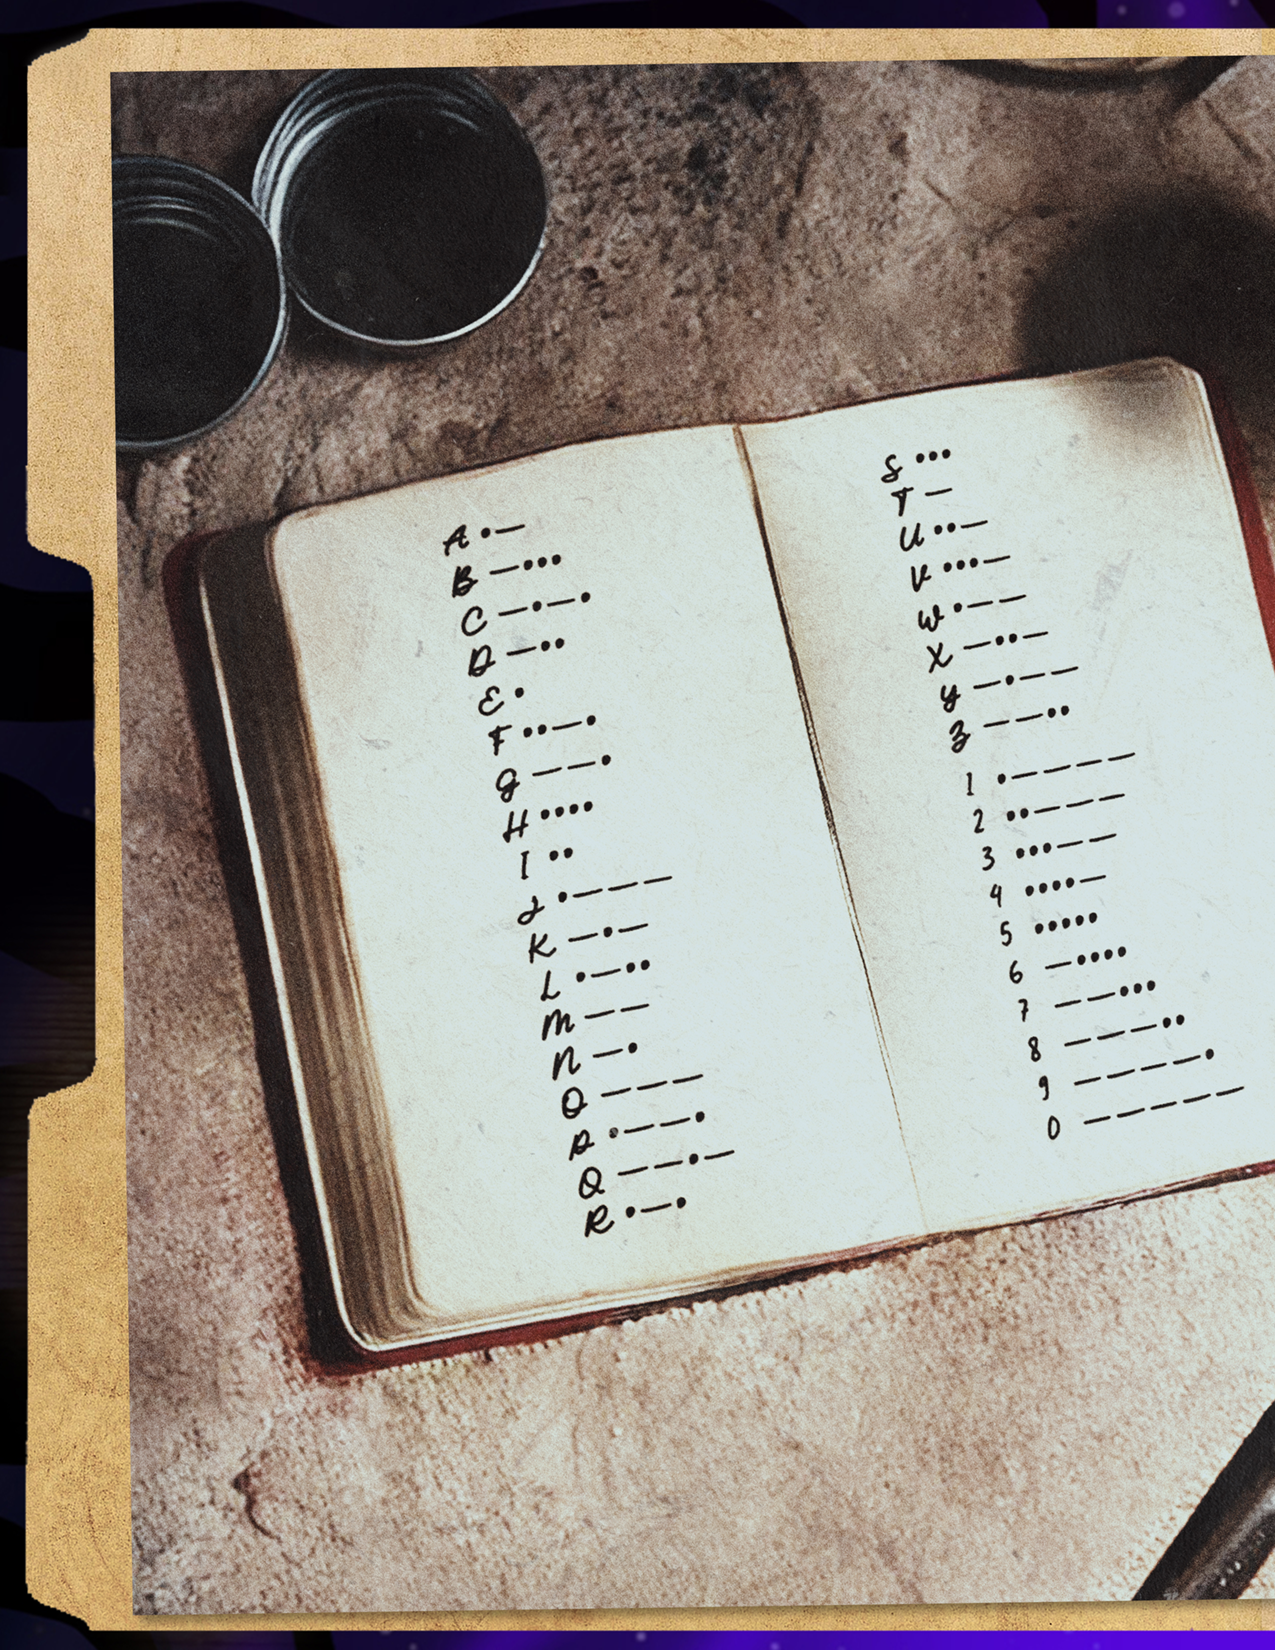
Lay the decoder wheel over the History of Nockfell page, lining up the solid circles. Each letter on the wheel should point to a different symbol on the page.
Translate the secret message from symbols to letters to get the solution: SOLID DOT DASH.
Puzzle 2 - Hint 1
Puzzle 2 - Hint 2
Puzzle 2 - Hint 3
Puzzle 2 - Hint 4
Puzzle 2 - Final Solution
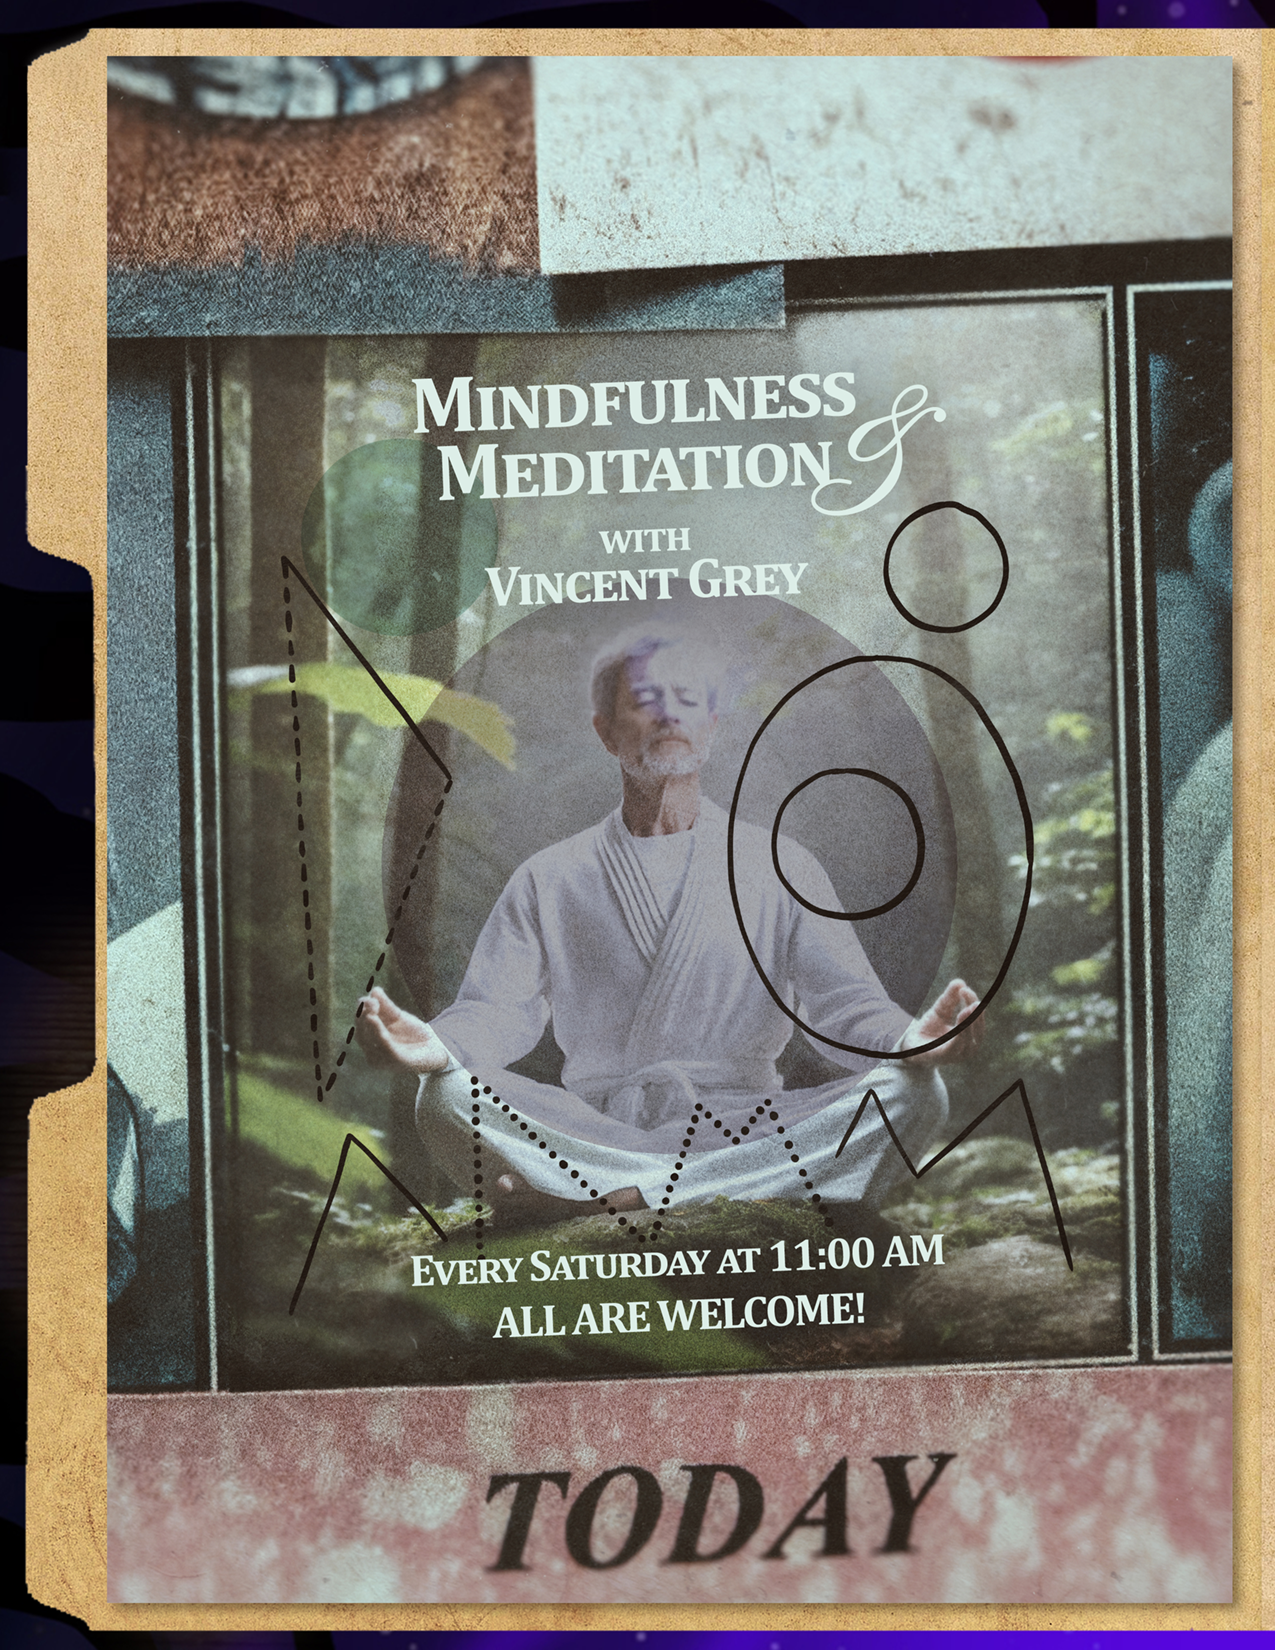
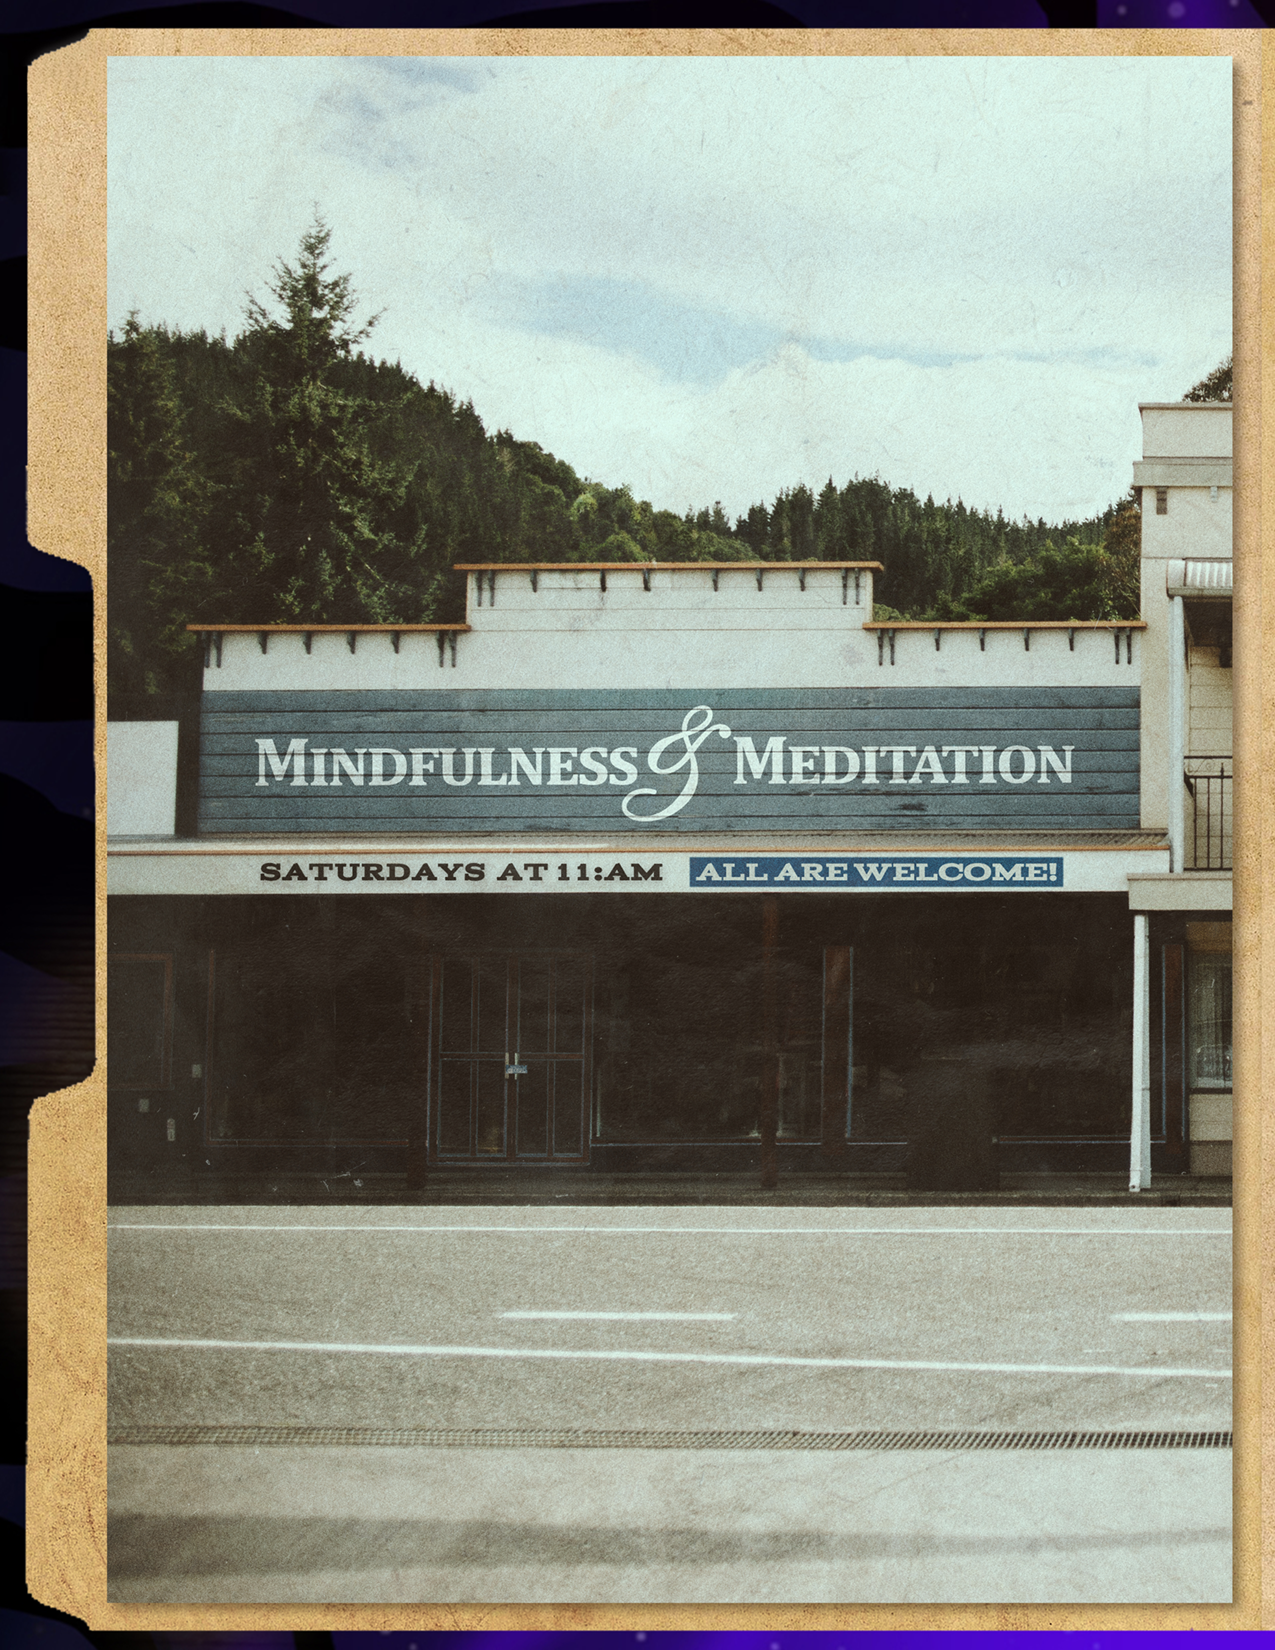
Flip the decoder wheel to the side with various lines, not letters. Place the decoder wheel over the central circle on the meditation poster. Rotate the wheel until the solid lines on the wheel connect with those on the poster. Repeat twice more for the dotted and dashed lines.
When properly lined up, each line forms 1 or 2 letters to create the final solution: DRAW.
BOX 8 PUZZLES


Puzzle 1 - Hint 1
Puzzle 1 - Hint 2
Puzzle 1 - Hint 3
Puzzle 1 - Hint 4
Puzzle 1 - Hint 5
Puzzle 1 - Solution
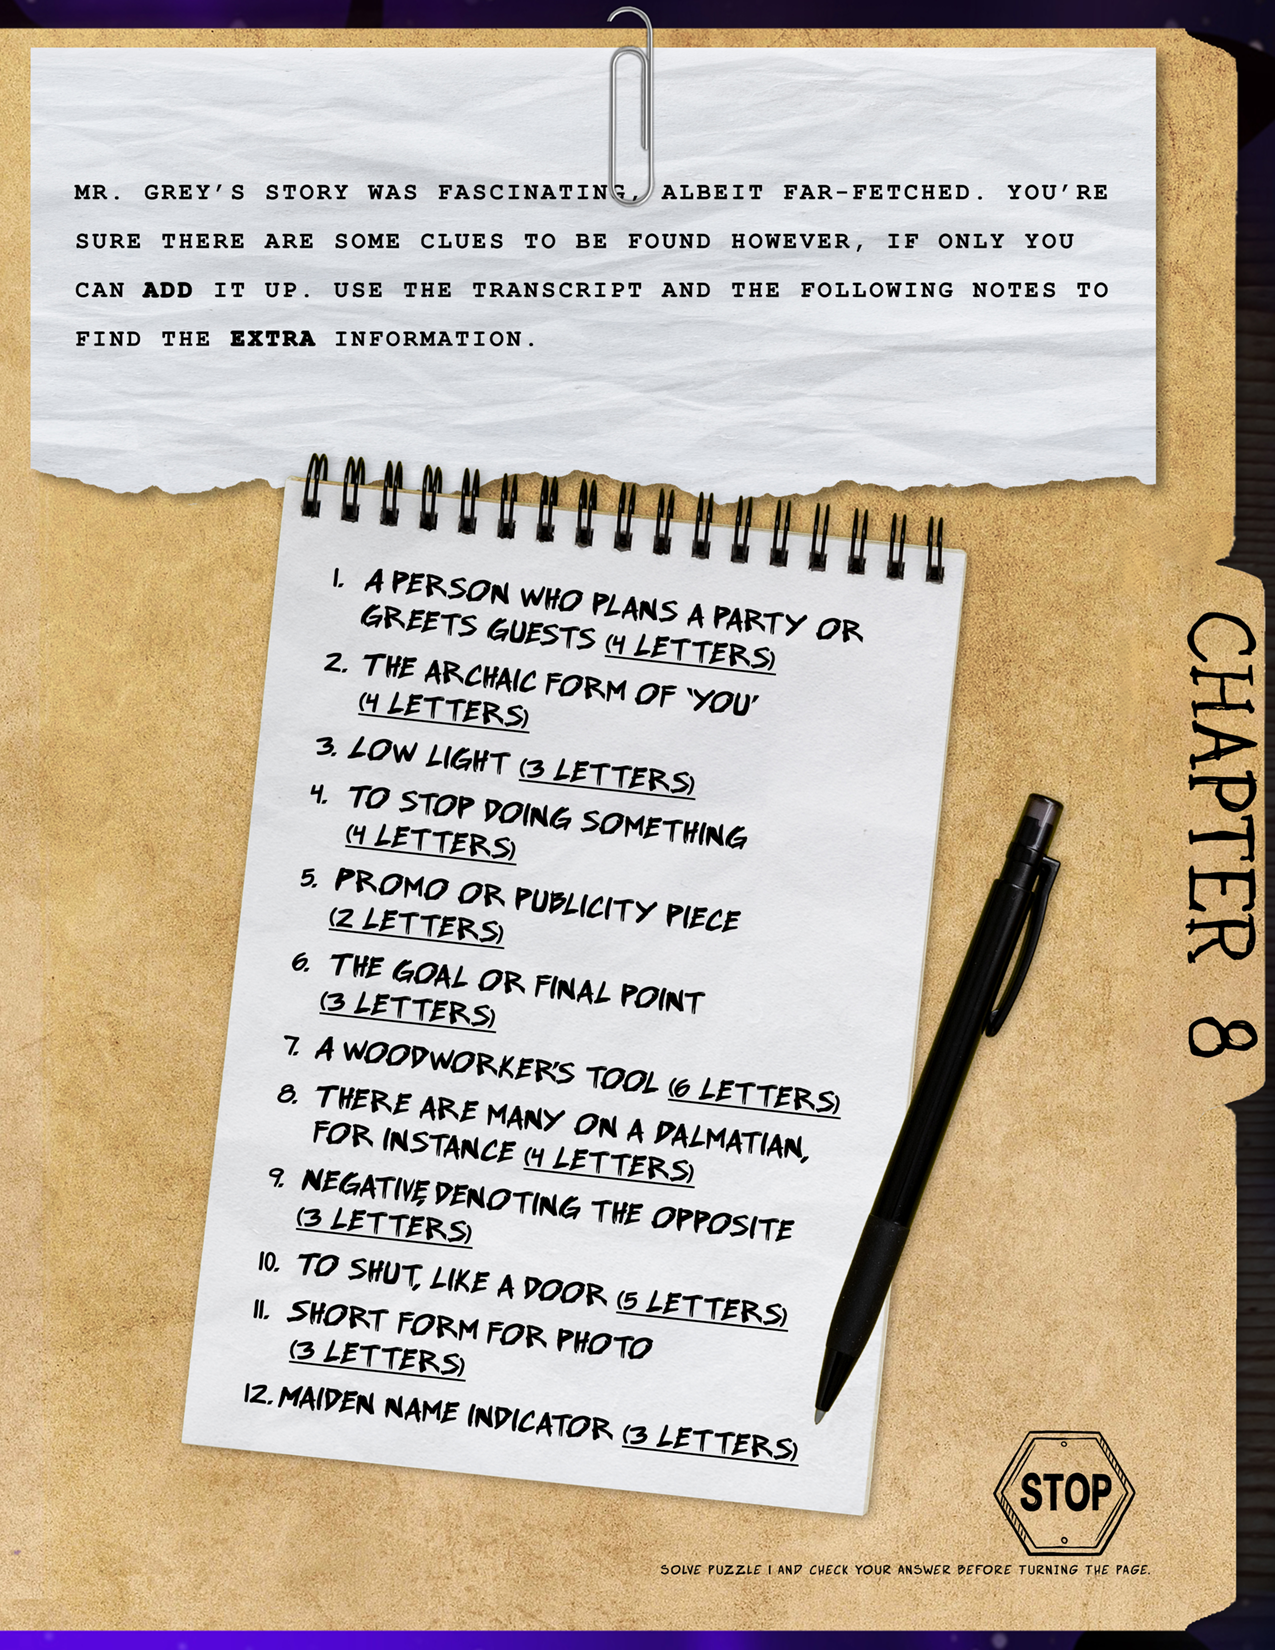
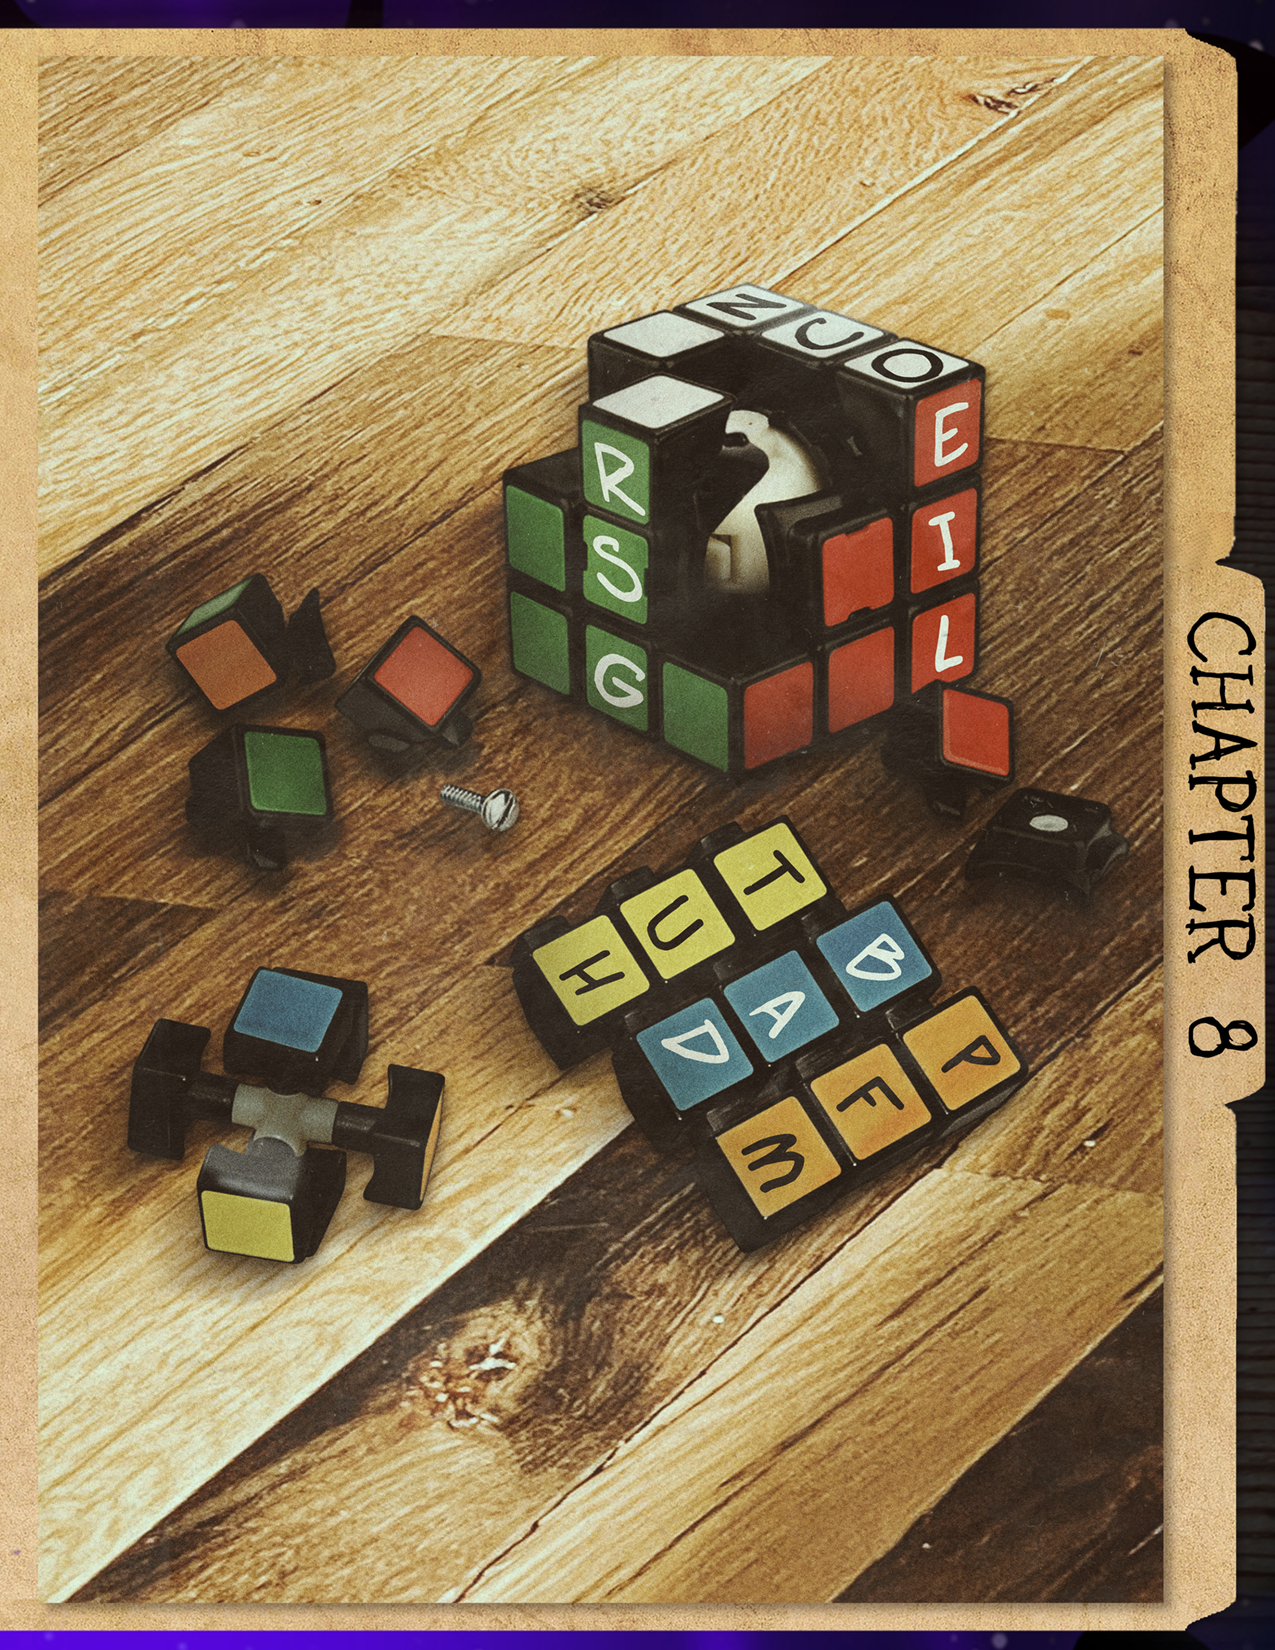
Identify the word that fits the definition, then find a word in the transcript that contains the same word plus one letter. That extra letter is the clue you need. In order, the clues are:
- HOST -> GHOST = G
- THEE -> THERE = R
- DIM -> DIME = E
- QUIT -> QUITE = E
- AD -> AND = N
- END -> BEND = B
- SANDER -> SLANDER = L
- SPOT -> SPOUT = U
- NOT -> NOTE = E
- CLOSE -> CLOSER = R
- PIC -> EPIC = E
- NEE -> NEED = D
Reading the letters in order gives the solution: GREEN BLUE RED.
Puzzle 2 - Hint 1
Puzzle 2 - Hint 2
Puzzle 2 - Hint 3
Puzzle 2 - Hint 4
Puzzle 2 - Final Solution
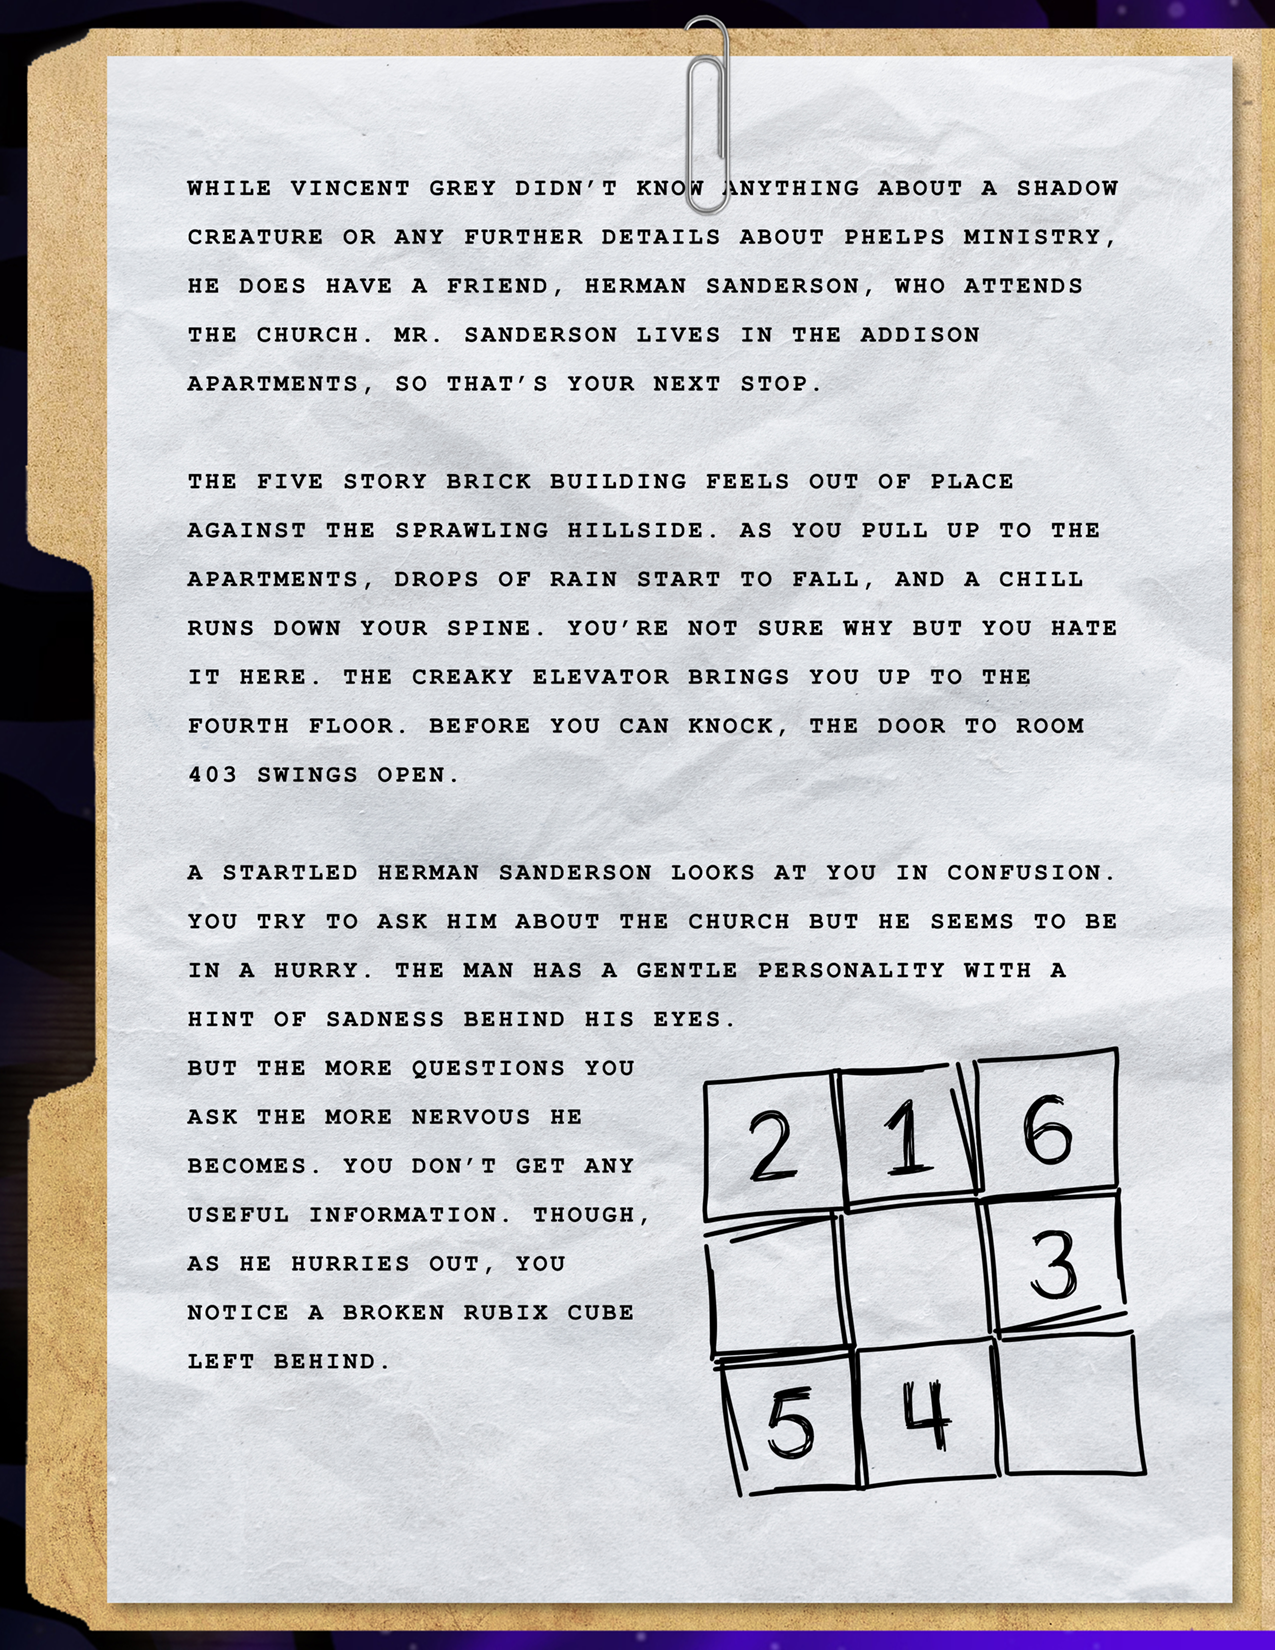
Using the prior solution of GREEN, BLUE, RED, look only at those colours of the Rubix cube, lining them up or writing them out in order. Referencing the grid of numbers, identify the letters at each place in the grid. In order, the solution spells out BRIDGE.
BOX 9 PUZZLES


Puzzle 1 - Hint 1
Puzzle 1 - Hint 2
Puzzle 1 - Hint 3
Puzzle 1 - Solution
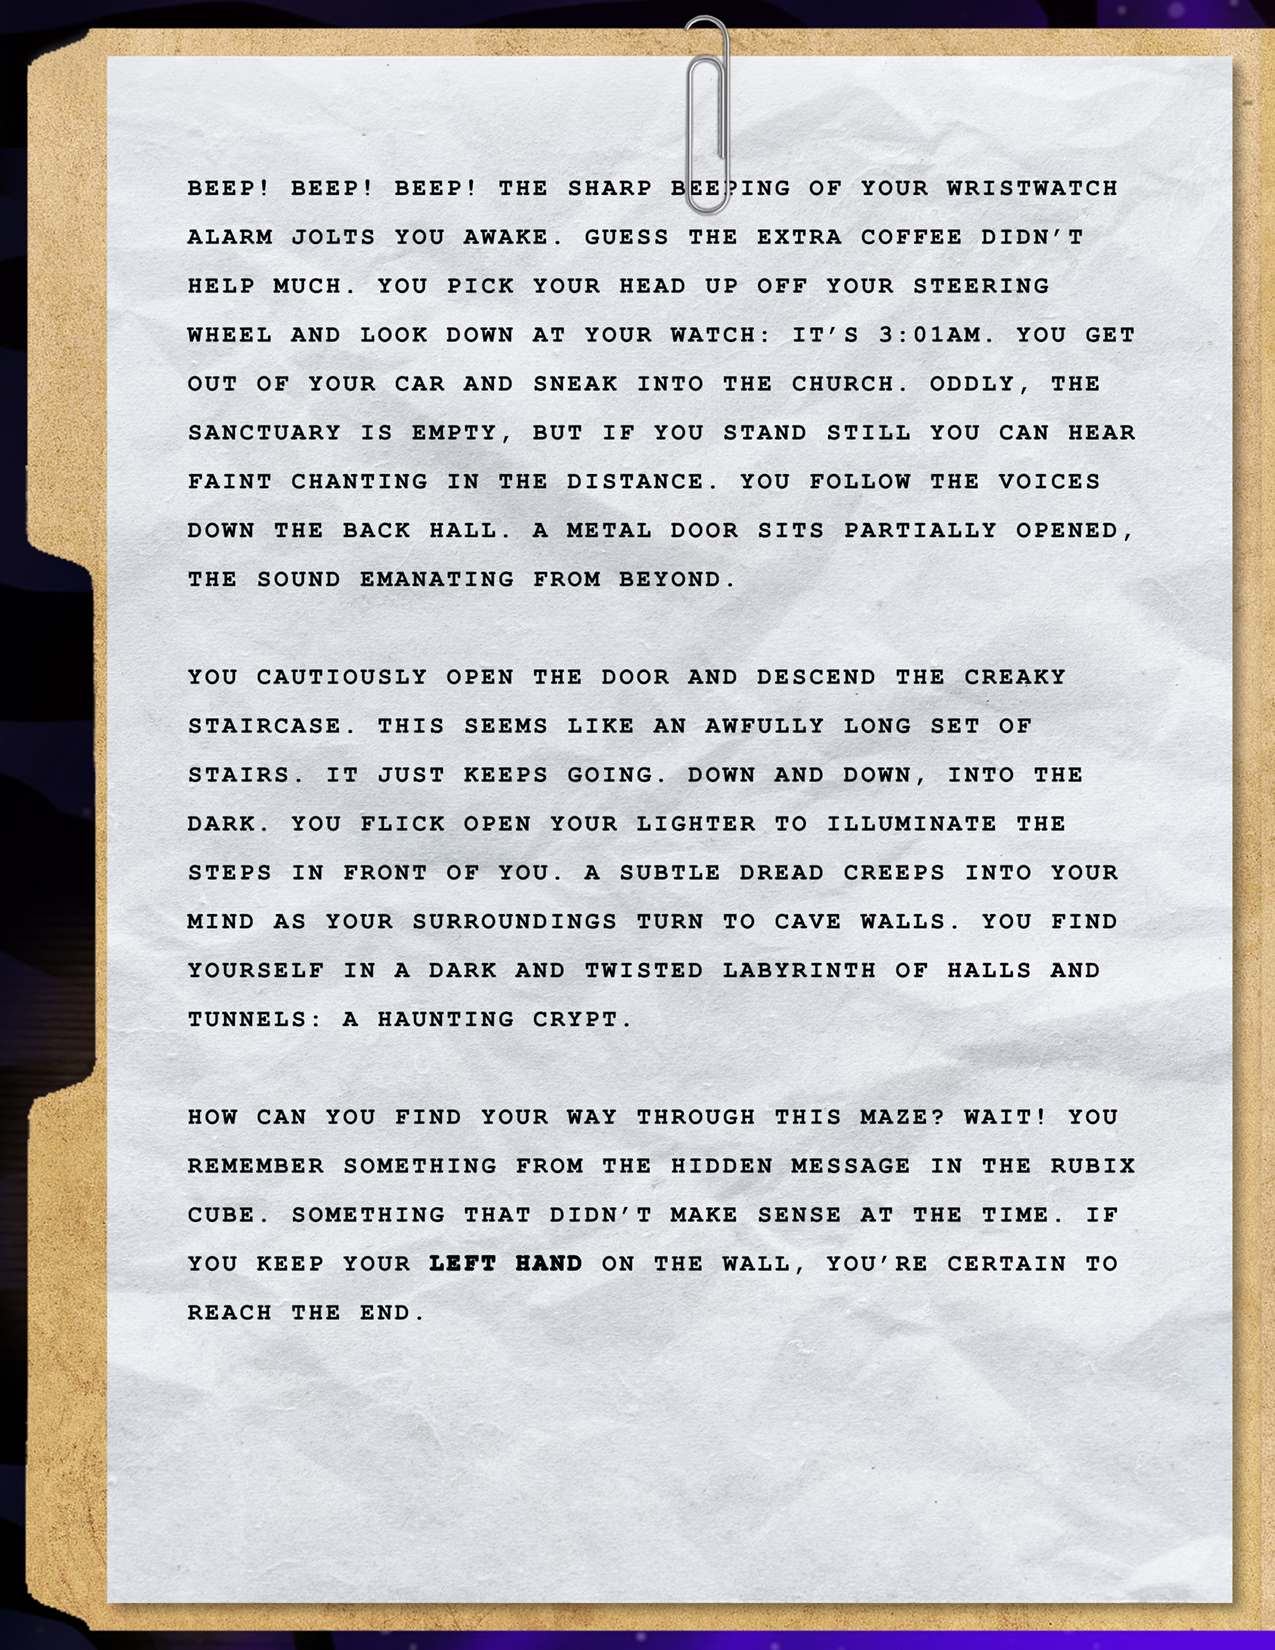
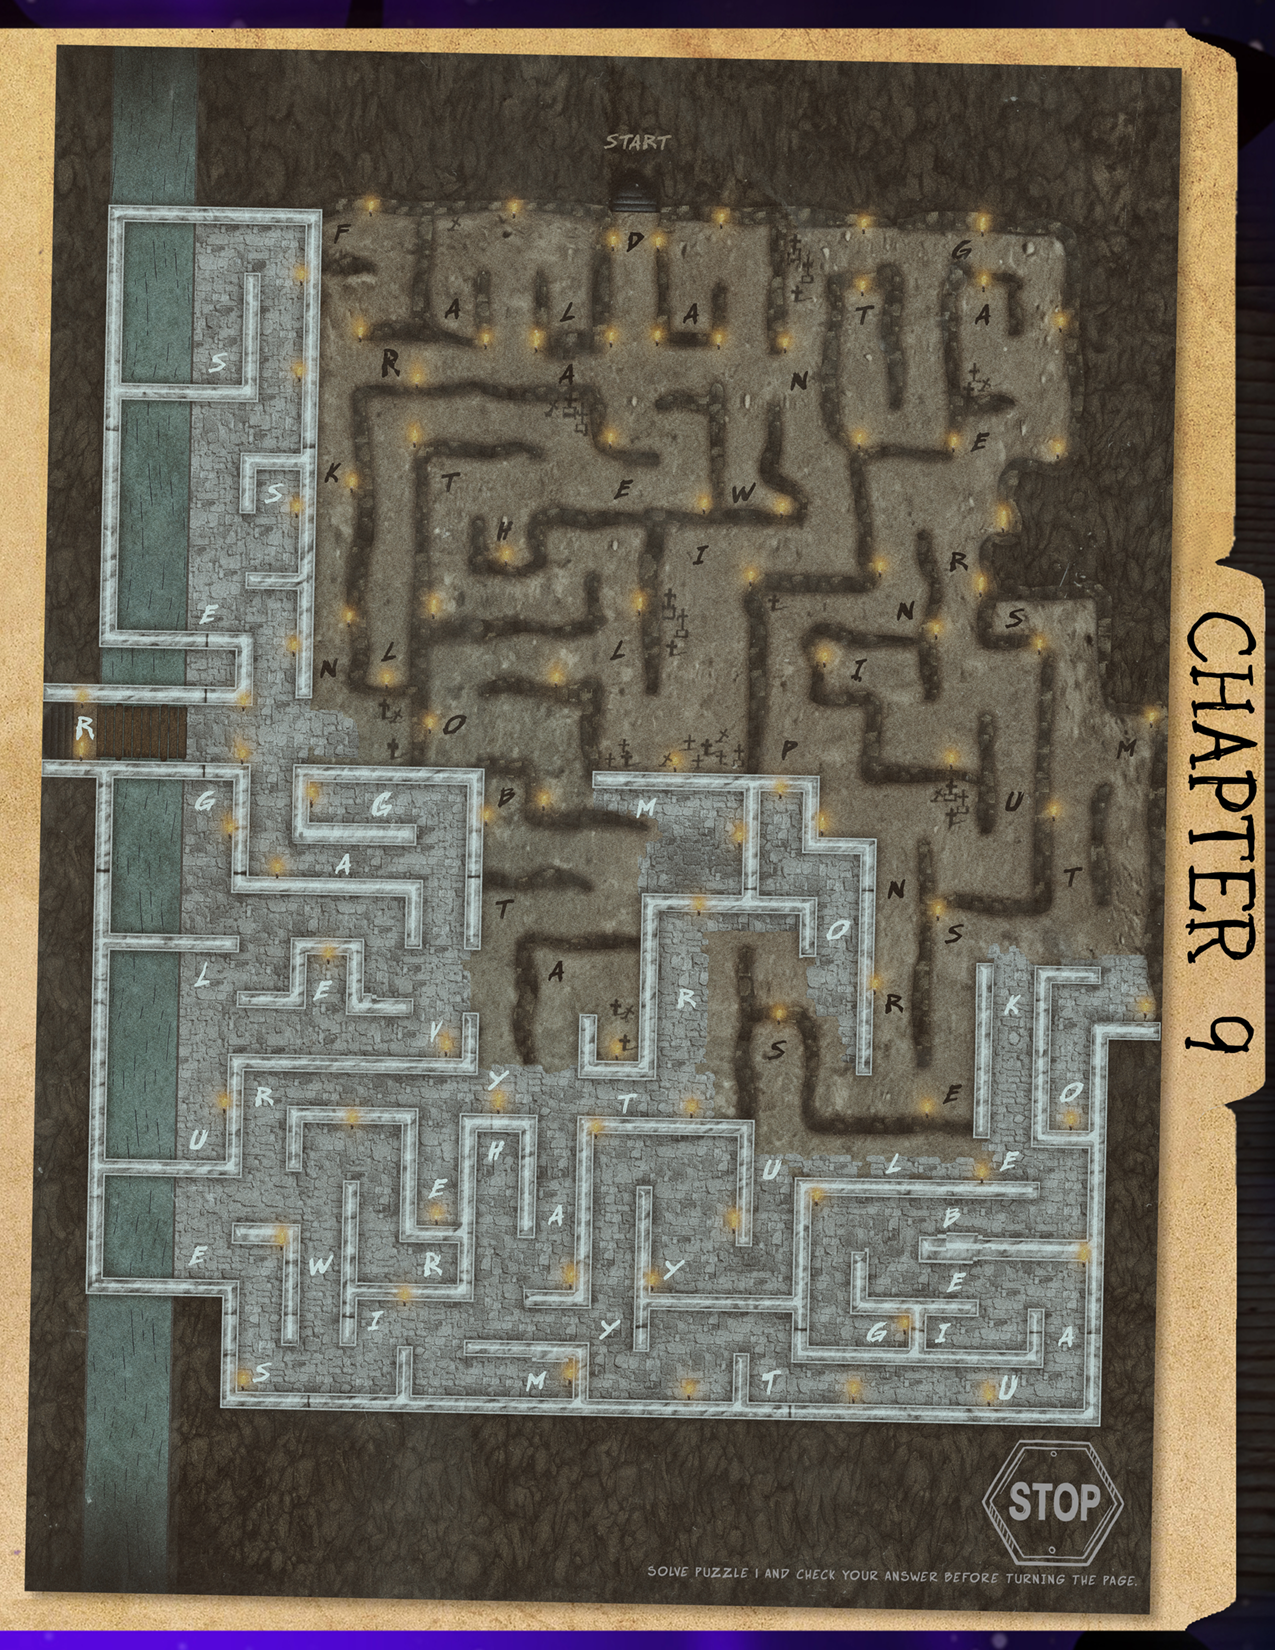
Navigate the maze as if your left hand was constantly on the wall, following the path through the maze and taking note of all letters along the way. Six words are revealed as the solution: DANGER, UNREST, SMOKE, BEAUTY, MISERY, VULGAR.
Puzzle 2 - Hint 1
Puzzle 2 - Hint 2
Puzzle 2 - Hint 3
Puzzle 2 - Hint 4
Puzzle 2 - Hint 5 & 6

Puzzle 2 - Final Solution
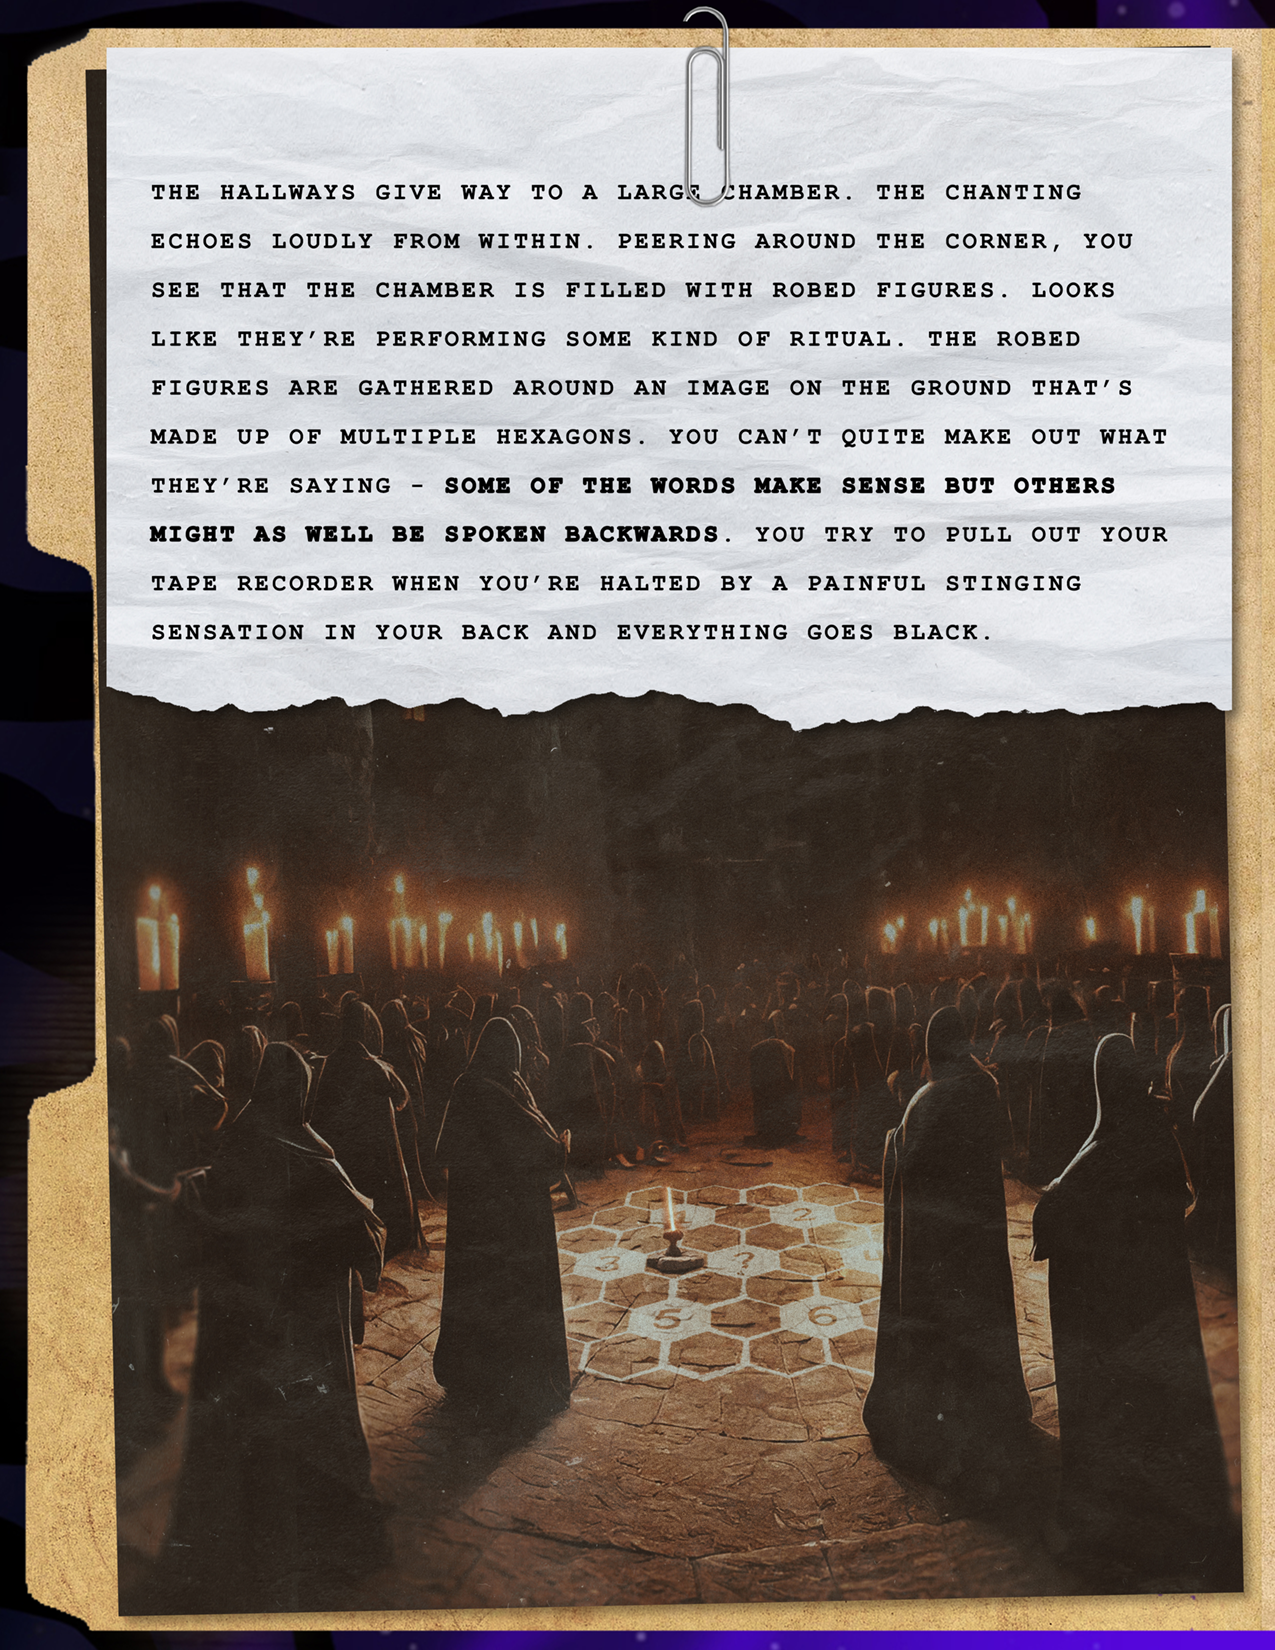
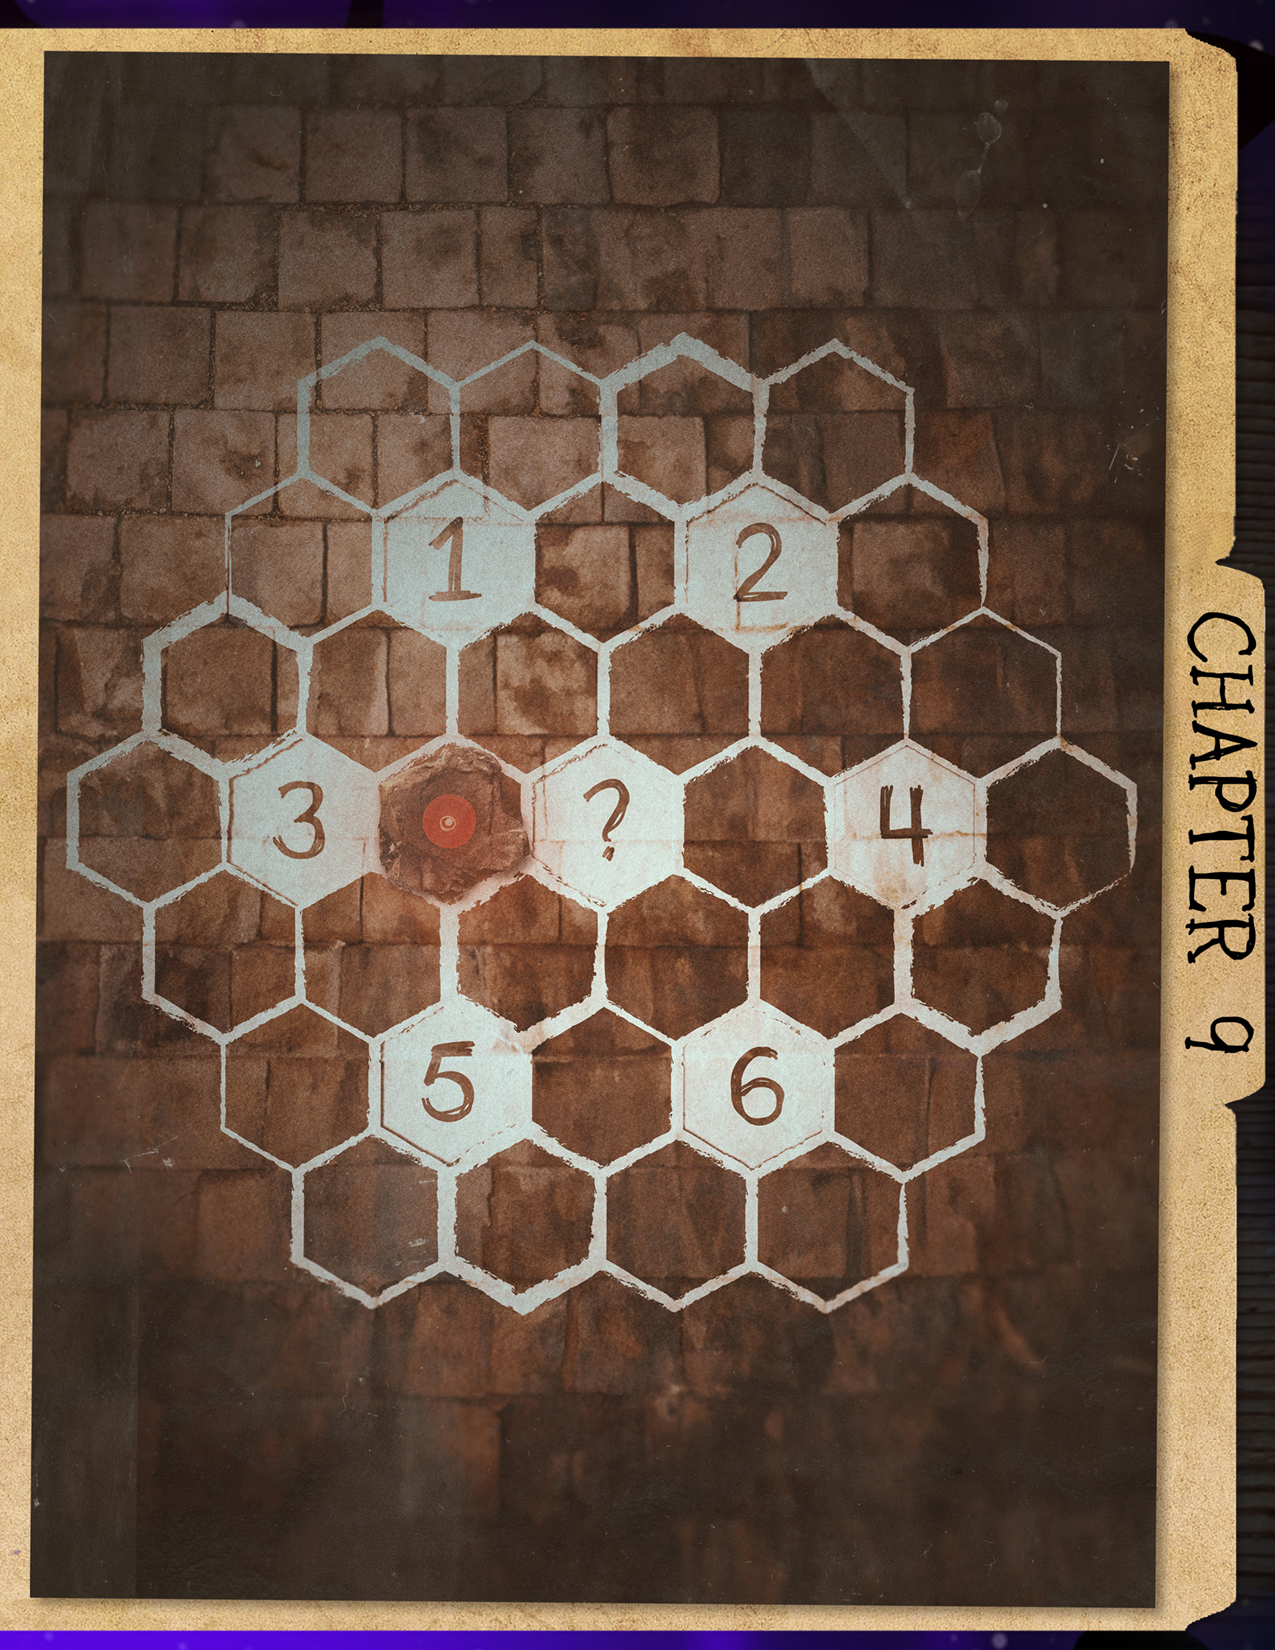
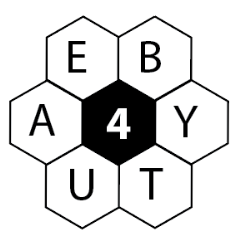
Final Solution: Take the 6 words from the previous puzzle and fill in the hexagon grid with one letter per shape and each word surrounding the corresponding number. Some words will circle the number clockwise, and some counterclockwise. The letters that circle the question mark in the center of the grid form the solution: GRAVE.
BOX 10 PUZZLES


Puzzle 1 - Hint 1
Puzzle 1 - Hint 2
Puzzle 1 - Hint 3
Puzzle 1 - Hint 4
Puzzle 1 - Solution
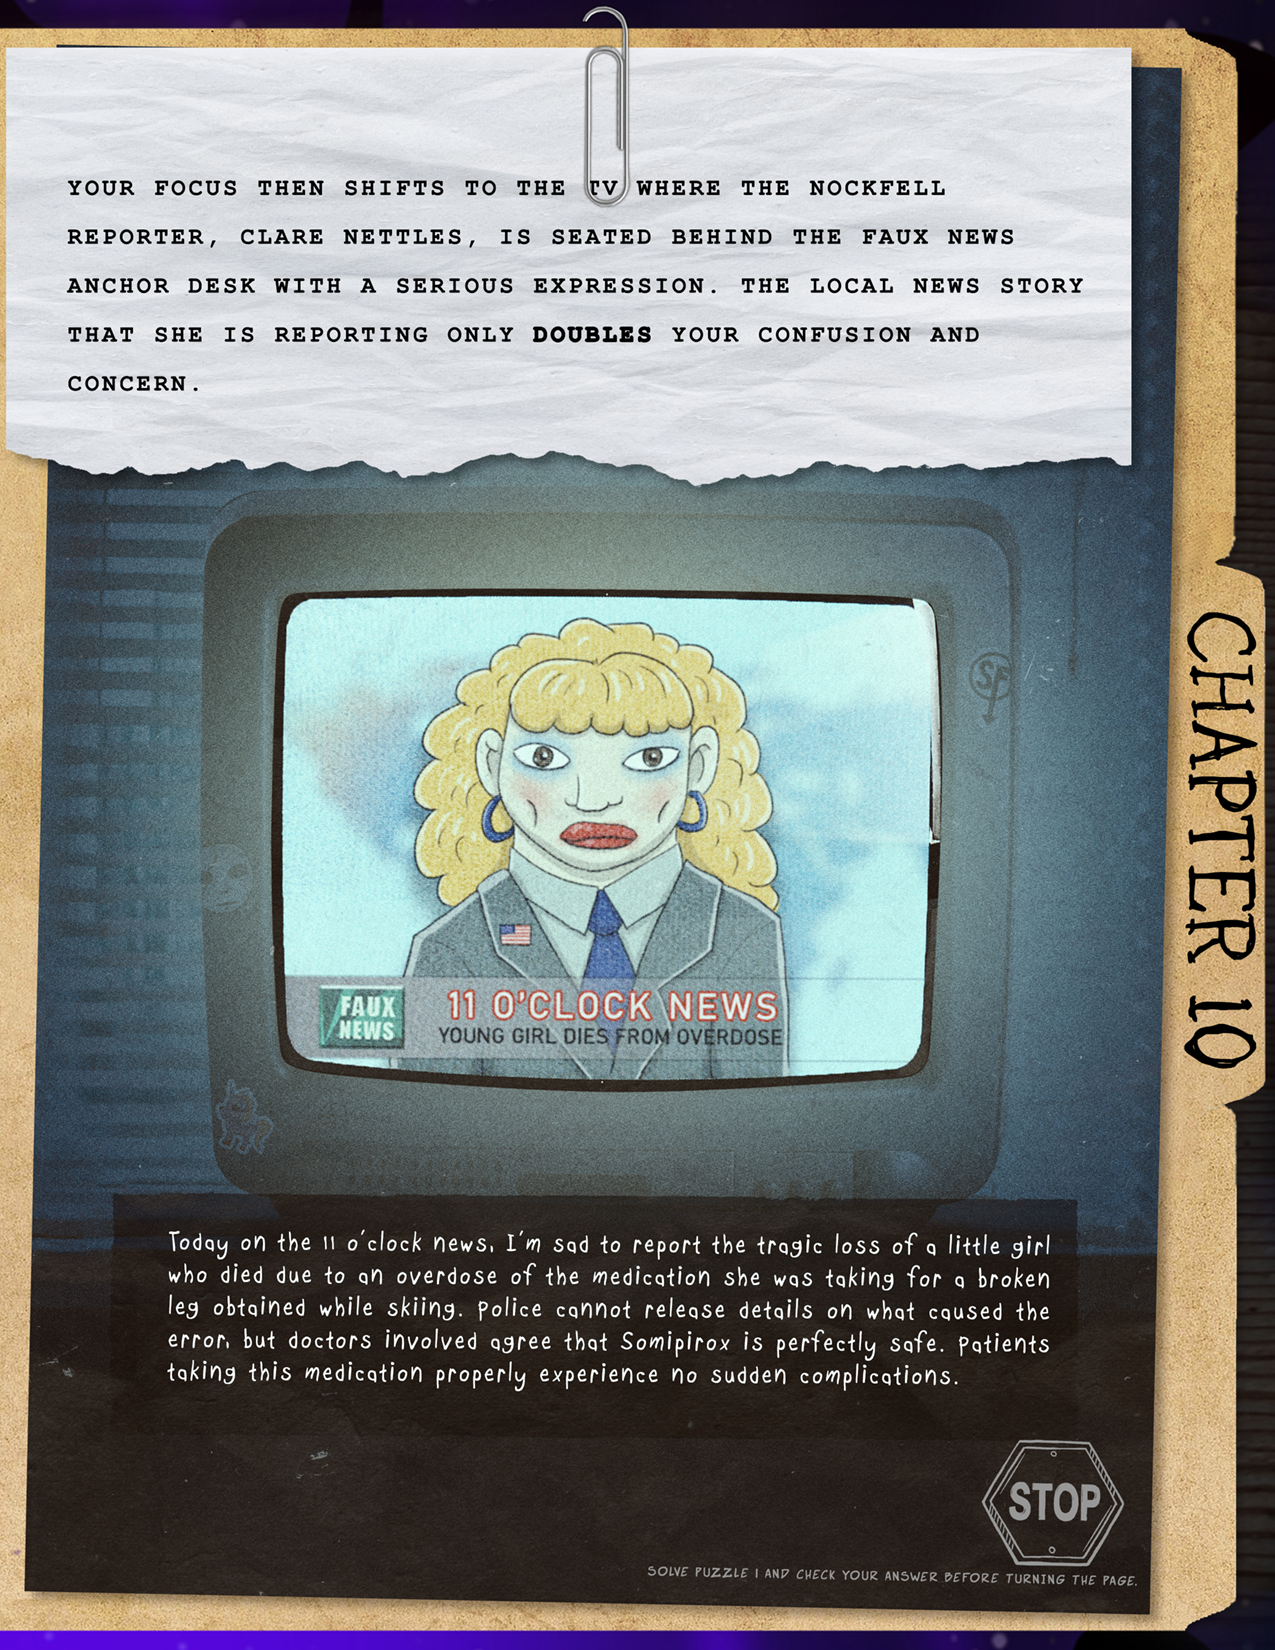
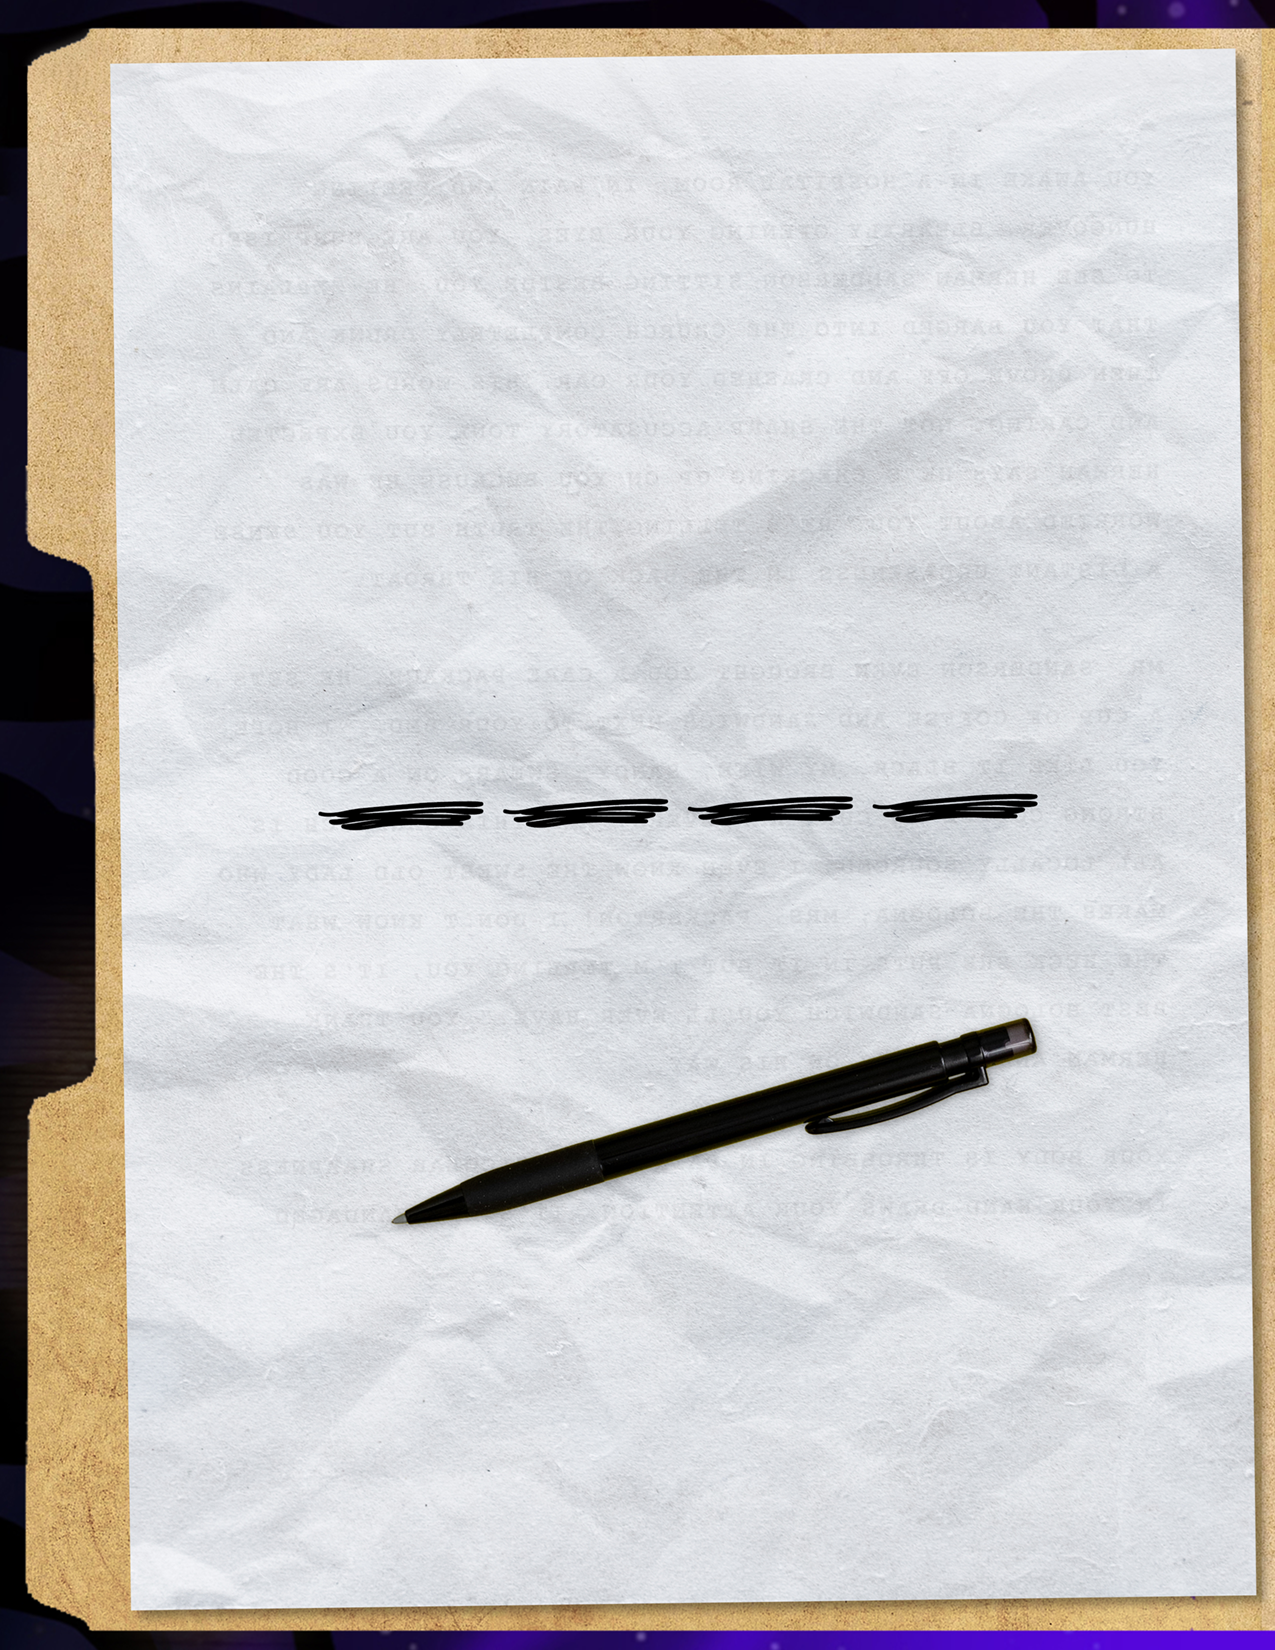
Read through the news report and in order, note each doubled number and letter. For example, ‘11 o’clock’ gives you a 1. The solution is: 1ST IN RED.
Puzzle 2 - Hint 1
Puzzle 2 - Hint 2
Puzzle 2 - Hint 3
Puzzle 2 - Hint 4
Puzzle 2 - Final Solution
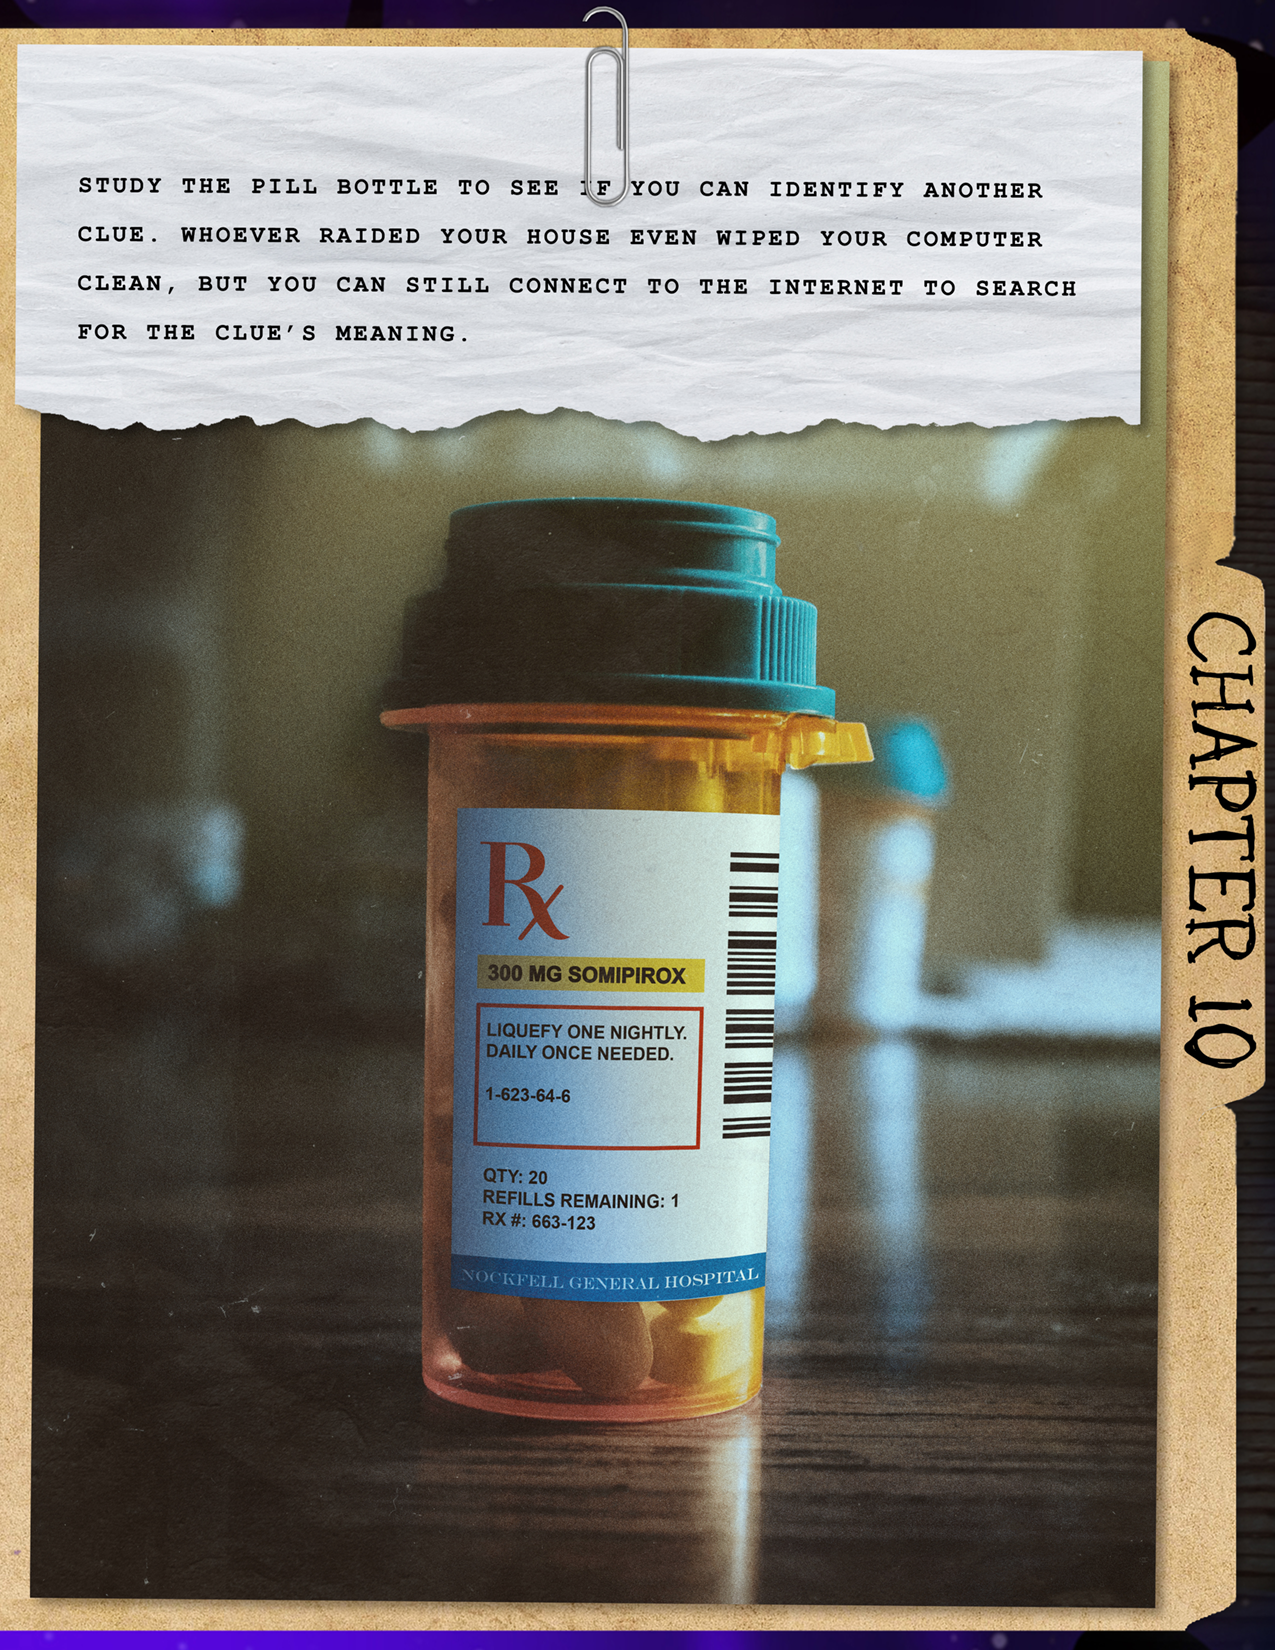
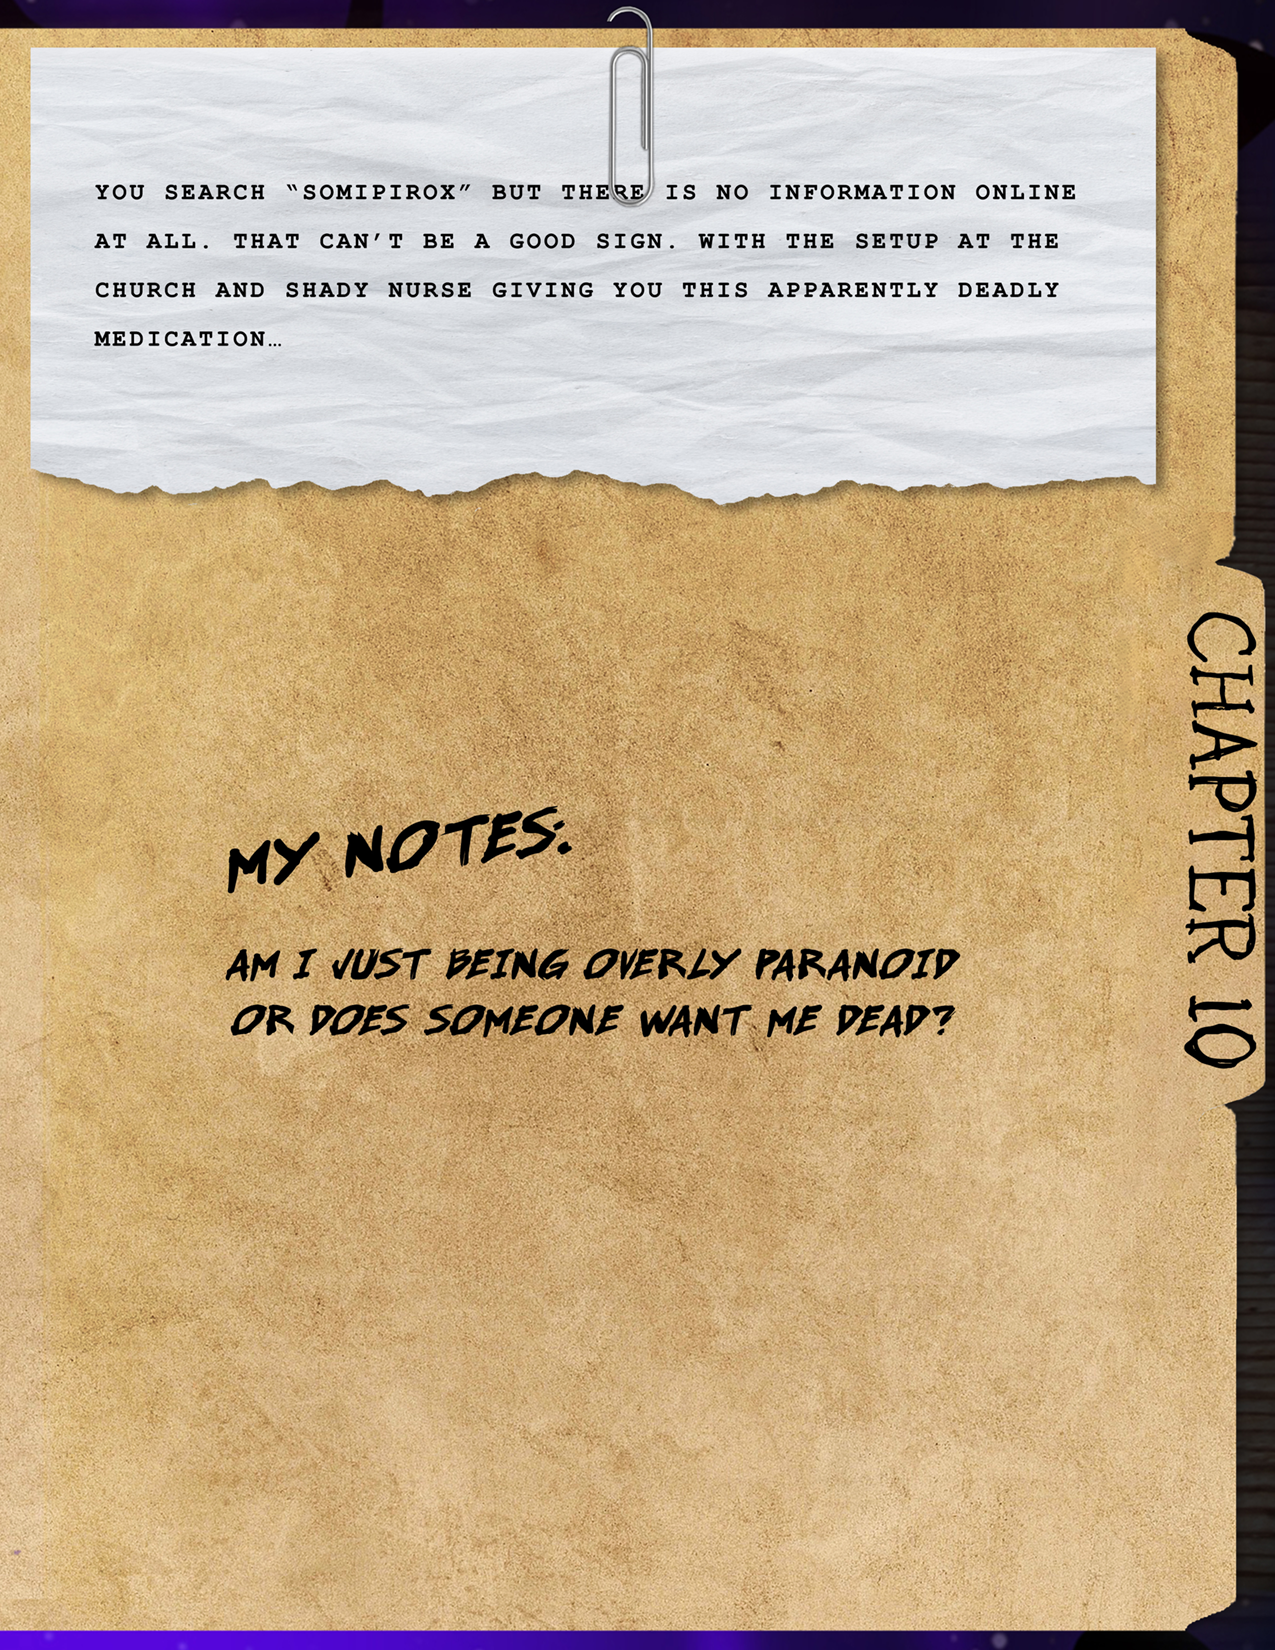
Take the solution from the previous puzzle, ‘1ST IN RED’, and study the contents of the red box on the medication label. Identify the first letter or digit of each word or number within the red box to spell: LONDON 1666. If needed, search the phrase online to discover that the Great Fire of London occurred in 1666. The final solution is: FIRE.
BOX 11 PUZZLES


Puzzle 1 - Hint 1
Puzzle 1 - Hint 2
Puzzle 1 - Hint 3
Puzzle 1 - Hint 4
Puzzle 1 - Hint 5
Puzzle 1 - Solution
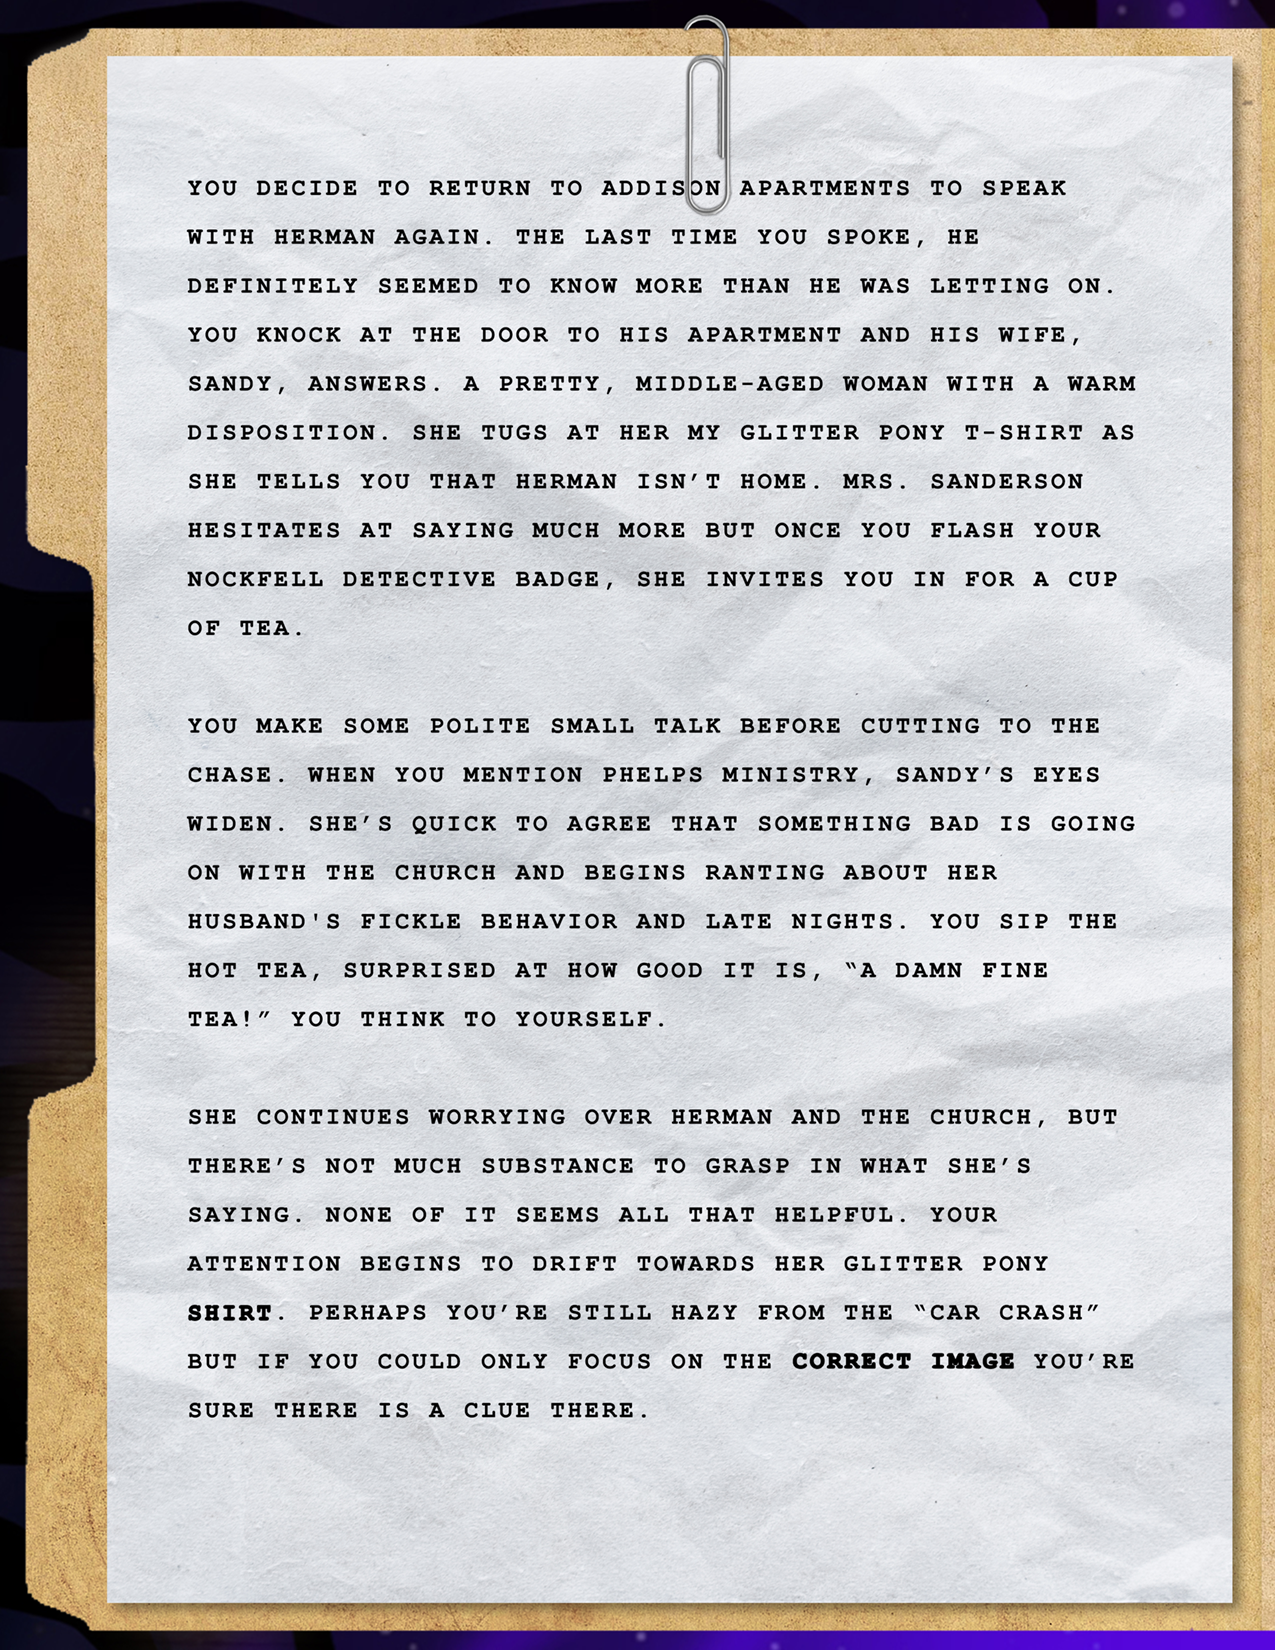
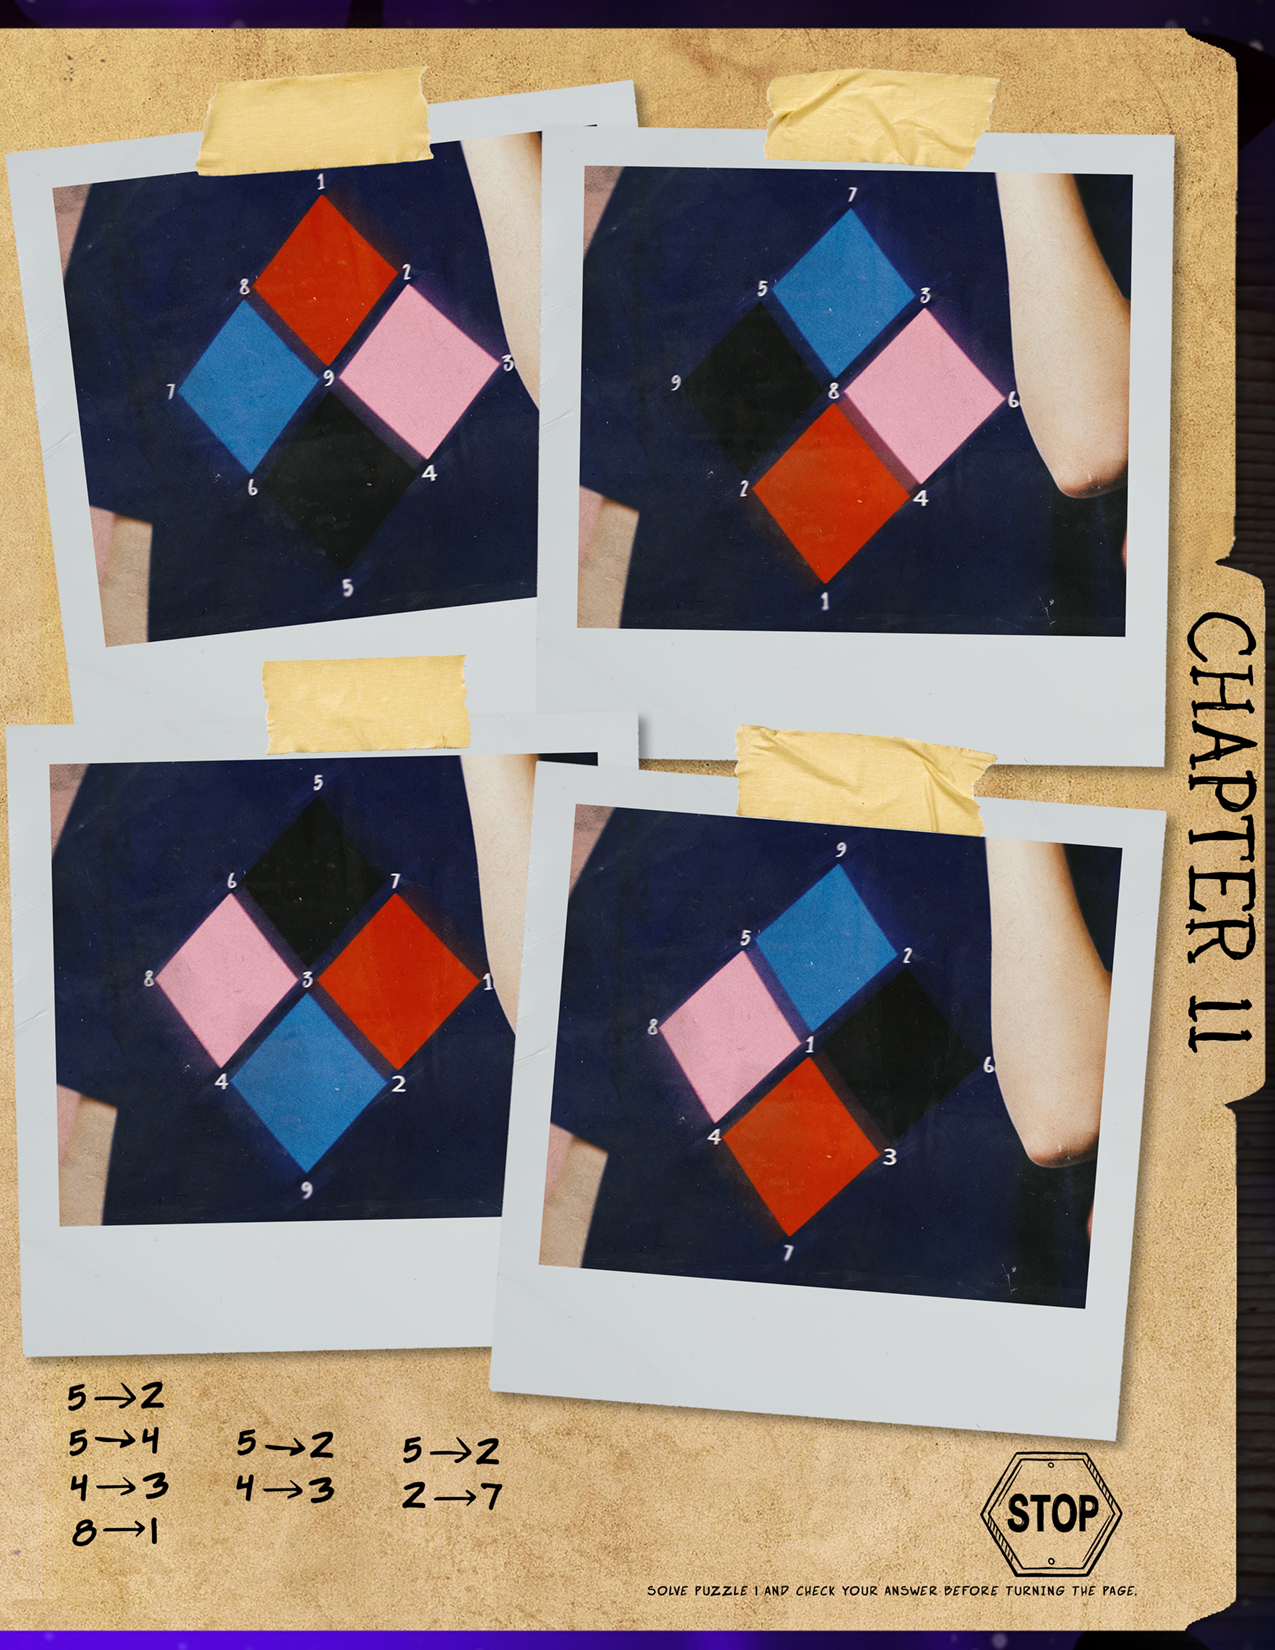
First identify the correct image of the four diamond patterns. The correct image matches the colour order of the Box 11 t-shirt (blue on top, then black, red and pink as you proceed clockwise). Next, draw lines to connect the numbers as shown in the graphic. I.e. connect 5 to 2, 5 to 4, etc. This will create 3 figures which is the phrase: E = 7.
Puzzle 2 - Hint 1
Puzzle 2 - Hint 2
Puzzle 2 - Hint 3
Puzzle 2 - Hint 4
Puzzle 2 - Final Solution
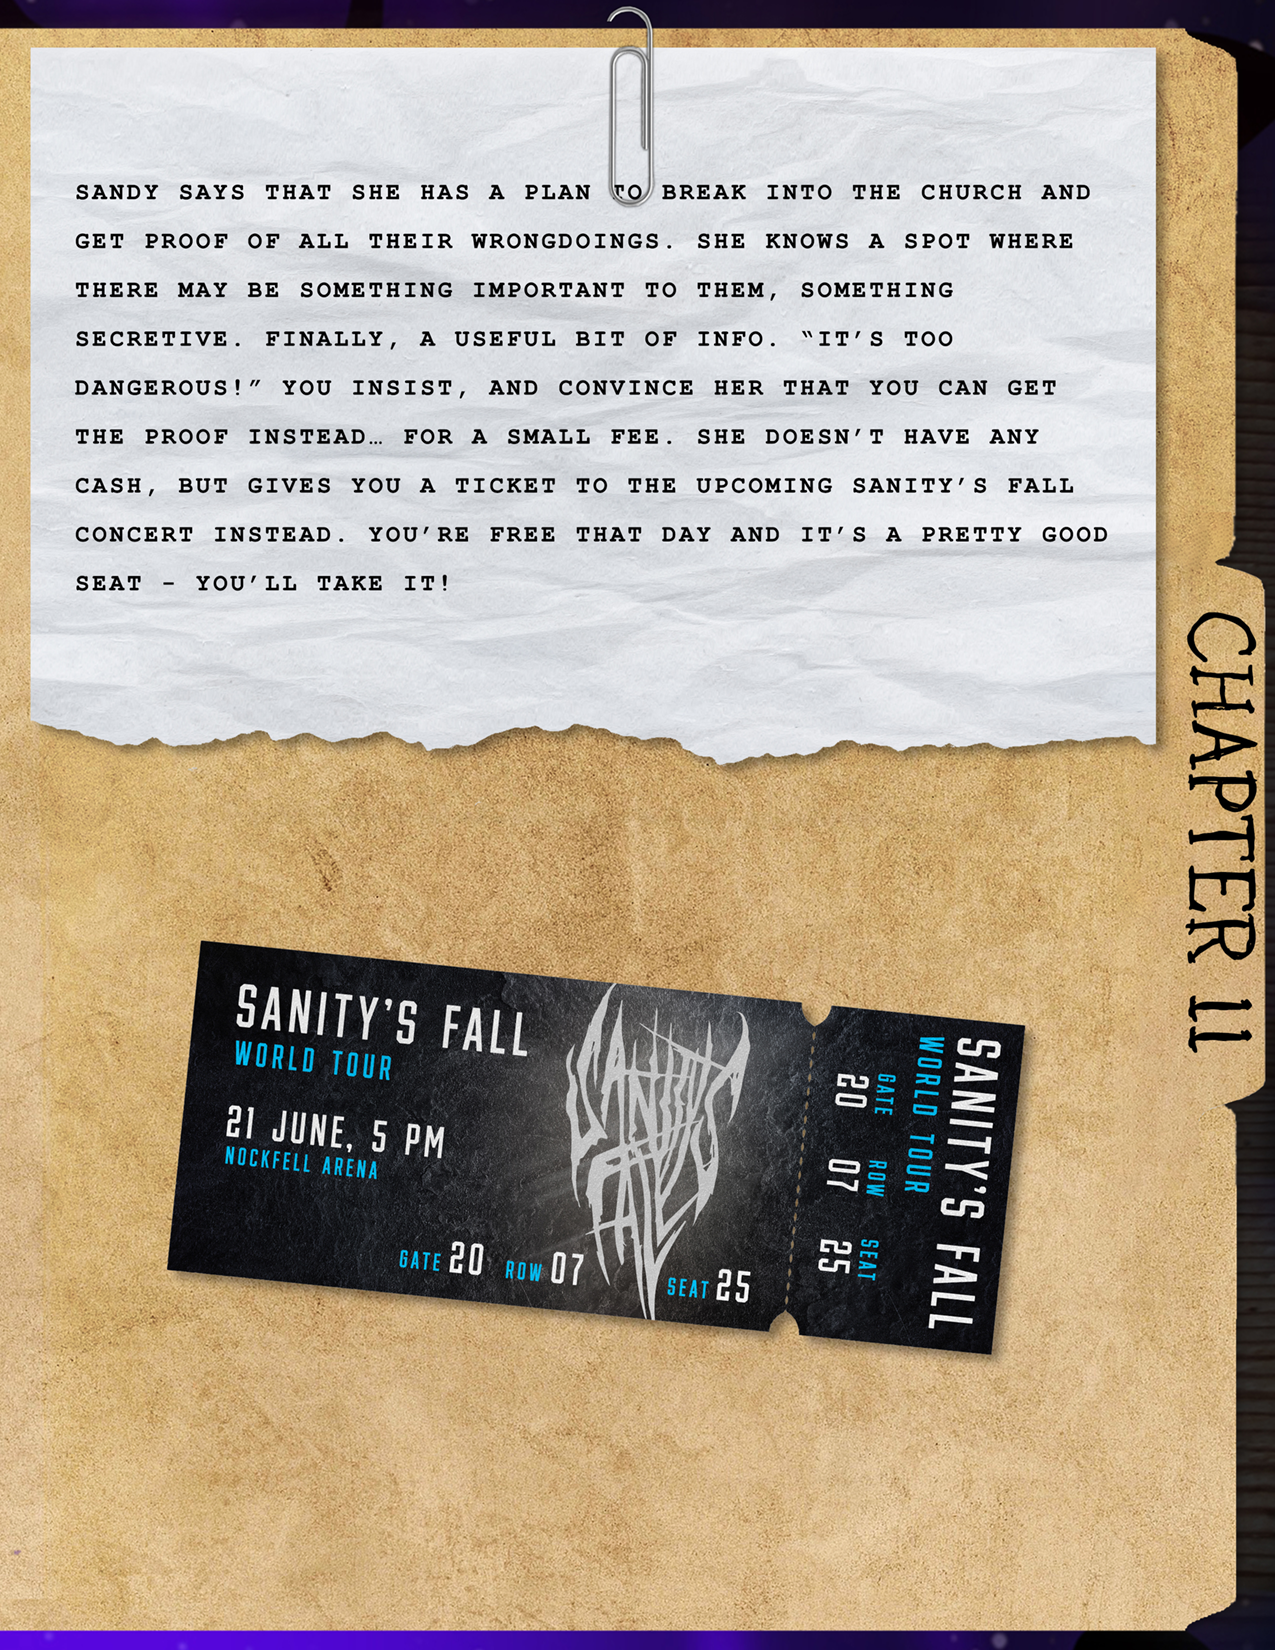
Using E=7 from the previous puzzle, identify all numbers on the ticket - 21, 5, 20, 07, 25. If E is 7, then counting through the alphabet means that 21 is S, 5 is C, 20 is R, and 25 is W, which gives the final solution: SCREW.
BOX 12 PUZZLES


Puzzle 1 - Hint 1
Puzzle 1 - Hint 2
Puzzle 1 - Hint 3
Puzzle 1 - Hint 4
Puzzle 1 - Hint 5
Puzzle 1 - Solution
First identify the correct image of the four diamond patterns. The correct image matches the colour order of the Box 11 t-shirt (blue on top, then black, red and pink as you proceed clockwise). Next, draw lines to connect the numbers as shown in the graphic. I.e. connect 5 to 2, 5 to 4, etc. This will create 3 figures which is the phrase: E = 7.
Puzzle 2 - Hint 1
Puzzle 2 - Hint 2
Puzzle 2 - Hint 3
Puzzle 2 - Hint 4
Puzzle 2 - Final Solution
Using E=7 from the previous puzzle, identify all numbers on the ticket - 21, 5, 20, 07, 25. If E is 7, then counting through the alphabet means that 21 is S, 5 is C, 20 is R, and 25 is W, which gives the final solution: SCREW.